Showing posts with label kids. Show all posts

Easter Table Chicks

The Tiny Funnel 
A little chick to save your place at the Easter table.
Sometimes, when I photograph my crafts, food etc. I get a little theme song for the image or the craft stuck in my head.
This one is "Stand" an R.E.M. favorite.

"Stand in the place where you live
Now face North
Think about direction
Wonder why you haven't before
Now stand in the place where you work..."

Materials:

*Wooden Eggs (they come blank or already painted white at Michael's)
*White paint (or white wooden eggs)
*Paint and brushes
*Paint pens- White and Black and maybe orange? 
I like the Sharpie brand- either oil or water based or the Moltow Acyrlic
*Pipe cleaners – about 2” long
*Not shown- white glue

Use a thumb tack to make a hole in the top of the egg.
 
Paint the eggs white so that the (next) colors are bright; then allow the paint to dry.

Use a pencil to draw on the wings and the features. 

Paint the main part of the body; let it dry (use a hair dryer if you’re impatient like me) then paint the wings and allow everything to dry completely before adding the small details.

Yes - I painted over the small details like the face but not the wings.

You can still see the drawing under the paint.
Paint the wings and let everything dry.

Outline the wings with a paint marker- that space between colors can be wonky and the marker adds a nice finished touch even if the paint lines are uneven.
Add the small details with paint pens.
Curl the pipe cleaner around a pencil, then add a dab of glue to the end before sticking it into the hole.
 
Let the glue dry for a bit so the pipe cleaner will stay in the hole.

Add the name card.
The Tiny Funnel

The Tiny Funnel

Halloween Paper Plate and Cupcake Wrapper Eye Balls

The Tiny FunnelYes! It's another 10 minute craft! Fast, cheap and easy - these eye ball plates are quick to put together and use things you (probably) have on hand.
The Tiny Funnel Materials:
9" Paper plates
Cupcake wrappers- iron them flat for easy gluing
(adults job) 
Black card stock
Glue stick

Red marker
3m removable foam squares or painters tape

Optional- circle punch (2") from craft store (use your coupon!)
 

The Tiny Funnel

Use glue stick to add a cupcake wrapper to each plate.
Cut or punch out a black pupil and add to the center of the cupcake wrapper.
Add bloodshot lines with a red sharpie marker.
Add a foam square (or painters tape) to the back and add to the wall.


TheTiny Funnel

Cheesy Googly Eyes

The Tiny FunnelYou can see (no pun intended) that you can add little mozzarella string cheese disks and olive googly eyes to anything.

 The Tiny Funnel
I made this rigatoni pie for work (recipe here) but added the eyes to nachos, mini pizzas, regular pizza or even crackers.
The Tiny Funnel


The Tiny Funnel
The Tiny FunnelCut the olive in half and then push the straw through the skin side. 

You can cut the extra olive off the back.

Different diameter straws will yield different sized pupils.

(yes, I punched out the pupils while I was talking to my mother-in-law on the phone. #multitasking).

Cut the cheese disks from the string cheese. 


The Tiny Funnel


Set everything up so it's ready to go.
Make whatever you’re going to make (pizza, nachos etc.) then add the cheese disks at the end for the last couple of minutes. Remove from the oven and push in the olive pupils. 
 
The Tiny FunnelIf you're making the crackers- put the Triscuits in the oven at 350 degrees for 5 minutes- it doesn’t take long for the cheese to get just melted enough to add the olive pupils.

Halloween Spiders (again)

@ The Tiny Funnel
The spiders from last year are in the October issue of FamilyFun magazine. While we were shooting the feature, the kids made their rock spiders on set and added tons of eyes; their versions are so cool! I really like them with all the eyes.

Hurray for October and Halloween!

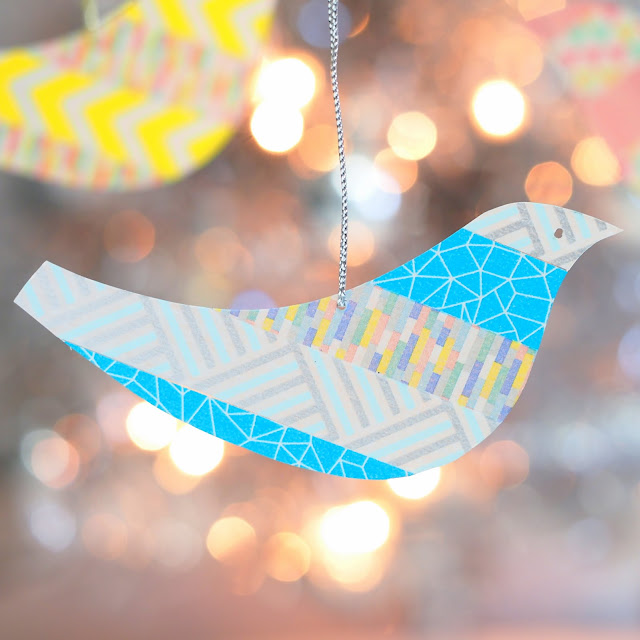
Recycled Plastic and Washi Tape Ornaments

The Tiny Funnel
The Tiny Funnel
If you didn’t know – I’m a big recycler- makes my family a little crazy. I also use a lot of recyclables in my crafts and clear plastic salad containers are one of my favorites. I use vegetable oil (soak then wash with hot water and detergent, dry and use rubbing alcohol on the residue) to get the labels off but I’ve read that a lot of people use a combination of coconut oil and baking soda (Google it)…or in a pinch there’s always Goo Be Gone.
 
AND I love washi tape and have an embarrassingly large collection that I never do anything with but look at…it‘s like candy for the eyes. So today’s ornament is a win-win!
Materials:
Clear clean light weight plastic – salad containers, clear cookie containers – lids on the candy containers from Trader Joes etc.
Washi tape
Push pin for making a hole for hanging (maybe an eye)
 

Cut the plastic out of the container- or the edges off the lid so that the plastic will lay flat.
Lay down strips of washi tape on the dry clean plastic. 
Make a paper template of the shape that will be cut out if it’s more complicated than just a circle (trace around a jar or can).
Transfer the shape to the tape covered plastic.
Cut out the shape and poke a hole to hang the ornament. 
Add a little sparkly tape to the top of the circle as the ornament hanger.
The Tiny Funnel

The Tiny Funnel


Cupcake Wrapper Ornaments

The Tiny Funnel
My goal is to make one ornament every day in December up until the 24th...using only (mostly) what I have on hand--very simple ornaments that are easy, easy, easy and fast for kids. And today - I give you the cupcake wrapper ornament.

The Tiny Funnel


Materials:
  • Paper cupcake wrappers- regular and mini sizes
  • Glue stick 
  • Clear tape
  • Pipe cleaner or twine or a paper clip
  • Scissors- fancy edged ones are good too

  1. Flatten or even iron (adults job) the cupcake wrappers.
  2. Fold 8 wrappers in half with the pretty side inside.
  3. Add glue stick to one half wrapper on the back side.
  4. Then line up the edges of the next wrapper and smooth it into place. Continue until all 8 wrappers have been attached EXCEPT the last one.
  5. Add the hanger in the middle seam with clear tape- it could be an opened paper clip, a length of knotted twine or a pipe cleaner section with a hook bent end.
  6. Add glue stick and close the ball with the hanger nestled inside.
  7. Trim any paper edges that are not quite lined up.

That's it!
One option is to use the fancy edges scissors or even to trim the ball into other shapes. The lightweight colorful paper is easy for kids to cut through even when there are several layers.

OR make a bunch of balls and string them on a garland.

OR try making them with doilies... it's a little more complicated as the glue stick will go through the holes-- put fresh scrap paper under each doily when adding the glue stick.


Lego People (and monster) Shelves

The Tiny Funnel
A place for all those little Lego people!
This little shelf started off as a project I made for work about 3 years ago (I'd link to the original but it's gone now). I saw one of those Anthropolgie mirror hacks and thought I could do one with tiny shelves as we have a lot of tiny things in our home that really need a place to hang out. These tiny shelves are made from 2 wooden yard sticks and an 18" quilting hoop.

With the de-toying of my son's room, we're keeping some favorite Lego people on display. This is also another project that uses the Lego plates from a previous post.

Materials:
18” quilting hoop (Joann fabrics $5.99)
Two 36” wood rulers
Wood Glue or Aleens Fast Grab Tacky Glue
120 grit sand paper
Acrylic Paint and brush
Skewer or toothpick
Wax paper
X-acto Knife

10" by 10" Lego Plate
Cutting surface/protected paint surface
Metal Ruler
E-6000 Clear “Craft Adhesive”—this is an industrial-strength adhesive made from a clear drying, flexible epoxy for adults to use- not children! Always read the directions/precautions on the package.

A few notes about the supplies:
  • The quilting hoops come in three different sizes: 14” 18” and 23”; I used the 18” hoop
  • There's even an oval-shaped option!
  • The rulers at Home Depot and Lowe's are slightly thicker and wider than those that I found at the Ace Hardware.
  • I prefer the rulers at Ace Hardware as the wood has not been indented with the inch marks and are easier to score and snap with a craft knife (and to paint).

Lay the ruler across middle of the hoop with one end of the ruler against the side of the hoop.
Mark where to cut it on the other side; this will vary from hoop to hoop.
For example-I measured 17 and 5/8” and another hoop was 18" across.
Repeat for the upper and lower shelves.
The ruler is "deeper/wider' than the hoop- so one side will be the "front" and have a little over hang.
It's possible with the lighter weight rulers to score and snap them to length or use a hand saw.
Lightly sand the ends with 120 grit sand paper.
Lay the hoop flat on wax paper.
Make a pencil mark where the shelves will butt up against the hoop.
Use a skewer or popsicle stick to apply glue to both the hoop and the ruler piece where the 2 surfaces touch and then slide the shelf into place.
Start with the middle shelf first (establishes structure) then repeat for the other shelves.
Wipe excess glue off the rulers exposed edge with a damp paper towel.
Make sure the ruler shelves are horizontal to each other!
Allow the glue to set.
Apply more glue if necessary in the cracks where the shelf meets the hoop.
Allow them to dry completely before priming, sanding and painting.

You could just glue long Lego pieces onto the tiny shelves. That would completely work. But if you want to try to make the long pieces from a Lego plate, they're incredibly easy to cut with scissors, however, for a long straight edge I suggest using a metal ruler and an X-Acto knife. 
 
On the back of the Lego plate measure and score the surface with the X-Acto knife then snap the length off (careful of pinching your fingers).

Follow the directions on the package for the E-6000 Glue and add the Lego strips to the wood shelves.
You can cut the Lego plate quite thin - I added a strip to the very bottom and curved it - hold it in place with masking tape until it dries.


But if you don't have Lego people and have monsters instead or tiny treasures - it also makes a nice display for those too.