Showing posts with label Crafts. Show all posts

Wind Sock for July 4th

The Tiny FunnelWhy not make a windsock (or two) to decorate your porch for July 4th? They're really easy to put together and made from a water bottle, duct tape and a trash bag. 

Materials:
  • 1 liter plastic bottle
  • Masking tape
  • Duct tape (multiple colors)
  • Parchment paper
  • Hole punch
  • Filament or string
  • Trash bag
  • Scissors (use pinking shears to make fancy edges)
 

Remove the packaging from the soda bottle.
Dry the bottle and add a strip of masking tape at the top and the bottom of the bottle where the curve starts and stops.
Cut the bottle along the strip and trim it so it's straight and use the hole punch to add holes every 2" along one edge.


Add two holes across from each other on the opposite end of the cut  "tube".
Remove the masking tape.

 
Lay strips of duct tape onto parchment paper and cut fun shapes and designs then add them the sides of the tube. 
The parchment paper is a little trick that let's you cut duct tape easily without it sticking (too much) to the scissors.


Thread and tie a length of filament through the top two holes then add 1" wide strips cut from a trash bag to the bottom holes as streamers.

 
the Tiny Funnel
Happy 4th of July!

Cupcake Wrapper Ornaments

The Tiny Funnel
My goal is to make one ornament every day in December up until the 24th...using only (mostly) what I have on hand--very simple ornaments that are easy, easy, easy and fast for kids. And today - I give you the cupcake wrapper ornament.

The Tiny Funnel


Materials:
  • Paper cupcake wrappers- regular and mini sizes
  • Glue stick 
  • Clear tape
  • Pipe cleaner or twine or a paper clip
  • Scissors- fancy edged ones are good too

  1. Flatten or even iron (adults job) the cupcake wrappers.
  2. Fold 8 wrappers in half with the pretty side inside.
  3. Add glue stick to one half wrapper on the back side.
  4. Then line up the edges of the next wrapper and smooth it into place. Continue until all 8 wrappers have been attached EXCEPT the last one.
  5. Add the hanger in the middle seam with clear tape- it could be an opened paper clip, a length of knotted twine or a pipe cleaner section with a hook bent end.
  6. Add glue stick and close the ball with the hanger nestled inside.
  7. Trim any paper edges that are not quite lined up.

That's it!
One option is to use the fancy edges scissors or even to trim the ball into other shapes. The lightweight colorful paper is easy for kids to cut through even when there are several layers.

OR make a bunch of balls and string them on a garland.

OR try making them with doilies... it's a little more complicated as the glue stick will go through the holes-- put fresh scrap paper under each doily when adding the glue stick.


Lego People (and monster) Shelves

The Tiny Funnel
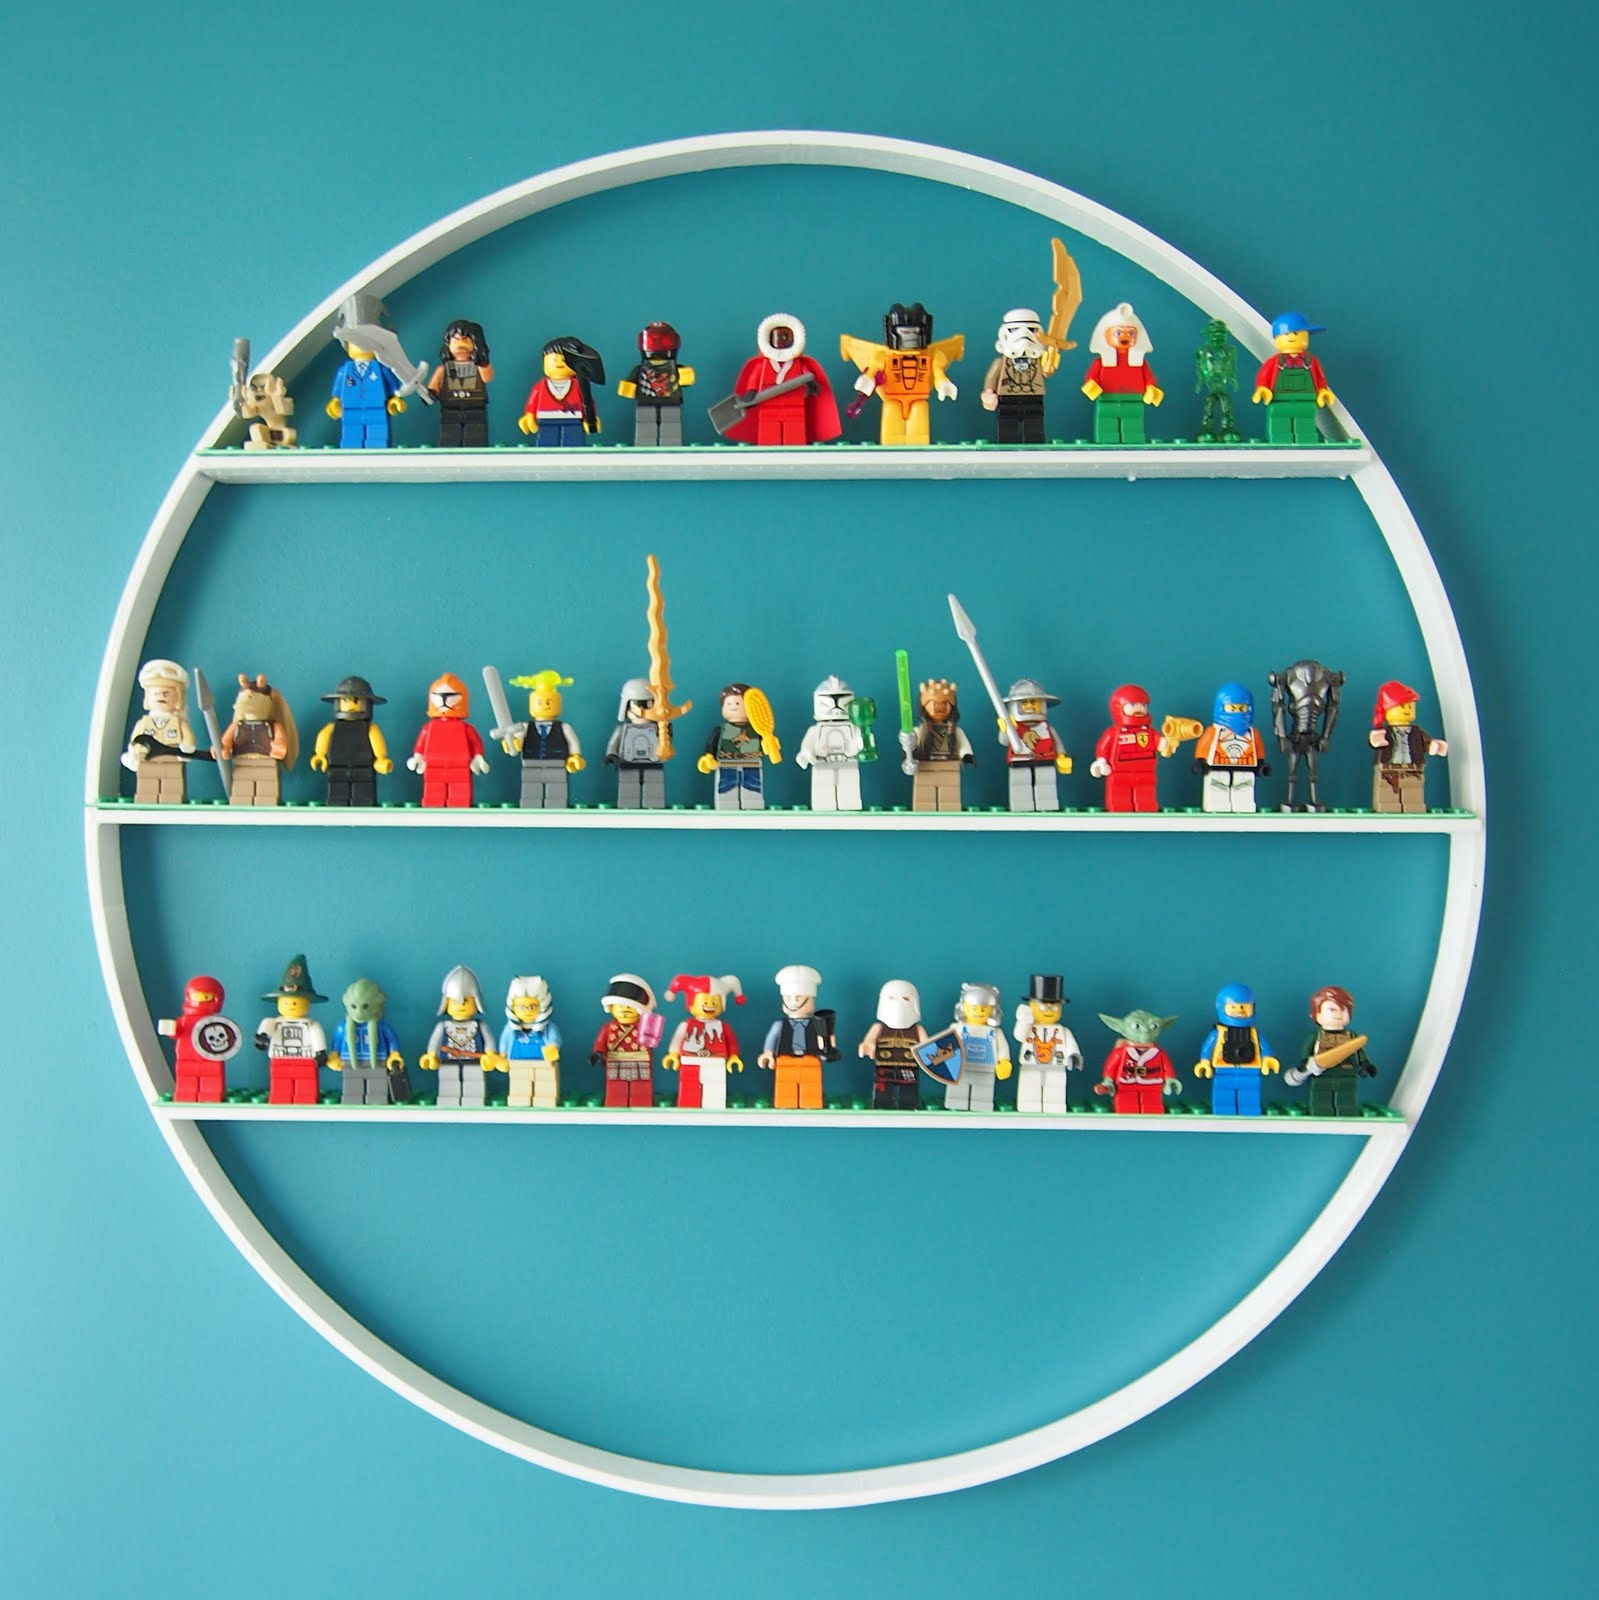
A place for all those little Lego people!
This little shelf started off as a project I made for work about 3 years ago (I'd link to the original but it's gone now). I saw one of those Anthropolgie mirror hacks and thought I could do one with tiny shelves as we have a lot of tiny things in our home that really need a place to hang out. These tiny shelves are made from 2 wooden yard sticks and an 18" quilting hoop.

With the de-toying of my son's room, we're keeping some favorite Lego people on display. This is also another project that uses the Lego plates from a previous post.

Materials:
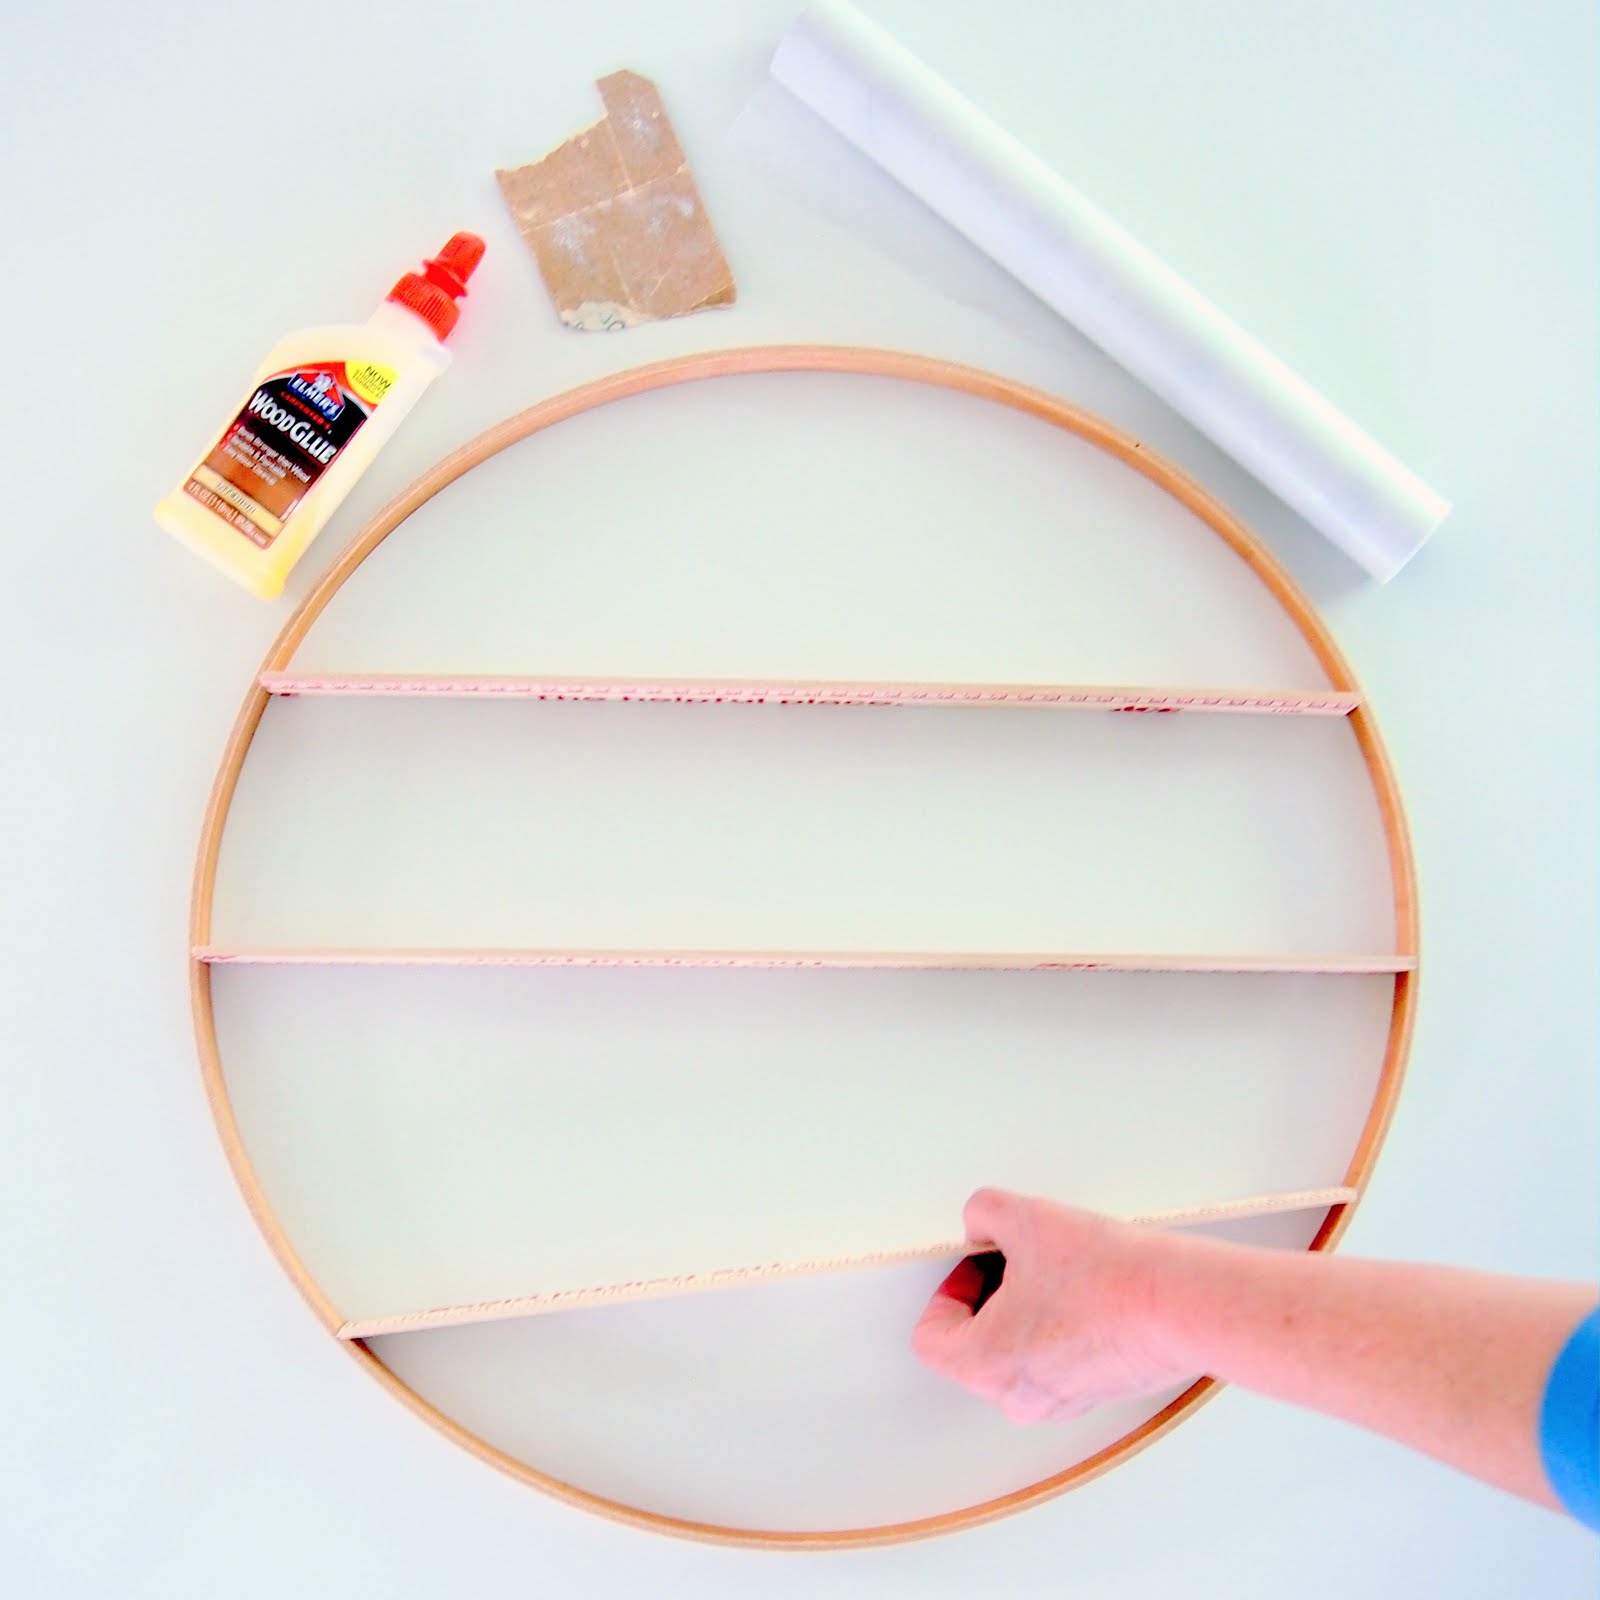
18” quilting hoop (Joann fabrics $5.99)
Two 36” wood rulers
Wood Glue or Aleens Fast Grab Tacky Glue
120 grit sand paper
Acrylic Paint and brush
Skewer or toothpick
Wax paper
X-acto Knife

10" by 10" Lego Plate
Cutting surface/protected paint surface
Metal Ruler
E-6000 Clear “Craft Adhesive”—this is an industrial-strength adhesive made from a clear drying, flexible epoxy for adults to use- not children! Always read the directions/precautions on the package.

A few notes about the supplies:
  • The quilting hoops come in three different sizes: 14” 18” and 23”; I used the 18” hoop
  • There's even an oval-shaped option!
  • The rulers at Home Depot and Lowe's are slightly thicker and wider than those that I found at the Ace Hardware.
  • I prefer the rulers at Ace Hardware as the wood has not been indented with the inch marks and are easier to score and snap with a craft knife (and to paint).

Lay the ruler across middle of the hoop with one end of the ruler against the side of the hoop.
Mark where to cut it on the other side; this will vary from hoop to hoop.
For example-I measured 17 and 5/8” and another hoop was 18" across.
Repeat for the upper and lower shelves.
The ruler is "deeper/wider' than the hoop- so one side will be the "front" and have a little over hang.
It's possible with the lighter weight rulers to score and snap them to length or use a hand saw.
Lightly sand the ends with 120 grit sand paper.
Lay the hoop flat on wax paper.
Make a pencil mark where the shelves will butt up against the hoop.
Use a skewer or popsicle stick to apply glue to both the hoop and the ruler piece where the 2 surfaces touch and then slide the shelf into place.
Start with the middle shelf first (establishes structure) then repeat for the other shelves.
Wipe excess glue off the rulers exposed edge with a damp paper towel.
Make sure the ruler shelves are horizontal to each other!
Allow the glue to set.
Apply more glue if necessary in the cracks where the shelf meets the hoop.
Allow them to dry completely before priming, sanding and painting.

You could just glue long Lego pieces onto the tiny shelves. That would completely work. But if you want to try to make the long pieces from a Lego plate, they're incredibly easy to cut with scissors, however, for a long straight edge I suggest using a metal ruler and an X-Acto knife. 
 
On the back of the Lego plate measure and score the surface with the X-Acto knife then snap the length off (careful of pinching your fingers).

Follow the directions on the package for the E-6000 Glue and add the Lego strips to the wood shelves.
You can cut the Lego plate quite thin - I added a strip to the very bottom and curved it - hold it in place with masking tape until it dries.


But if you don't have Lego people and have monsters instead or tiny treasures - it also makes a nice display for those too.


Rock On! Painted Rock People


Rock on! I say. 
For more than 13 years, I’ve worked at Family Fun Magazine in Northampton, MA as a freelance craft developer and stylist. As of August 15, 2015 the office relocated to NYC and the Northampton doors have closed. I’ve loved working with all the staff, editors and art directors there- it’s been a real pleasure and I’m so sad to see the office move.  It will be a huge change in my life (as well as for the 24 people who lost their full time jobs) but I’m looking forward to whatever happens next. 

Soooo--If you need a craft idea for a specific audience or a project tested for...your book? or want to collaborate on an adventure? Send me a message- I'm just sitting here painting rocks.

Painted Rock People
  
Materials:
  • Rocks
  • Paint brush
  • Acrylic Paints
  • Fine tip Sharpie (black) 
  •  Fine tip Paint Sharpie (white)


  1.  Look for a variety of small rocks-long skinny ones make good arms and legs or use a wide long one and paint both legs on it.
  2. Paint the rocks-light colors will need several coats (or use white a base coat first).
  3. Allow the paint to dry completely-- then 
  4. Add details with the markers.


String Nests for Easter

Yes! It’s something new to do with those crazy string eggs!

Last year we made them for work (in December, because that's how we roll around here) and then put them out at Easter time.


When I unpacked the Easter stuff last week --Yawzaa! one was squished! But I think it was such a great happy accident because immediately --I saw it as a cool design-y nest. So I did it will all the eggs.

Cut a little paper egg for a place name and now we're good to go!

I’ve seen the string eggs used to make garlands, wreaths, and ornaments but – only here folks - are you seeing a lemon made into lemonade- metaphorically speaking.
I’m going to tell you the truth. I could not blow up the water balloons and I used regular balloons when I made ours. 

Here’s a video of the balloon shrinking.


So let’s say you made the eggs last year or last week… then just push the middle top down into the center and squish the side edges together.
Really, it's not rocket science but it's super cute. 


I suppose if you were making them into nests on purpose - you could just wrap half the balloon but I like the double weave and the little space in between the layers and the jelly beans seem to stay inside the bowl just fine.
If you’re wondering how to make the eggs here are some more links:
The Tiny Funnel


It’s that time of year again! Lucky March 17th is next week and we are so ready for spring! This year we wanted to make a small trap for tiny Leprechauns. So we modified a trap I made for work a longtime ago from an oatmeal container.  (The original image has disappeared from the website but it still exists everywhere on the internet).

Apparently, leprechauns are the shoe makers for fairie folk; they have huge egos, love gold (a lot) and are also very curious and mischievous. Hopefully this hat with a gold nugget on top and an inviting ladder will be enough to catch one.

For the first try- we used a paper coffee cup but the cup slant is hard to negotiate- a cylinder is much easier to cover with felt.

The second try-we used a shortened paper towel tube but the proportions seemed a little off.

Third times a charm- just a cylinder of paper covered in felt.

Materials:
Card stock cut to 4” by 7”
Green felt
Double sided tape
Rickrack, sequins, ribbon or a felt strip- an embellishment


Ladder & Footprints

Little sticks
Hot glue
Pencil
X-acto
Stamp pad
Tin foil
Yellow marker


Our ladder measures 61⁄2" by 11⁄2" and is made by gluing little sticks on the 2 sides about every 1⁄2".
Trim the felt into a 4” by 7’” rectangle, a 21⁄4" diameter circle and a  37⁄8" diameter circle.

Roll the card stock into a cylinder shape and secure the edge closed with the double sided tape.

Add double sided tape to the paper cylinder then press the felt rectangle around the cylinder, trim off any excess.

Add the embellishment trim to the felt covered cylinder – we used double sided tape to attach the rickrack and the sequin chain on the back near the felt seam.

Trim top the felt circle so it fits perfectly on top of the cylinder.
Place the cylinder on the larger circle.

Cover a piece of tin foil with yellow marker then squish it up to make the “gold nugget.”

Carve a little shoe print into a pencil; eraser to make a tiny boot print (yeah- it's kind of wonky but it printed up fine).