Valentines already? I bet you thought I forgot…
I’ve been busy taking a break from work. Taking some time off to blow the snow and make lots of pots of stew among other things.
Maybe because Valentines is on Saturday this year, or the day after winter break starts or maybe it’s just the way of middle school but we didn’t make Valentines this year! Yikes! It’s the first year since preschool.
However, I have some sweeties that I want to give cards to so I made these 2 fast cards this morning. Super easy and quick.
And also-- this jar full of candies. I made this project as a prototype for work for a Christmas present but I really think it works as a Valentines gift.
It's pretty self explanatory – but I made a
document for my words- you can write your own words. The labels are 2 3/4" by 1 3/8" and print out on sheet with cutting lines.
Wrap them around the Hershey's Miniatures chocolate candy bars and tape them on the back with clear tape.
Put the candies in a quart mason jar and decorate the lid with washi tape and decorative paper. Use string or ribbon to attach a card stock heart shaped tag labeled "The many things I love about you."
The cards:
Eye Love You
Use any size card stock base folded in half (mine measures 5.5” by 4”).
Cut a front piece from pretty paper that is slightly smaller than the card.
Use a piece of scrap paper to cut a heart shape out (you know fold it in half and cut the shape out).
Make sure it fits on the card.
Then trace around the heart shape on the pretty paper and use a craft knife to trim the center out.
Place the pretty paper on the card – trace lightly around the inside heart shape. Set the paper aside.
Add glue to the drawn heart shape and put the eyes inside the drawn line.
Allow the glued eyes to dry then use glue stick to add the pretty paper.
Add the words on a separate piece of paper (hand written or computer).
I like you sew much!
Use any size card stock base folded in half (mine measures 4.25” by 4.25”).
Cut a front piece from card stock that is slightly smaller than the card.
Use a piece of scrap paper to cut a heart shape out (you know fold it in half and cut the shape out). Make sure it fits on the card.

Trace lightly around the heart shape on the smaller card stock sheet. Then mark around the heart shape about every .25”.
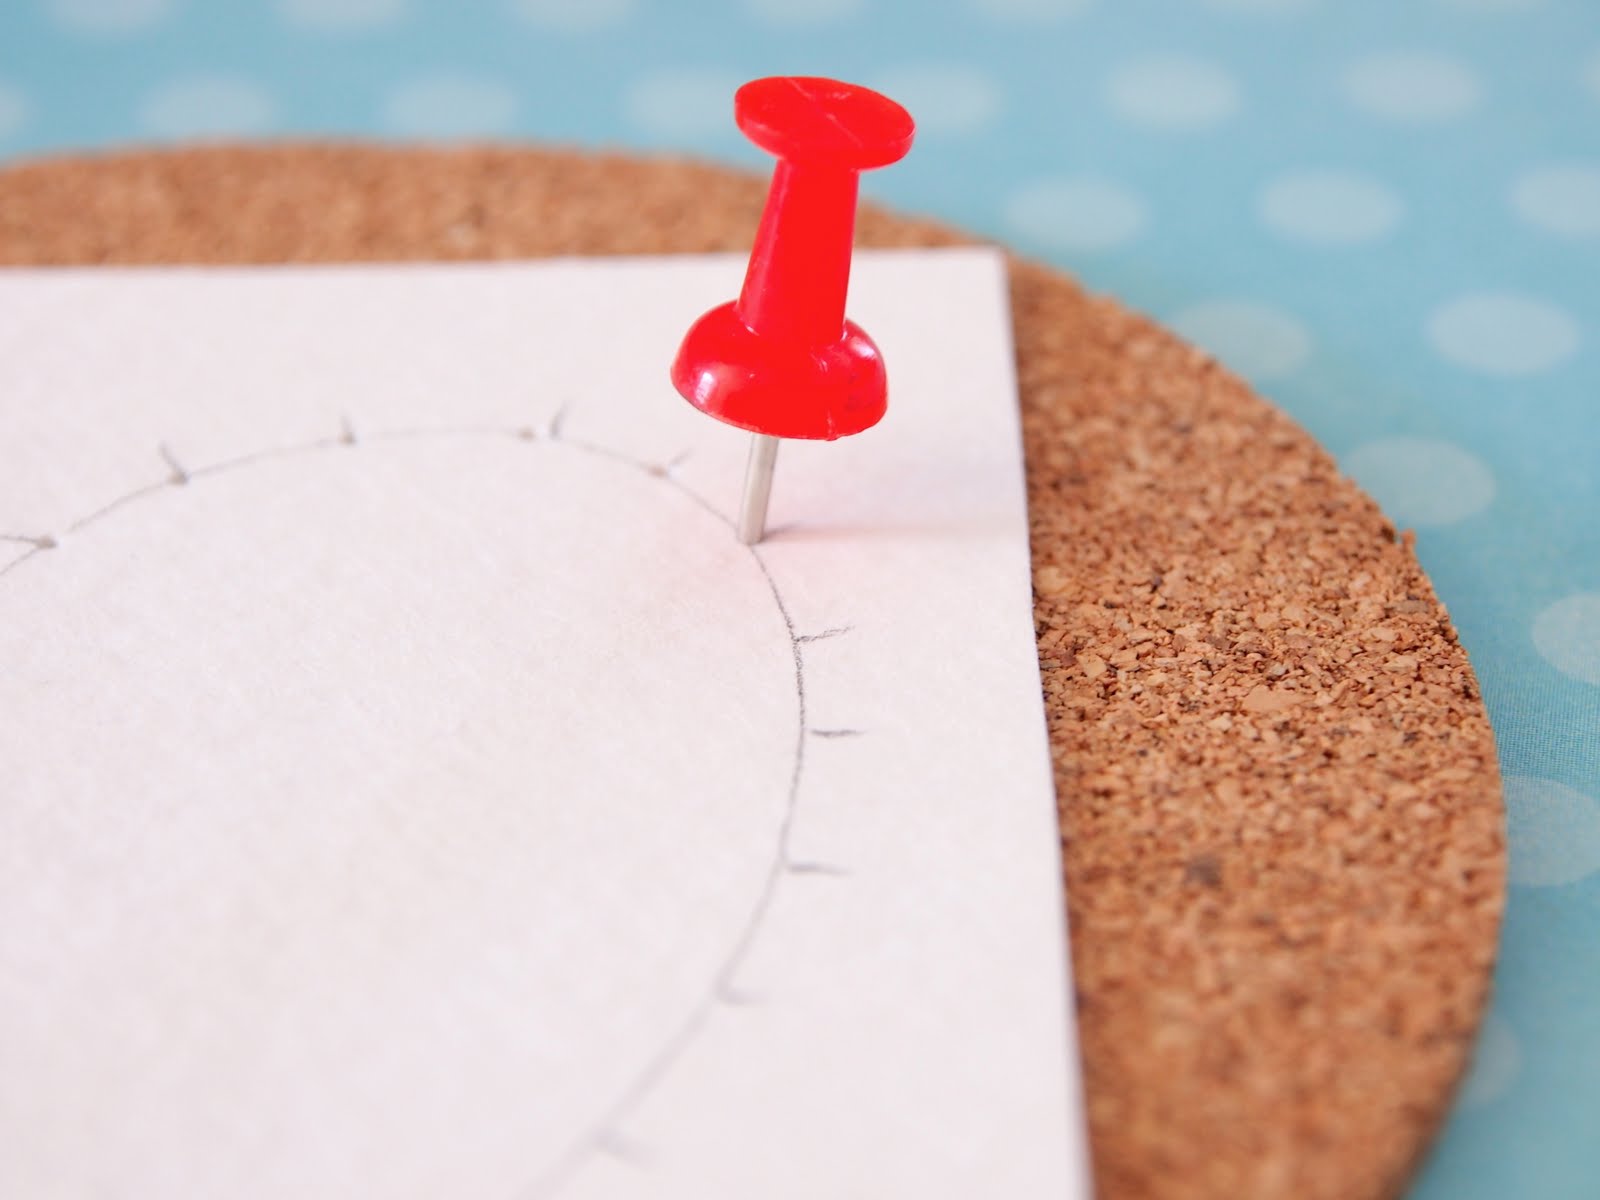
On a cork coaster, fun foam, or a magazine (something soft and protective of the surface your working on) use a push pin to make holes around the hearts shape on the .25” marks.

Use 3 strands of embroidery floss, Perle cotton or string (or yarn) to do a running stitch on the paper. I doubled up the stitches around the center of the heart to make it look even. Tie the strings off in the back and trim the ends.

Add glue stick to the back then add it to the card base. Add your message
to the front:
You’re sew cute!
I love you sew much!
I’m sew excited we’re friends!

") Yes! It's another 10 minute craft! Fast, cheap and easy - these eye ball plates are quick to put together and use things you (probably) have on hand.
Yes! It's another 10 minute craft! Fast, cheap and easy - these eye ball plates are quick to put together and use things you (probably) have on hand. Eye Balls-10 Minute Crafts") Materials:
Materials: Eye Balls- 10 Minute Crafts")
 Eye Balls- 10 Minute Crafts")


