Showing posts with label Easter. Show all posts

String Nest Bowl for Easter

I've been wanting to make a giant double sided string bowl ever since I made the little ones for Easter a couple of years ago. They came about because our string eggs were squished and I loved the double weave and the little space in between the layers.

Materials:
Cotton yarn skein
Balloon
White glue
Popsicle or craft stick   
2-3 Plastic trash bags
Glass bowl
Measuring cup

 
Get ready:
Protect the table surface with plastic bag (maybe even the floor).
Cut armholes and a neck hole in the other plastic bag and put it on like a smock.

Make:
Add ¼ water to ½ cup glue in the measuring cup –mix well with the craft stick.
Pull the yarn end from the middle of the skein.
Add the cotton yarn skein to the glass bowl.

Pour the glue water straight down into the middle of the skein.

Swish the cotton yarn skein around with the craft stick and let it absorb the glue water.
Pull the string from the middle of the skein and wrap the wet yarn around the balloon.
Cover the whole balloon.
This is messy- that’s why you’re wearing a trash bag to protect your clothes – you'll find that you need to brace the balloon against your tummy to wrap the gluey string around the balloon (notice in the picture my bag is too small).

Set the balloon on the bowl to dry overnight (don’t worry, you can wash the bowl later).

Turn the balloon to make sure all the yarn is COMPLETELY DRY.
Gently check to see if the string is pulling away from the balloon then use a pin to burst the balloon.

The Tiny Funnel
Carefully pull the deflated balloon out from the egg.

The Tiny Funnel
Push the middle top down into the center and squish the side edges together.

Holiday Tradition Tree

The Tiny Funnel

The Holiday Tradition Tree is a custom I started when my son was very little. I made several trees for work but they were never published so they floated around our home for awhile until I settled on one and it slowly became the Holiday Tree.

At Christmas it gets little ornaments, at Thanksgiving-- thankfulness leaves, at Halloween- bats (obviously) and at Easter - little chicks.

You could put any number of different things on it year round: origami birds, fabric flowers, twinkle lights etc.

Materials:

  • Branch(es) about 24" tall with lots of little twigs coming off of them
  •  A saw (I won mine in an Instructables contest)
  • Wood glue
  • A wood base: a wood plaque from the craft store works really well; they even have natural wood slice bases now
  • Drill and bits (size depends on branch bottom diameter)
  • Scrap wood surface to drill into (just in case)
  • Wax paper
  • Optional: Paint (spray or acrylic and a brush)

Determine the depth of the wood base - you will not need to drill through the bottom.

Gauge the diameter of the branch(es) being added to the base and select the corresponding sized drill bit.


Put a piece of painters tape around the drill bit to show how deep to drill (i.e. not all the way through the base).

In some cases, the wood bases already have a hole drilled into them for lamps but in general, it will not be the size needed to fit the bottom of the branch.
 

Hold the branches where they will sit and be aware that you might need to have the things balance later (i.e. put a second branch in).

On a protected surface, such as a piece of scrap wood, drill all the holes.
Set the base on wax paper and add a dab of glue into the hole.
Add a dab of glue to the branch bottom and stick it into the hole.


Repeat with the other branches if more are being used.

When the glue is completely dry, spray paint the whole tree or set your children to painting it by hand with acrylic paint.

You can paint it
white (or a color) or leave it natural - both white or natural will work for all the holidays and seasons.

The Tiny Funnel

Easter Table Chicks

The Tiny Funnel 
A little chick to save your place at the Easter table.
Sometimes, when I photograph my crafts, food etc. I get a little theme song for the image or the craft stuck in my head.
This one is "Stand" an R.E.M. favorite.

"Stand in the place where you live
Now face North
Think about direction
Wonder why you haven't before
Now stand in the place where you work..."

Materials:

*Wooden Eggs (they come blank or already painted white at Michael's)
*White paint (or white wooden eggs)
*Paint and brushes
*Paint pens- White and Black and maybe orange? 
I like the Sharpie brand- either oil or water based or the Moltow Acyrlic
*Pipe cleaners – about 2” long
*Not shown- white glue

Use a thumb tack to make a hole in the top of the egg.
 
Paint the eggs white so that the (next) colors are bright; then allow the paint to dry.

Use a pencil to draw on the wings and the features. 

Paint the main part of the body; let it dry (use a hair dryer if you’re impatient like me) then paint the wings and allow everything to dry completely before adding the small details.

Yes - I painted over the small details like the face but not the wings.

You can still see the drawing under the paint.
Paint the wings and let everything dry.

Outline the wings with a paint marker- that space between colors can be wonky and the marker adds a nice finished touch even if the paint lines are uneven.
Add the small details with paint pens.
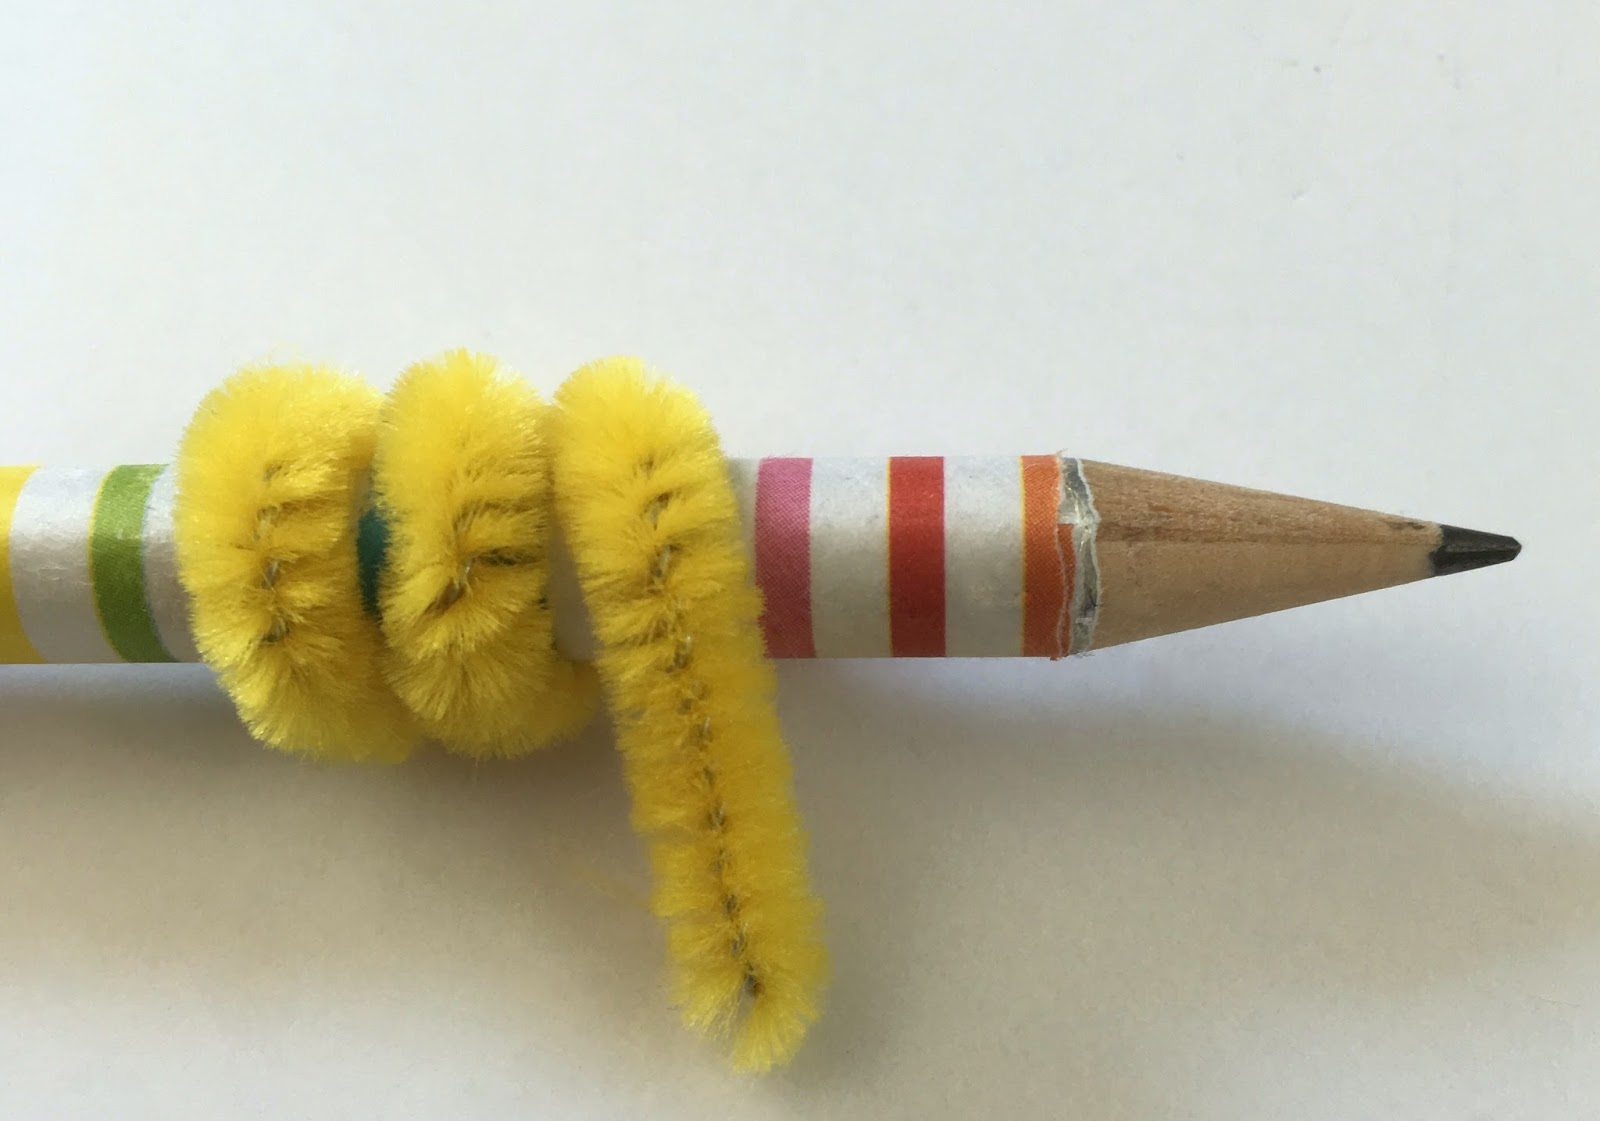
Curl the pipe cleaner around a pencil, then add a dab of glue to the end before sticking it into the hole.
 
Let the glue dry for a bit so the pipe cleaner will stay in the hole.

Add the name card.
The Tiny Funnel

The Tiny Funnel

Easter Egg Garland

The Tiny FunnelThis year’s Easter garland is brought to you by recycled milk and water jugs. I really liked working with the milk container plastic at Christmas and decided to use it for this project. It’s easy to cut, translucent and uses something we already have.


The Tiny Funnel

Materials:
  • Water, milk or juice jug
  • Washi tape
  • Oval template (or you can use a punch if you have one)
  • Marker
  • Scissors
  • Thick needle with a sharp point
  • Cord (not twisted string)

  1. Cut the panels from a container- clean any packaging off (oil and baking soda or Goo Gone).
  2. Trace the oval onto the plastic and cut the shape out (or use the punch).
  3. Add washi tape strips to the oval.
  4. Pre-pierce 2 holes near the top of the "egg" with a thick sharp needle.
  5. Then add the cord through the holes (yes, pierce first then string).
The cord (left) doesn't unravel like string (right).

You could also string the eggs individually to hang on a tree or in a window.


String Nests for Easter

Yes! It’s something new to do with those crazy string eggs!

Last year we made them for work (in December, because that's how we roll around here) and then put them out at Easter time.


When I unpacked the Easter stuff last week --Yawzaa! one was squished! But I think it was such a great happy accident because immediately --I saw it as a cool design-y nest. So I did it will all the eggs.

Cut a little paper egg for a place name and now we're good to go!

I’ve seen the string eggs used to make garlands, wreaths, and ornaments but – only here folks - are you seeing a lemon made into lemonade- metaphorically speaking.
I’m going to tell you the truth. I could not blow up the water balloons and I used regular balloons when I made ours. 

Here’s a video of the balloon shrinking.


So let’s say you made the eggs last year or last week… then just push the middle top down into the center and squish the side edges together.
Really, it's not rocket science but it's super cute. 


I suppose if you were making them into nests on purpose - you could just wrap half the balloon but I like the double weave and the little space in between the layers and the jelly beans seem to stay inside the bowl just fine.
If you’re wondering how to make the eggs here are some more links:
The Tiny Funnel


Crepe Paper Easter Egg Garland

I’ve being working on a project using crepe paper and this was something that happened along the way. I suppose you could make the eggs with tissue paper but the crepe paper was so easy and when the edges over lap, they make a new color stripe!
It’s really beautiful to see the hanging eggs in the sun. They glow almost like stained glass.

Materials:
Contact paper
Crepe paper streamers
Scissors
Thin Sharpie marker
String
Needle


Cut two 4.5” strips of contact paper (the roll is 18”).
Peel the paper back off one strip and lay the film sticky side up on the table.

Add a length of crepe paper to the center of the sticky contact paper then add a 2nd length and over lap them slightly.

Add a 3rd length of crepe paper to the bottom.

Now, you could just cut your eggs out here- you don’t need to encase them in a second layer of contact paper but I did.

Remove the paper back off the 2nd strip and lay the film sticky side over the crepe paper.

Really press the 2 surfaces together.

Trace around an egg shape cut from card stock – mine measures 4" tall.

Remember to flip the egg template so there are different top and bottom colors.

First, lay the eggs out and arrange them in the order they will go on the string.

Then cut the string to about 6’ (or more/less if needed) and thread the needle through the top of each egg about .25" from the edge.