Showing posts with label Kids crafts. Show all posts

Easter Table Chicks

The Tiny Funnel 
A little chick to save your place at the Easter table.
Sometimes, when I photograph my crafts, food etc. I get a little theme song for the image or the craft stuck in my head.
This one is "Stand" an R.E.M. favorite.

"Stand in the place where you live
Now face North
Think about direction
Wonder why you haven't before
Now stand in the place where you work..."

Materials:

*Wooden Eggs (they come blank or already painted white at Michael's)
*White paint (or white wooden eggs)
*Paint and brushes
*Paint pens- White and Black and maybe orange? 
I like the Sharpie brand- either oil or water based or the Moltow Acyrlic
*Pipe cleaners – about 2” long
*Not shown- white glue

Use a thumb tack to make a hole in the top of the egg.
 
Paint the eggs white so that the (next) colors are bright; then allow the paint to dry.

Use a pencil to draw on the wings and the features. 

Paint the main part of the body; let it dry (use a hair dryer if you’re impatient like me) then paint the wings and allow everything to dry completely before adding the small details.

Yes - I painted over the small details like the face but not the wings.

You can still see the drawing under the paint.
Paint the wings and let everything dry.

Outline the wings with a paint marker- that space between colors can be wonky and the marker adds a nice finished touch even if the paint lines are uneven.
Add the small details with paint pens.
Curl the pipe cleaner around a pencil, then add a dab of glue to the end before sticking it into the hole.
 
Let the glue dry for a bit so the pipe cleaner will stay in the hole.

Add the name card.
The Tiny Funnel

The Tiny Funnel

Halloween Eye Can!


The Tiny Funnel
As we get closer to Halloween I'm making fast, easy projects in the 10 minute craft theme...but my secret theme is "eyes". Did you notice?

This monster fur container with googly eyes can hold silverware, straws, or even art supplies-pencils, brushes and markers. It's made from a (28 ounce tomato or any size) can or tea tin; cleaned and dried with the edges flattened down along the rim.

It's easy to get colored fur at Joann Fabrics at Halloween (not year round) but I usually buy swatches from Michael's (our local store had fuschia!).

Cut the fake fur fabric to fit the outside of the can then hot glue the fabric in place (the can gets hot so be careful). 

Add the eyes with little dabs of hot glue (not enough to melt the plastic or burn yourself).
The Tiny Funnel

Halloween Paper Plate and Cupcake Wrapper Eye Balls

The Tiny FunnelYes! It's another 10 minute craft! Fast, cheap and easy - these eye ball plates are quick to put together and use things you (probably) have on hand.
The Tiny Funnel Materials:
9" Paper plates
Cupcake wrappers- iron them flat for easy gluing
(adults job) 
Black card stock
Glue stick

Red marker
3m removable foam squares or painters tape

Optional- circle punch (2") from craft store (use your coupon!)
 

The Tiny Funnel

Use glue stick to add a cupcake wrapper to each plate.
Cut or punch out a black pupil and add to the center of the cupcake wrapper.
Add bloodshot lines with a red sharpie marker.
Add a foam square (or painters tape) to the back and add to the wall.


TheTiny Funnel

Cheesy Googly Eyes

The Tiny FunnelYou can see (no pun intended) that you can add little mozzarella string cheese disks and olive googly eyes to anything.

 The Tiny Funnel
I made this rigatoni pie for work (recipe here) but added the eyes to nachos, mini pizzas, regular pizza or even crackers.
The Tiny Funnel


The Tiny Funnel
The Tiny FunnelCut the olive in half and then push the straw through the skin side. 

You can cut the extra olive off the back.

Different diameter straws will yield different sized pupils.

(yes, I punched out the pupils while I was talking to my mother-in-law on the phone. #multitasking).

Cut the cheese disks from the string cheese. 


The Tiny Funnel


Set everything up so it's ready to go.
Make whatever you’re going to make (pizza, nachos etc.) then add the cheese disks at the end for the last couple of minutes. Remove from the oven and push in the olive pupils. 
 
The Tiny FunnelIf you're making the crackers- put the Triscuits in the oven at 350 degrees for 5 minutes- it doesn’t take long for the cheese to get just melted enough to add the olive pupils.

Halloween Spiders (again)

@ The Tiny Funnel
The spiders from last year are in the October issue of FamilyFun magazine. While we were shooting the feature, the kids made their rock spiders on set and added tons of eyes; their versions are so cool! I really like them with all the eyes.

Hurray for October and Halloween!

Fairy House Week Part 7: Little Fairy House Details

And lastly, a few details for Fairy House Week; it's important to remember that fairies like their furniture, their little tables and lamps - their tea. Acorns, acorn caps, milkweed pods, stones and twigs can be used to make the special tiny furnishings in a fairy house. Simple is the key.

Here is a PDF of all the Fairy House constructions. For personal use only please.


Wood disks bought at craft store
Hot glue little chair together

Fairy House Week Part 6: Fairy House Mini Washi Tape Bunting

The Tiny Funnel 
Every fairy house needs to have a little bunting - made from fabric or washi tape it makes the house festive and welcoming.

Materials:
Japanese Washi tape
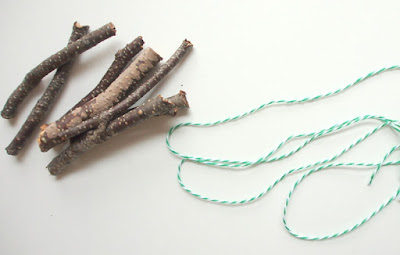
Bakers twine, Perle cotton, embroidery floss, waxed thread- basically any thin string
2 sticks


The Tiny Funnel
  • Cut a length of string.
  • Place a 2” long, piece of Washi tape –sticky side up under the string.
  • Fold the Washi tape onto itself with the string in the middle. 
  • Trim the tape bottom straight.
  • Trim the sides to make a triangle shape or make a forked flag by cutting out a small triangle at the bottom of the folded tape.
  • Repeat along the string – cutting the folded tape to the same length then into a triangle shape.

Fairy House Week Part 5: Fairy Fences and Ladders

Te Tiny FunnelSometimes fairies like little ladders, fences, and walkways for their homes- here are a couple of ways we've constructed them in our Fairy House Construction week.

The Ladder/Fence

To make the Fairy House ladder, cut 2 sticks into 12” lengths.
Cut smaller sticks into 2”-2.5”lengths.
Lay the long sticks parallel to each other about 1.5” to 2” apart.
Use (hot or wood) glue to attach the short sticks every 1” to both long sticks to make the ladder.
Propped up – a ladder.
On its side – a fence.

Laying down - a walkway.

The Tiny Funnel 

The Tiny Funnel 
The Tiny Funnel 


Mini Rope Ladder

Materials:
Twine
Twigs


Cut twigs into small sections-about 3” each.
Cut 2 lengths of twine, twice as long as the length of the finished ladder.
Make a knot around the end of a twig with one piece of twine, leaving a 3” tail on one end.
Continue to tie the twigs every inch or so until all the rungs are in place on one side.
Repeat on the other side, keeping the twigs even on the second length of twine.
Trim any remaining twine.


Fairy House Week Part 4: The Tree Branch Fairy House

The Tiny Funnel 
Continuing with this weeks Fairy House Construction series: the Tree Branch House is an easy way to make a fairy house but will need a little help from a saw.
 

Use a sturdy thick stick with 3 branches coming off it.
Cut the branches so they're even in length and rest them on the ground.

Trim the top.
 
Lash short sticks with thin twine to the branches 1” to 2” from the ends and then lay smaller sticks across to make a platform floor.
Add fairy details - tables, chairs, bowls and such to lure and keep your fairies happy.
The Tiny Funnel  
The Tiny Funnel 

Fairy House Week Part 3: Two Story Fairy Houses

The Tiny Funnel


Continuing the week of Fairy House Constructions!

For this 2 story fairy house you will need:
8 sticks cut into--
4 longer sticks (ours measure about 14”)
4 short sticks (ours measure about 8”)
2 pieces of bark
 

Start by constructing the first floor.
Push 4 sticks into the ground in square shape arranged so that it is slightly smaller than the shape of one of the pieces of bark.
Add the bark (roof/floor).


Add the 2nd group of sticks into the ground around the first platform and add the roof bark to make the second floor roof.
The Tiny Funnel