Showing posts with label Plastic. Show all posts

Last minute Hoppy Valentine's Cards

Along time ago, in a distant galaxy, we made origami frog valentines for my sons class with a little chocolate tucked under each belly.

Today, simple, fast and easy and no candy.
I love my paper punches because they make projects like this easy to assemble. Punch
out the heart shape and add the printed message "Hoppy Valentine's Day!" Use glue stick to add the message and glue dots to add the plastic frogs.
Set up a production line!

The original idea included folding and stamping- very laborious and who has time right now?


Recycled Plastic and Washi Tape Ornaments

The Tiny Funnel
The Tiny Funnel
If you didn’t know – I’m a big recycler- makes my family a little crazy. I also use a lot of recyclables in my crafts and clear plastic salad containers are one of my favorites. I use vegetable oil (soak then wash with hot water and detergent, dry and use rubbing alcohol on the residue) to get the labels off but I’ve read that a lot of people use a combination of coconut oil and baking soda (Google it)…or in a pinch there’s always Goo Be Gone.
 
AND I love washi tape and have an embarrassingly large collection that I never do anything with but look at…it‘s like candy for the eyes. So today’s ornament is a win-win!
Materials:
Clear clean light weight plastic – salad containers, clear cookie containers – lids on the candy containers from Trader Joes etc.
Washi tape
Push pin for making a hole for hanging (maybe an eye)
 

Cut the plastic out of the container- or the edges off the lid so that the plastic will lay flat.
Lay down strips of washi tape on the dry clean plastic. 
Make a paper template of the shape that will be cut out if it’s more complicated than just a circle (trace around a jar or can).
Transfer the shape to the tape covered plastic.
Cut out the shape and poke a hole to hang the ornament. 
Add a little sparkly tape to the top of the circle as the ornament hanger.
The Tiny Funnel

The Tiny Funnel


Halloween Black Bats (and Spiders too)

I like to have a simple, fast craft for Halloween Eve that doesn’t call for drying time for glue or paint (we made the glowing eyes 2 years ago). That’s why these bats are perfect for making with kids- we have a group that gathers at our house every year before going out to trick or treat.

Here are 2 crafty tips for making this craft:


Tip #1 
About glue dots in general-
DON’T pull the glue dot off the paper backing! Just press the thing you want to adhere to the
glue dot on the paper and the glue dot will peel off and stay on the thing you are gluing OR tear a piece of the glue dot paper roll with the glue dot on it and press the dot (or line) onto the thing you are gluing to… then pull the paper backing away away. Stop trying to peel the dot off with your fingers! That's just futile and frustrating- you know who you are; the rest of you carry on.

Tip # 2
When you have to cut a LOT of tiny felt things, iron the shiny side of freezer paper to your felt (mat side up to the iron), then use a template
to trace onto back of the freezer paper and cut the shapes out OR just glue (stick) what you’re cutting out onto the freezer paper backing and cut everything at once.
Then peel off the freezer paper. Ta-dah! tiny felt things.

So if you decide to make a dozen bats – it might be easier to cut the wings using the freezer paper method (because that’s 24 wings).

Materials:
  • Plastic Easter eggs (spray painted black or buy from Oriental Trading*)
  • Googly eyes (small)
  • Black felt
  • Glue dot lines (like glue dots but 1” lines)
  • White tape (electrical, masking or duct tape)
  • Baker's twine/yarn/jute/Perle cotton
  • Wing template

*You can purchase chalkboard eggs (pack of 72 for $12.99) from Oriental Trading or use evil spray paint to paint the plastic Easter eggs.

The “chalkboard “ eggs (top in photo) came with 2 holes in the top and at the bottom but if you’ve painted your plastic eggs you can use a pushpin to make the hole at the top bigger as well as make a second hole (and you might need to use a needle to get the string through).
Or maybe your bats have purple and blue bodies? That's cool too.
 
Cut an 11” length of twine.
Open the egg.
Thread the string through the top of the plastic egg and tie it into a loop.
Close the egg.

Cut the wing shapes from the felt and attach them to the egg in the back on the sides using the line glue dots.
 
Add 2 googly eyes to a glue dot line and then cut them off together and put them on the bat.
Cut out 2 fangs from white tape (I used electrical tape).

 
I realized while I was making the bats there are several other Halloween themed things that could be made from the black eggs- like a spider-made here with 4 chenille pipe cleaners or owls, cats, witches, monsters…more?

I'd love to see yours if you make them.

Washi Tape and Recycled Plastic Bookmarks

Did you know that March is National Reading Month? 
Anytime is reading time around here!
 
This project is the 2nd in a plastic series that is once again, inspired by our recycling bin.
 

These bookmarks are fun and really easy to make and actually, quite resilient. 

We’ve been testing them for a couple of weeks. 


Also- It’s an excuse to use washi tape – which as you can see, I store on an embroidery ring à la so many Pinterest pictures.
It’s a very functional system.


 Materials:
#1 plastic- ours is from a clear egg carton.
Washi tape
Ruler and X-acto knife or scissors
Corner punch

Cut the flat top off the egg carton and recycle the rest of the carton (or make these butterflies I made for work a longtime ago); if you’re using another source for plastic -say from a salad container, you'll need to wash and clean any paper branding off (and it might take hot water and even some Goo Gone to get the glue off off).


Cut a 1” wide by 7” long strip of plastic (a wider version is pictured here).
Apply tape to one side then trim the edges and flip the plastic over.


Stick tape to the second side, carefully lining the patterns up on both sides (so they don’t compete with one another).
    
Trim the excess tape off the sides.
The trim the sides with scissors or use a ruler and X-acto knife on a protected surface (adults job).


I really like using the corner punch to get rid of the sharp corners- you could use a scissors if you don't have a paper punch obsession like mine.
We also tried punching a hole in one end and adding a ribbon but it’s just not necessary.


You can leave sections of clear plastic too.


When I showed my friend our bookmarks, she suggested making a wider bookmark and blocking out all but one line to help a young reader focus.

When my son was little, he read using his pointer finger to help him keep place; I was told that's developmentally normal so I made one like that for the instructions here. Do you have an early reader? Would this help?

Lucky Charm Necklaces-DIY Shrinky Dinks

We have a lot of plastic in the recycling bin right now (left over from a work project) so we're making a few recycled crafts. These DIY Shrinky Dink lucky charm necklaces are just in time for St. Patrick's Day's (and my son’s market day at school)- and are made from # 6 plastic.

Make any shape charm you want- stars, moons and clovers- or hearts! I’ve loaded our clovers onto Google drive for you- not fancy- just drawn out and copied.
Here are a few tips :

*Only use #6 plastic-it's doesn't work with #1 (we have another project for that)

*Whatever line you draw will get thicker and darker.
*Holes gets smaller and must be punched before the plastic shrinks.
*Don’t be alarmed if/when the plastic curls- it will flatten out again.
*Our plastic shrank down from 1.5” to .5” but it varied a bit.

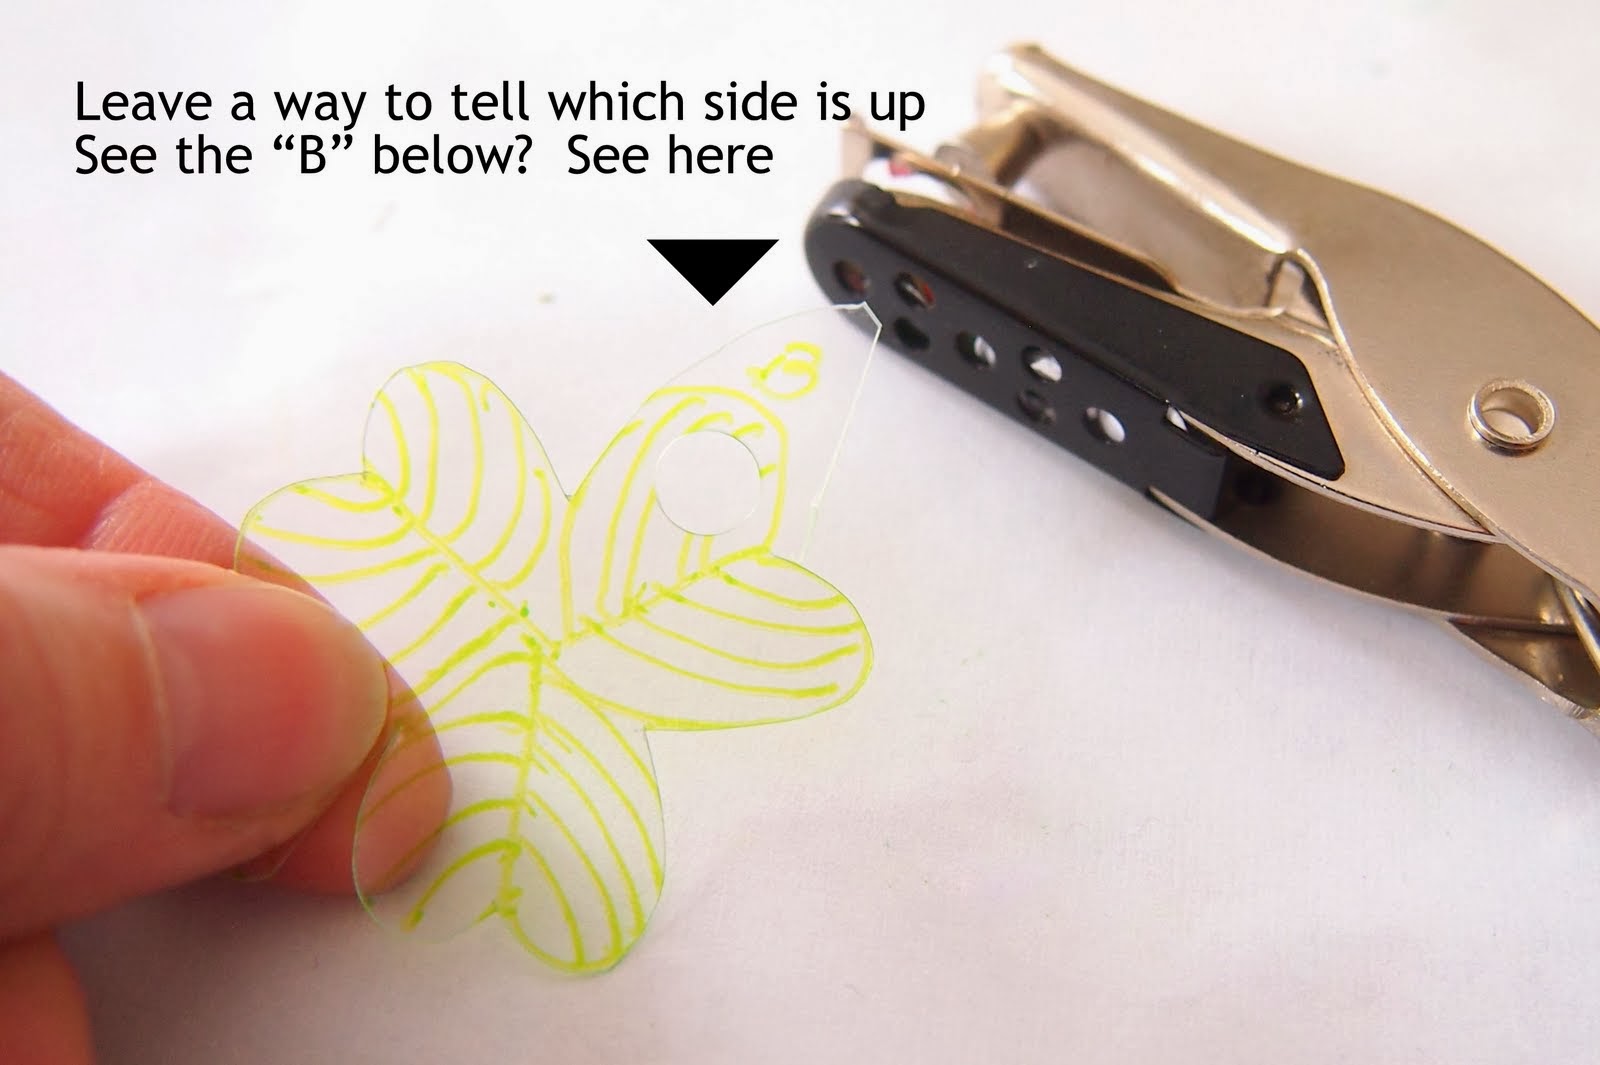
*Make a little notation somewhere close to one edge that will be cut off before baking-- we drew the letter "B" which shows which side is up; if the drawn side is face down-the ink will transfer to the paper and come off the plastic during the shrinking process.
Materials:
  • Clean, dry recycled number six plastic –ours is cut from a salad takeout container
  • Thin permanent markers
  • ¼ hole punch
  • A piece of paper cut from a brown paper bag
  • Satin cord or metal chain for the necklace-- whatever necklace supplies you'd like to use- I bought the jump rings from Micheal's; they come in silver and gold. 

To start-preheat the oven to 325 degrees; all oven activities should be done by an adult!  

Lay the plastic over the image and copy and decorate it with a thin permanent marker (or free draw).


Cut the shape out-sometimes cutting a curve is easier to do by turning the plastic over and coming at it from a different angle ---but keep track of which side was drawn on (with that little B).


Punch a hole in the shape before it's baked (trim that little B off now).

Place the (drawn side UP) shapes on the brown paper on a metal pan (not insulated) and put the pan in the oven; set the timer for 3 minutes. 


Remove the pan after 3 minutes and the pieces will have shrunk. Ta-da!


Experiment with different shapes (we did a bunch of hearts) or even try a different (water proof) pen- we tried this Sharpie oil pen- cool!


Just a word about jump rings- it's best to twist the opening ends away from each other- not pull them apart.
 

Just sayin' in case you wondered why yours are always out of whack.
I had to learn the hard way.
Then twist them back together.


Lastly- someone might ask about fumes- we didn't smell any but we were in a well ventilated room.