Showing posts with label crepe paper. Show all posts

Ice Cream Cone Surprise "Scoops"

The Tiny FunnelThe Tiny Funnel

It's the perfect time to make a surprise ball ice cream cone for someone (maybe someone at camp? hint, hint). Tuck some little surprises into the crepe paper "scoop". We made them at Halloween with candy and little toys in Witches Heads -here.

First, wrap crepe paper streamer around small toys and treats-set it aside and then make the paper cone out of any kind of paper you like.

Here's a quick list of some things (including candy) to wrap up in the ball:

Balloons
Barrette
Bus tickets
Confetti!
Cute pins to stick on bags
Dollar bill (folded into an origami shape)
Earphones
Earrings
Erasers in fun shapes-puzzle erasers
Flat candy (chocolate coins, interesting gum flavors)
Gold dollars
Googly eyes
Guitar picks
Hair Ties
Little charms-metal or glass treasures (animals etc.)
Gag presents
Magic Fortune Telling Fish
Matchbox car
Mini harmonica necklace
Mini Legos figures
Mini compact mirror
Miniature or post-it sized notepad
Miniature pen
Movie passes
Necklace
Patterned/Colored shoe laces
Plastic Monster finger puppets
Phone charms
Ring
Small USB key
Spinning top
Stick-on mustaches
Temporary tattoos
Tiny plastic bugs, dinos etc.
USB stick
Vampire teeth
Washi tape

 
 A little reminder how to make a cone:

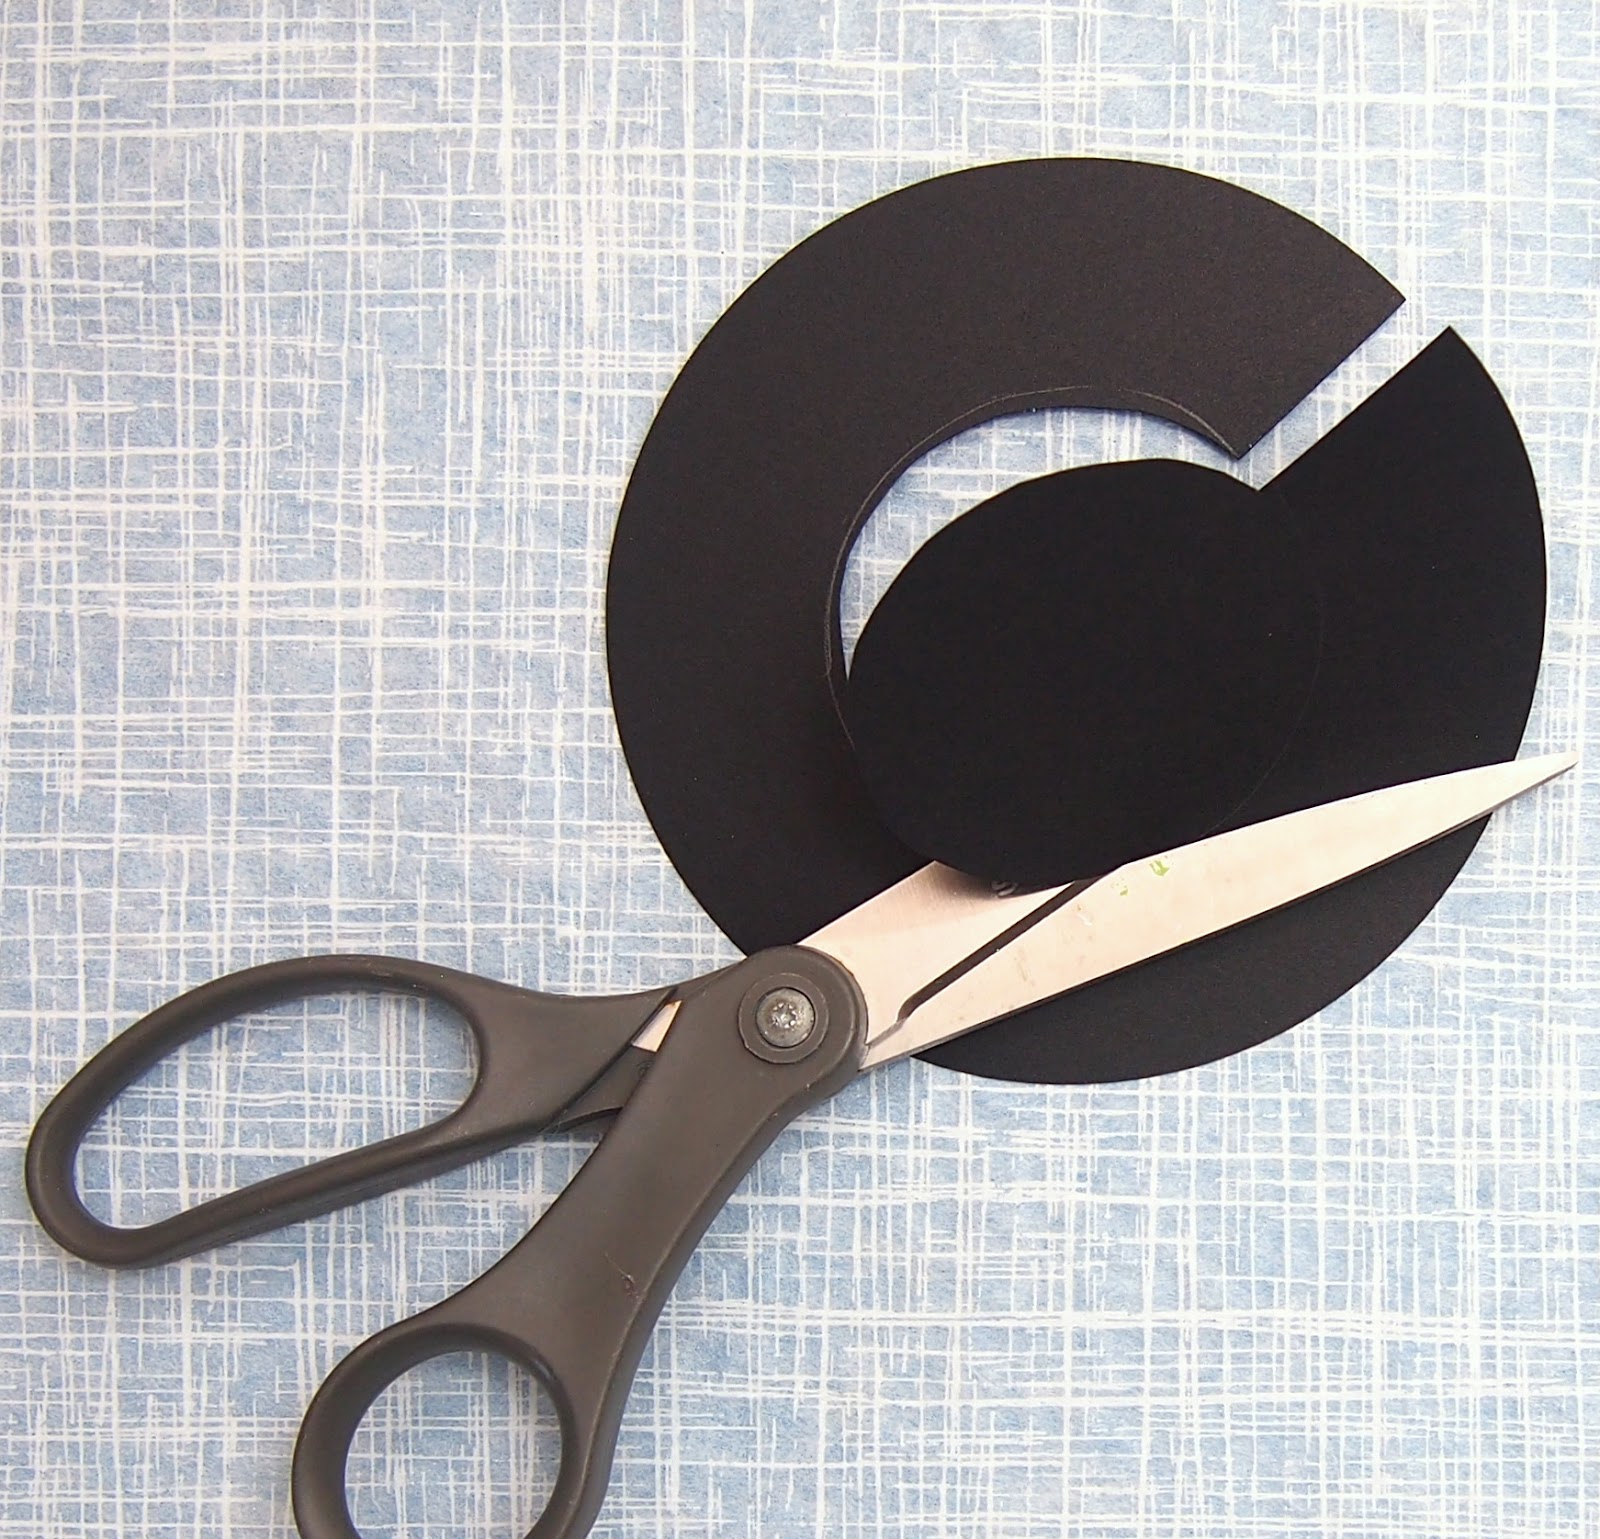
Trace around a 10” diameter lid and cut out a paper circle.

Fold the circle in half then open it up and cut it into 2 equal halves.
Roll one half of the circle into a cone.


Secure the end with double sided tape.

Add a bead of glue on the inner rim of the cone shape then add the crepe paper ice cream ball.

Allow the the glue to dry.

Witch Heads

 The Tiny Funnel
Last winter I worked on a few crepe paper projects for work. I thought it would be fun to make an ice cream cone surprise ball- you know that kind that has small treats and candies rolled into it? The ice cream cone idea didn’t go any further but as I was working, I “saw” it upside down and it looked like a witch's head! 

The Tiny Funnel


NOW it’s finally Halloween time and I made few witch head surprise balls. I think they could work for a party or just maybe as special treats for family members.
Here’s how I made it:

Materials:
Black card stock
Crepe paper(green)
Googly eyes
Pipe cleaner
Aleen’s Tacky Glue
Stapler
Glue Stick
Clear Tape
10”-12” paper plate
5" lid or compass

Trace then cut a 5” diameter card stock circle.
Fold the paper plate in half.
Trace the half circle onto the card stock then cut it out.

Roll the half circle into a cone and staple the edge in place.
Set the cone on the center of the 5” circle (the brim) and trace around the cone bottom, and then cut out the center.

Tape the slit in the circle back together.
Set the cone down into the hole and line up the taped slit with the stapled edge.
Add a line of tacky glue were the circle edge meets the cone. Set aside and allow to dry.
Fold the 4" pipe cleaner in half and twist it about .5“ from the ends –set aside.
Start the witches head by rolling the crepe paper around the largest treats and treasures (and most special) then add the more flat candies closer to the outside of the ball.

Secure the end with glue stick.
It's really okay if the balls are misshapen-so are witches heads.
Tape the nose on with clear tape and add crepe paper around it and over the head again- (glue stick to helps hold the crepe paper in place). I imagine you could try just twisting some paper and taping it on but I wanted a hook in the nose.
When the brim connection glue is completely dry, trim off any excess paper from the cone.
Trace around where the hat will sit on the witch's head and add glue just inside the line.
Set the hat on the head.

Add the eyes and the pipe cleaner mouth with tacky glue.
Then put the head in a cup to hold it up while everything dries.

The Tiny Funnel

The Tiny Funnel

Crepe Paper Easter Egg Garland

I’ve being working on a project using crepe paper and this was something that happened along the way. I suppose you could make the eggs with tissue paper but the crepe paper was so easy and when the edges over lap, they make a new color stripe!
It’s really beautiful to see the hanging eggs in the sun. They glow almost like stained glass.

Materials:
Contact paper
Crepe paper streamers
Scissors
Thin Sharpie marker
String
Needle


Cut two 4.5” strips of contact paper (the roll is 18”).
Peel the paper back off one strip and lay the film sticky side up on the table.

Add a length of crepe paper to the center of the sticky contact paper then add a 2nd length and over lap them slightly.

Add a 3rd length of crepe paper to the bottom.

Now, you could just cut your eggs out here- you don’t need to encase them in a second layer of contact paper but I did.

Remove the paper back off the 2nd strip and lay the film sticky side over the crepe paper.

Really press the 2 surfaces together.

Trace around an egg shape cut from card stock – mine measures 4" tall.

Remember to flip the egg template so there are different top and bottom colors.

First, lay the eggs out and arrange them in the order they will go on the string.

Then cut the string to about 6’ (or more/less if needed) and thread the needle through the top of each egg about .25" from the edge.


Valentines Heart (mini) Piñata


I really wanted to make a mini pinata for Valentines- I've worked the last few days trying to figure out how to streamline it but it's still a little much to make for a whole classroom of kids.
Still, making a bunch over a few days might work or maybe just for a few special people?
Materials:
Crepe paper streamer roll
Brown paper bag cut out hearts
Glue stick
Perle cotton (light string)
Clear tape
Flat candy, tiny toys and confetti
One trick is to roll the crepe paper around a can 6 or 7 times, slip the paper off and then make the tiny slits through all the layers (yes, I tried to cut it on the actual roll but it was a disaster as it's wound so tightly).


Cut two 5.5" tall by 5.5" wide hearts from a brown paper bag (you can make your own template by folding a piece of card stock in half and cutting one heart out); it's fine to have fold lines or printing on the bag- no one will see them.

I like using the brown bag paper because it has suppleness to it, it's strong and has a nice weight. If there's writing on the bag, place it face down and cover the plain side.

Cut a few lengths of the fringed crepe paper.
Start at the bottom of the heart and add glue stick about 2" at time- then add a layer of crepe paper and move up to the top of the heart shape until the whole shape is covered- I left about .25" fringe between layers.


Go right across the top humps.

Trim the crepe paper from the edges.

Use clear tape to add an 8" string looped in half to the middle of one inside heart shape.

You could alternate colors of crepe paper too.

Run glue stick around the inside edge of one heart- leave a section/side unglued to poke things into later.


LET THE GLUE DRY!!

Walk away and do something else - trim the other hearts, check the weather, make some hot chocolate or... make some confetti!
We used a heart punch from Micheal's (use your coupon!) to make little hearts for the inside of the Piñata heart.
You could just use regular round hole punch.

I plan to get some flat chocolate hearts when we make these for school but for now, I had some smarties on hand and a little bouncy ball (a pack from Target).
Print and cut out a strip of paper for the heart string- though you could use it to address the Valentine as well.
When the glue is completely dry - pop the goodies into the pocket.

Just to note here- I tried making this several ways- stapling and/or taping the heart together THEN covering it but it got really cumbersome and messy so this is the order that seems to work the best. 

When we make them for school I'll see if there are any other tips and add them.


Add glue stick to the last edge.
Pinch the glued edge shut- this is why you waited for the glue to dry earlier! so the pressure of the stuff inside doesn't cause the whole thing to come undone while the glue stick sets up.
There might be a little unevenness on an edge-- this is real life and I'm not going to pretend it's all perfect so just trim around the heart until it's good enough but DON'T cut that little string hanging out of the middle V.


Add the little paper loop to the string loop and use the glue stick to close the strip to itself.
Do you have a good (clean) pun for this project? We want to print something clever on the paper loop. 
We have: Piñhearta, 
You pull my hearts strings, You tear me up, but we haven't come up with a great one yet.

Let us know if you have one!