Showing posts with label Jewelry. Show all posts

Be-ad Mine Valentine?

The Tiny Funnel
Are you a romantic at Valentines time? I’m really not and instead have always liked Valentine’s Day as an excuse for a good word pun. Even though we don’t give Valentine cards at school anymore (too old for that) it doesn’t stop me from thinking of them. I have few that I’ve been mulling over- this is one of my favorites.
Be-ad mine?
Maybe it’s an excuse to make and wear a wooden bead necklace?


When it comes to school Valentines – or any mass making- I usually use a typed out saying and have my child write his name separately. We use to get the list waaaay in advance and spend several long (painful) afternoons carefully making and writing all the Valentines cards. And the dilemma of candy vs. no candy.
Enough of that.

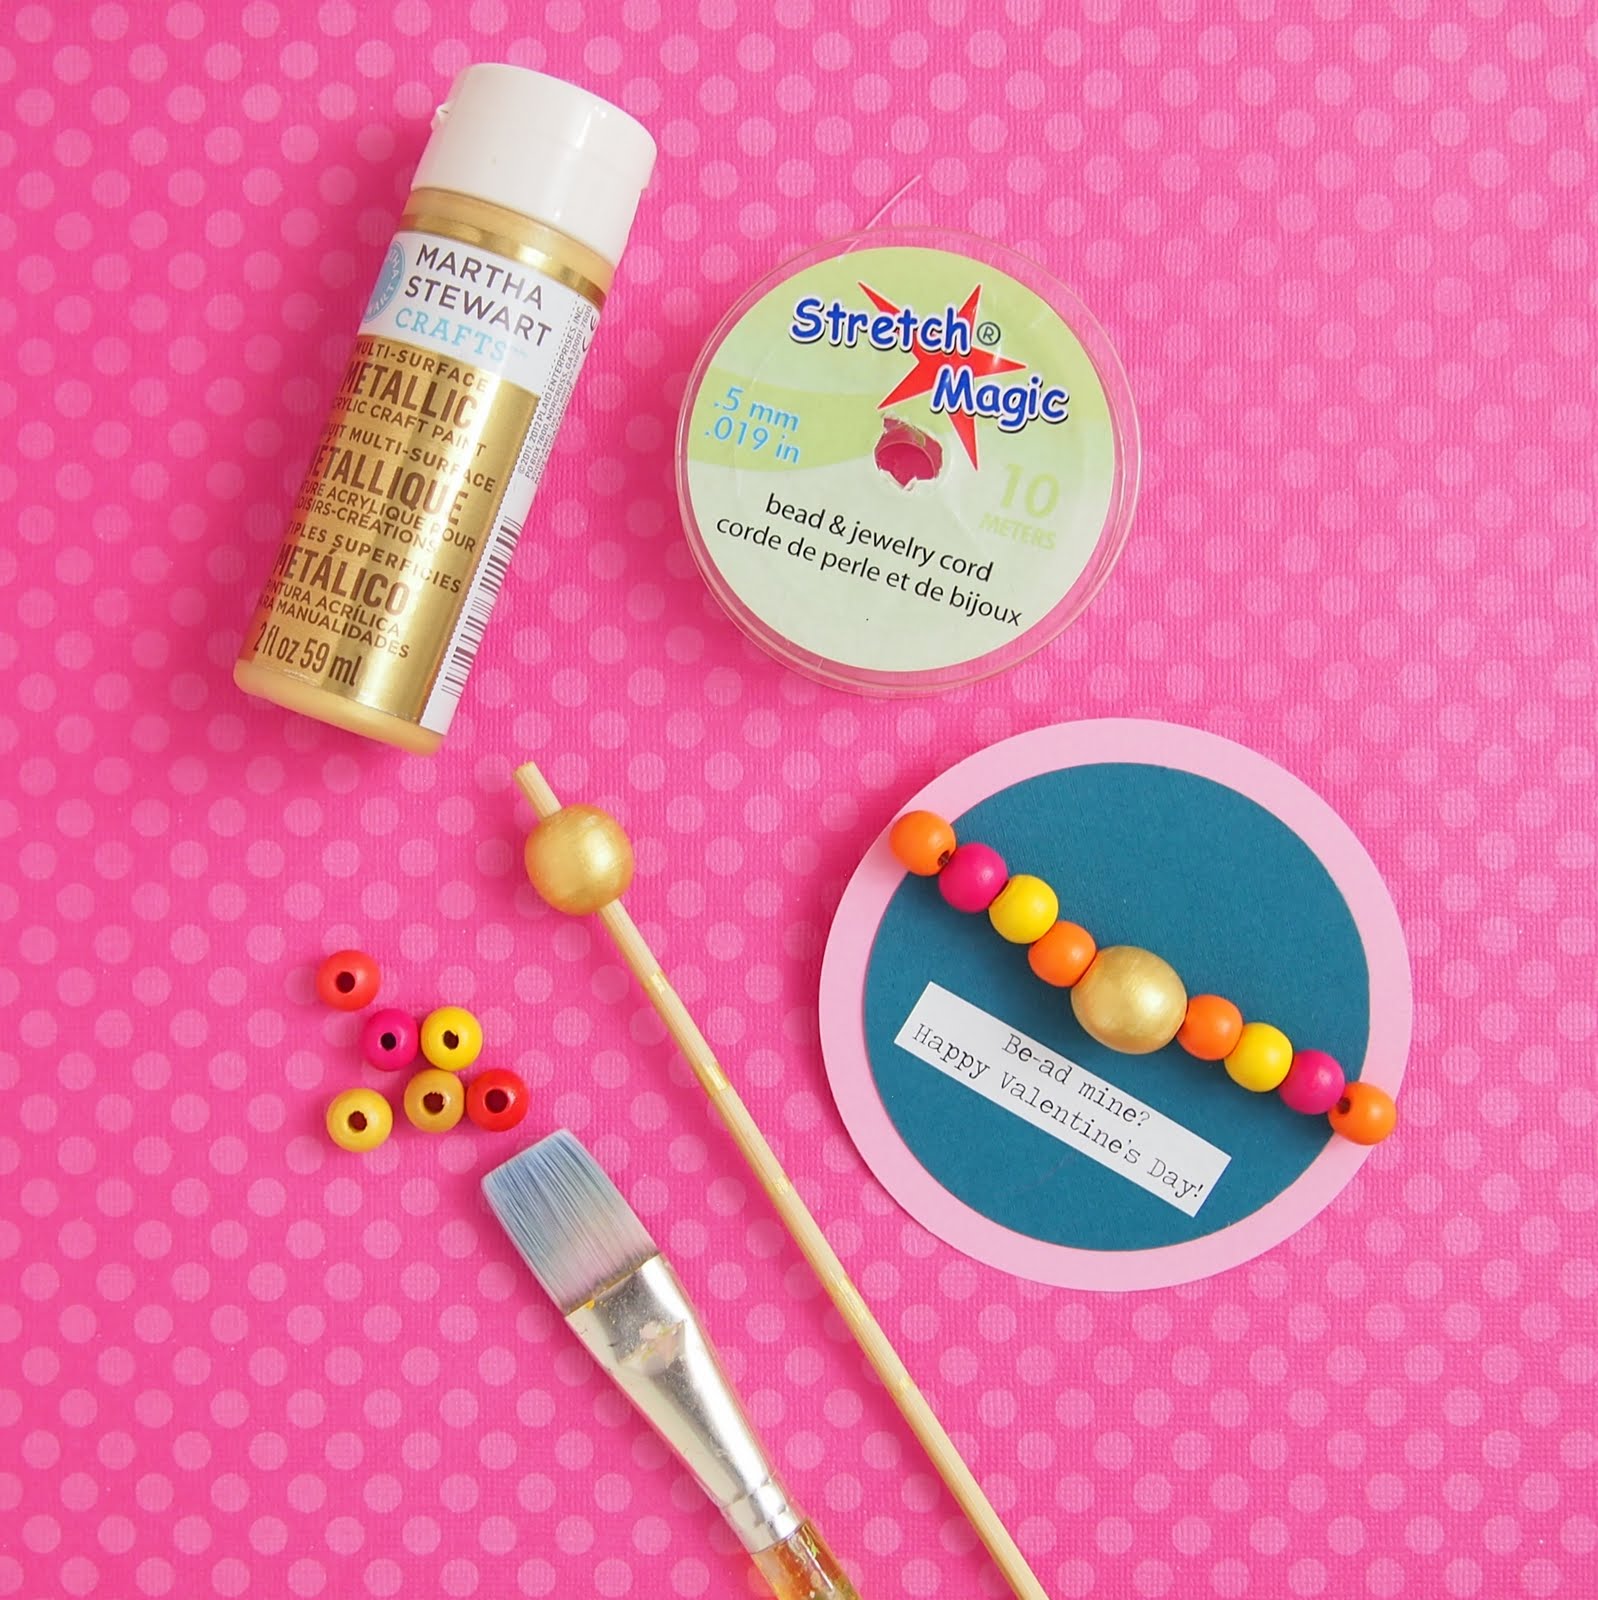
You can buy all of the materials (beads, string and paint) for these simple bead Valentines at the craft store including the colored wooden beads.

Use a heavy duty string and a ”split” ring for the backpack zipper pull (or key chain).The Tiny Funnel
If you want custom colored beads, I recommend using a small dowel- or even better, a small paint brush handle to hold the bead while it's being painted. I started with a yellow bead as the base for the “gold” beads.

Use Stretch Magic (stretchy string) for the bracelet.
The Tiny Funnel

The Tiny FunnelAnd for the necklace- use a strong string and make sure to tie the length so that is slips easily over a child's head (made that mistake once at Halloween with too-small bat necklaces).

The Tiny Funnel

Lucky Charm Necklaces-DIY Shrinky Dinks

We have a lot of plastic in the recycling bin right now (left over from a work project) so we're making a few recycled crafts. These DIY Shrinky Dink lucky charm necklaces are just in time for St. Patrick's Day's (and my son’s market day at school)- and are made from # 6 plastic.

Make any shape charm you want- stars, moons and clovers- or hearts! I’ve loaded our clovers onto Google drive for you- not fancy- just drawn out and copied.
Here are a few tips :

*Only use #6 plastic-it's doesn't work with #1 (we have another project for that)

*Whatever line you draw will get thicker and darker.
*Holes gets smaller and must be punched before the plastic shrinks.
*Don’t be alarmed if/when the plastic curls- it will flatten out again.
*Our plastic shrank down from 1.5” to .5” but it varied a bit.

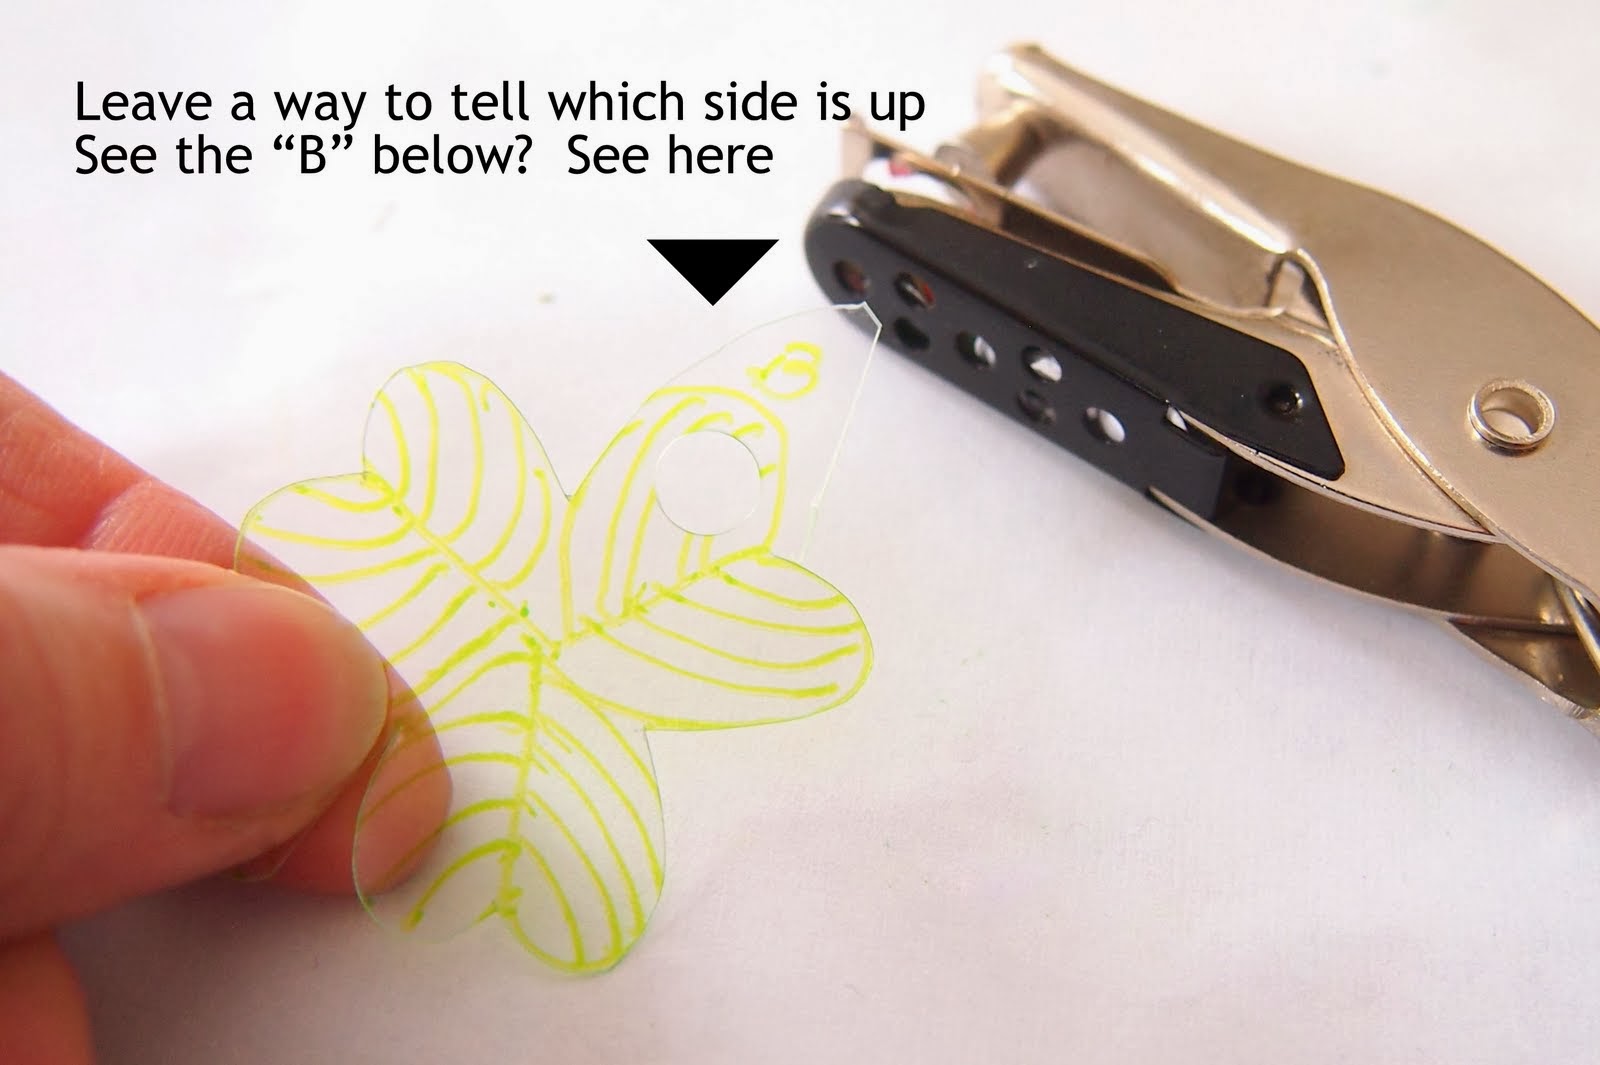
*Make a little notation somewhere close to one edge that will be cut off before baking-- we drew the letter "B" which shows which side is up; if the drawn side is face down-the ink will transfer to the paper and come off the plastic during the shrinking process.
Materials:
  • Clean, dry recycled number six plastic –ours is cut from a salad takeout container
  • Thin permanent markers
  • ¼ hole punch
  • A piece of paper cut from a brown paper bag
  • Satin cord or metal chain for the necklace-- whatever necklace supplies you'd like to use- I bought the jump rings from Micheal's; they come in silver and gold. 

To start-preheat the oven to 325 degrees; all oven activities should be done by an adult!  

Lay the plastic over the image and copy and decorate it with a thin permanent marker (or free draw).


Cut the shape out-sometimes cutting a curve is easier to do by turning the plastic over and coming at it from a different angle ---but keep track of which side was drawn on (with that little B).


Punch a hole in the shape before it's baked (trim that little B off now).

Place the (drawn side UP) shapes on the brown paper on a metal pan (not insulated) and put the pan in the oven; set the timer for 3 minutes. 


Remove the pan after 3 minutes and the pieces will have shrunk. Ta-da!


Experiment with different shapes (we did a bunch of hearts) or even try a different (water proof) pen- we tried this Sharpie oil pen- cool!


Just a word about jump rings- it's best to twist the opening ends away from each other- not pull them apart.
 

Just sayin' in case you wondered why yours are always out of whack.
I had to learn the hard way.
Then twist them back together.


Lastly- someone might ask about fumes- we didn't smell any but we were in a well ventilated room.


Twig Necklace


Cut small disks from a hardwood branch and sand them using 150 grit paper flat on the sandpaper.


Drill a small hole and decorate- the possibilities are endless-you can use scribbles glitter, permanent marker, paint, initials, words, glue things on like a tissue paper flowers or a real dried flower?- possibly seal it?

You could put a jump ring in the hole but we used lightweight twine (which might be itchy but it was what we had on hand) in the hole and back around in on itself. It would look nice with a light linked metal chain I think- more finished?