Showing posts with label Recycle. Show all posts

Gingerbread House Tissue Box

The Tiny Funnel
This is a great project to have kids decorate with stickers, Gelly or Paint pens (I like Posca acrylic pens but sharpie pens could work), patterned paper (scrap booking or wrapping paper), pom-poms, sequins, whatever the heart desires! The cutting is definitely an adults job.
You could cover it with felt and add cute felt candies. You--do you!


Materials:
Corrugated cardboard

Tools:
Hot glue Gun (and glue sticks)
X-Acto knife and cutting surface
Ruler


This project is easiest if it’s made so that the cardboard bends with its “grain”, the direction the corrugation runs. Make scoring lines so that they're in the same direction corrugation too.

Measure and cut a 20” long  by 7.5” piece of cardboard (corrugation vertical on long side).

Next, cut an 8“x 6“
piece for the roof (corrugation vertical on long side) and then lastly, cut a 6“x 2“piece for the chimney (corrugation vertical on long side).


On the 20” piece, measure, mark and score a vertical line every 5” across the length (lightly use the x-acto knife to cut through only the first layer of cardboard).

Draw a line 5.5" up from the bottom edge.
Divide the 2nd and 4th sections in half (2.5”) and make a mark at the top of the sections.

Draw connection lines from the top marks down to each side intersection to designate 2 roof sections.

Score and cut the roof sections out.

The best time to draw designs is when the house is flat.
Fold the scored sections back and forth and then hide the score/drawing lines by folding them inside the house. 

Use a line of hot glue to connect the 2 edges- hold in place until the glue is cool so that the pressure of the cardboard doesn’t force the house to spring open.


For the roof:

Measure 4” to the middle of the 8" piece of cardboard (i.e. half).
Score the line.
Fold the cardboard back and forth.
Measure and mark a 1.75” x 1.5” rectangle in the center of the roof – long sides of the roof and rectangle lined up
This may seem odd to cut the hole as a rectangle and not a square but when the roof is angled, the hole changes size.

Cut the rectangle out.

Bend the score line and flip the roof over and decorate.

On the last piece of cardboard, measure, mark, and score lines
alternating 1.25” and then 1.5” apart.

Fold the scored sections back and forth and then back- hide the score/drawing lines inside the chimney.

Fold the chimney together and use a line of hot glue to connect the 2 edges- hold in place until the glue is cool (so that the pressure of the cardboard doesn’t force the chimney to spring open).


Add/push the chimney into the roof THEN glue the roof to the house.

Reach inside and add dots of glue to the chimney to secure in place.
Decorate more!!

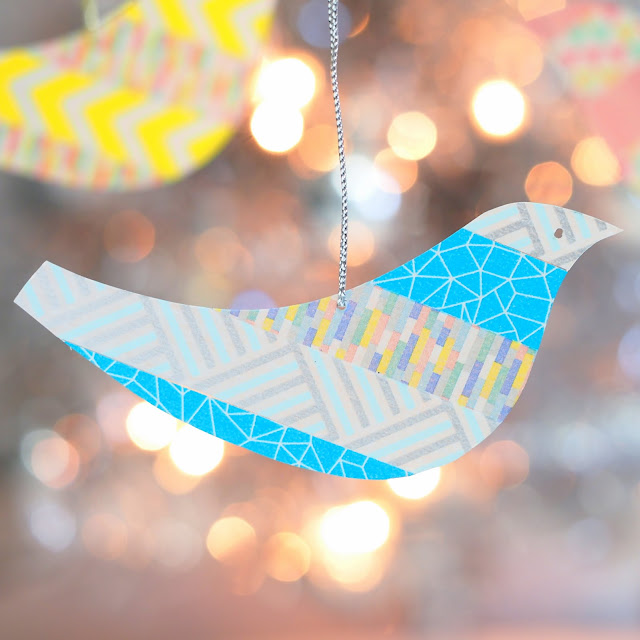
Recycled Plastic and Washi Tape Ornaments

The Tiny Funnel
The Tiny Funnel
If you didn’t know – I’m a big recycler- makes my family a little crazy. I also use a lot of recyclables in my crafts and clear plastic salad containers are one of my favorites. I use vegetable oil (soak then wash with hot water and detergent, dry and use rubbing alcohol on the residue) to get the labels off but I’ve read that a lot of people use a combination of coconut oil and baking soda (Google it)…or in a pinch there’s always Goo Be Gone.
 
AND I love washi tape and have an embarrassingly large collection that I never do anything with but look at…it‘s like candy for the eyes. So today’s ornament is a win-win!
Materials:
Clear clean light weight plastic – salad containers, clear cookie containers – lids on the candy containers from Trader Joes etc.
Washi tape
Push pin for making a hole for hanging (maybe an eye)
 

Cut the plastic out of the container- or the edges off the lid so that the plastic will lay flat.
Lay down strips of washi tape on the dry clean plastic. 
Make a paper template of the shape that will be cut out if it’s more complicated than just a circle (trace around a jar or can).
Transfer the shape to the tape covered plastic.
Cut out the shape and poke a hole to hang the ornament. 
Add a little sparkly tape to the top of the circle as the ornament hanger.
The Tiny Funnel

The Tiny Funnel


Recycled Cardboard Coffee Cup Sleeve Ornaments

The Tiny Funnel
...otherwise known as cardboard beads, these simple ornaments are made from recycled cardboard coffee sleeves from Starbucks (or Panera- they have a lovely texture too). This is day 2 of my Christmas Ornament challenge for myself.

the Tiny Funnel

Materials:
  • Cardboard coffee cup sleeves
  • Hot glue
  • Paint
  • Glitter Mod Podge or white glue
  • String
  1. Open the cardboard sleeve and trim it into a triangle shape. You can use pinking shears to give it fancy edges.
  2. Place the textured surface face down on the table.
  3. Use a dab of hot glue to add a knotted loop of string to the wide inside surface of the cardboard triangle.
  4. Start at the wide end and roll the triangle toward the point.
  5. Add a dab of hot glue to the end to hold the end in place.
  6. Paint the ornament any way you like- or/and use Mod Podge or white glue to add glitter. 
Experiment cutting the triangle in different ways- wavy edges or add extra cardboard pieces.
The Tiny Funnel

Washi Tape and Recycled Plastic Bookmarks

Did you know that March is National Reading Month? 
Anytime is reading time around here!
 
This project is the 2nd in a plastic series that is once again, inspired by our recycling bin.
 

These bookmarks are fun and really easy to make and actually, quite resilient. 

We’ve been testing them for a couple of weeks. 


Also- It’s an excuse to use washi tape – which as you can see, I store on an embroidery ring à la so many Pinterest pictures.
It’s a very functional system.


 Materials:
#1 plastic- ours is from a clear egg carton.
Washi tape
Ruler and X-acto knife or scissors
Corner punch

Cut the flat top off the egg carton and recycle the rest of the carton (or make these butterflies I made for work a longtime ago); if you’re using another source for plastic -say from a salad container, you'll need to wash and clean any paper branding off (and it might take hot water and even some Goo Gone to get the glue off off).


Cut a 1” wide by 7” long strip of plastic (a wider version is pictured here).
Apply tape to one side then trim the edges and flip the plastic over.


Stick tape to the second side, carefully lining the patterns up on both sides (so they don’t compete with one another).
    
Trim the excess tape off the sides.
The trim the sides with scissors or use a ruler and X-acto knife on a protected surface (adults job).


I really like using the corner punch to get rid of the sharp corners- you could use a scissors if you don't have a paper punch obsession like mine.
We also tried punching a hole in one end and adding a ribbon but it’s just not necessary.


You can leave sections of clear plastic too.


When I showed my friend our bookmarks, she suggested making a wider bookmark and blocking out all but one line to help a young reader focus.

When my son was little, he read using his pointer finger to help him keep place; I was told that's developmentally normal so I made one like that for the instructions here. Do you have an early reader? Would this help?

Lucky Charm Necklaces-DIY Shrinky Dinks

We have a lot of plastic in the recycling bin right now (left over from a work project) so we're making a few recycled crafts. These DIY Shrinky Dink lucky charm necklaces are just in time for St. Patrick's Day's (and my son’s market day at school)- and are made from # 6 plastic.

Make any shape charm you want- stars, moons and clovers- or hearts! I’ve loaded our clovers onto Google drive for you- not fancy- just drawn out and copied.
Here are a few tips :

*Only use #6 plastic-it's doesn't work with #1 (we have another project for that)

*Whatever line you draw will get thicker and darker.
*Holes gets smaller and must be punched before the plastic shrinks.
*Don’t be alarmed if/when the plastic curls- it will flatten out again.
*Our plastic shrank down from 1.5” to .5” but it varied a bit.

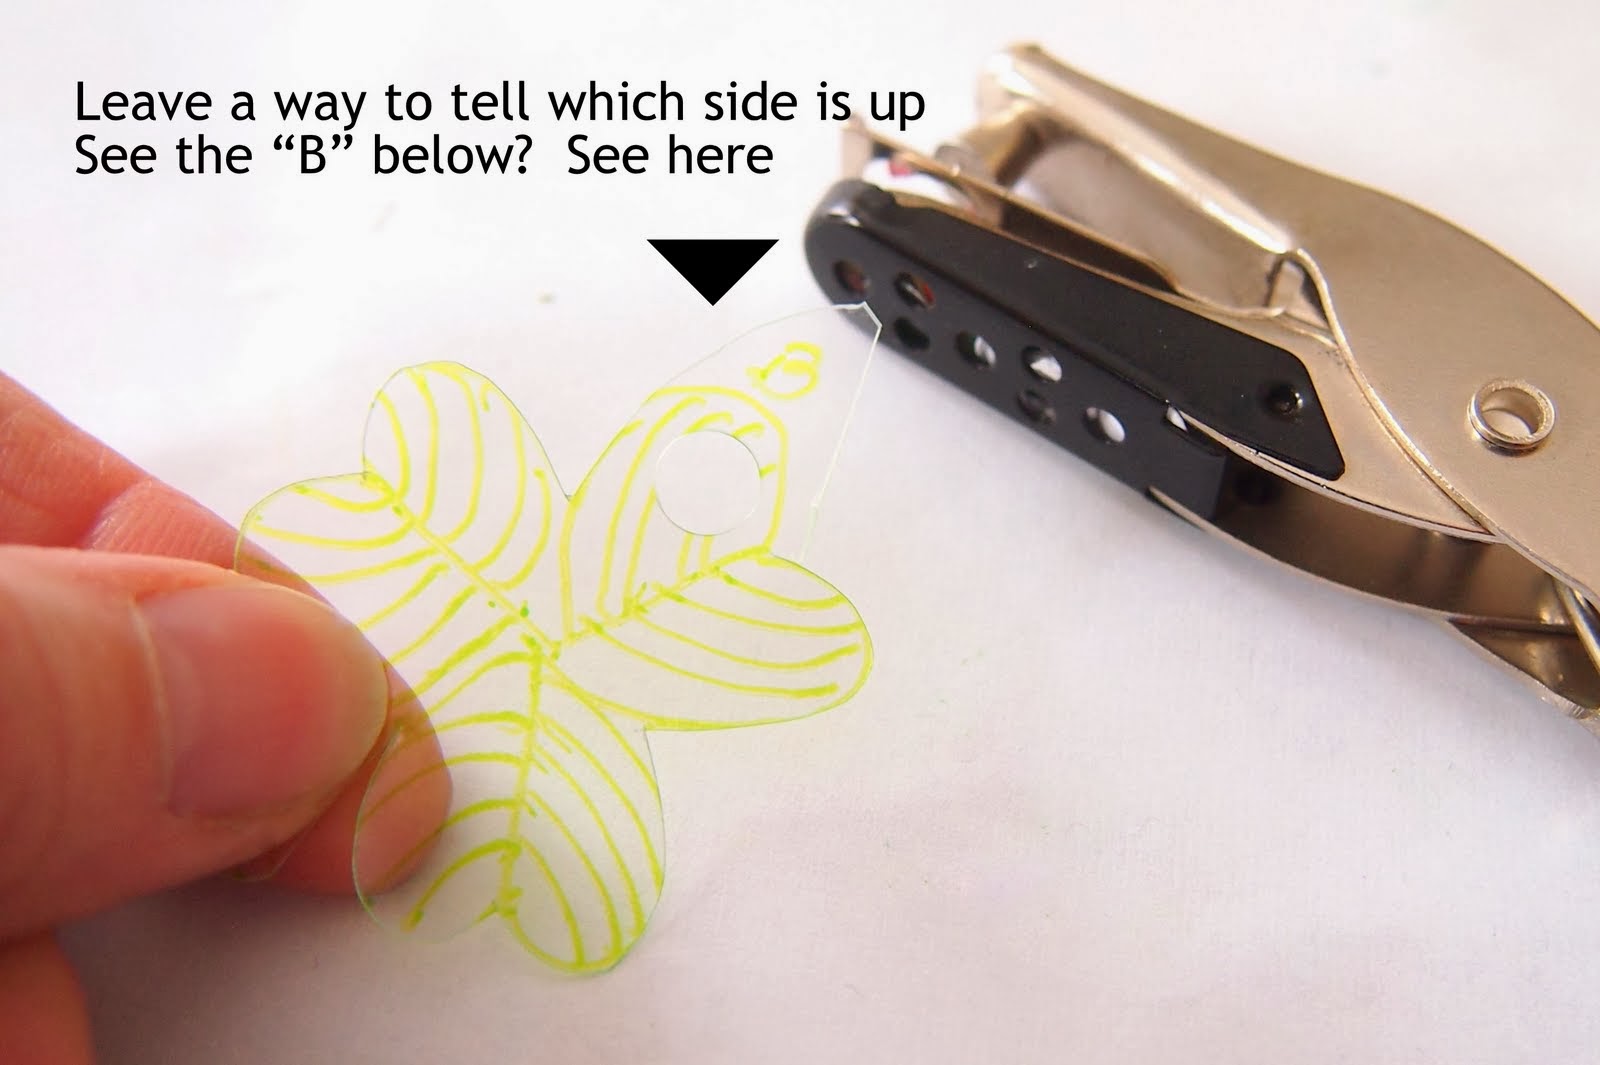
*Make a little notation somewhere close to one edge that will be cut off before baking-- we drew the letter "B" which shows which side is up; if the drawn side is face down-the ink will transfer to the paper and come off the plastic during the shrinking process.
Materials:
  • Clean, dry recycled number six plastic –ours is cut from a salad takeout container
  • Thin permanent markers
  • ¼ hole punch
  • A piece of paper cut from a brown paper bag
  • Satin cord or metal chain for the necklace-- whatever necklace supplies you'd like to use- I bought the jump rings from Micheal's; they come in silver and gold. 

To start-preheat the oven to 325 degrees; all oven activities should be done by an adult!  

Lay the plastic over the image and copy and decorate it with a thin permanent marker (or free draw).


Cut the shape out-sometimes cutting a curve is easier to do by turning the plastic over and coming at it from a different angle ---but keep track of which side was drawn on (with that little B).


Punch a hole in the shape before it's baked (trim that little B off now).

Place the (drawn side UP) shapes on the brown paper on a metal pan (not insulated) and put the pan in the oven; set the timer for 3 minutes. 


Remove the pan after 3 minutes and the pieces will have shrunk. Ta-da!


Experiment with different shapes (we did a bunch of hearts) or even try a different (water proof) pen- we tried this Sharpie oil pen- cool!


Just a word about jump rings- it's best to twist the opening ends away from each other- not pull them apart.
 

Just sayin' in case you wondered why yours are always out of whack.
I had to learn the hard way.
Then twist them back together.


Lastly- someone might ask about fumes- we didn't smell any but we were in a well ventilated room.


Tea Candle Covers

Here are the candle covers we worked on this week based on our birds. It's so easy to make a complicated pattern if it's flat- much easier than on a round can. I can see making these for the 4th of July, Halloween and Christmas. I placed our design above the height of the can edge for one test; below the can edge and the light does not shine through (so I put the candle directly on the stump for the picture - candle wax everywhere, dah!)  I say- opt for the can and the design above the can edge.
 

Materials:
"EZ Foil" oven rack liners (2 pack) with their edges cut off (adult job)
A sheet of fun foam
Push pin
Clear tape
Paper fasteners
Simple printed shapes- flowers, stars,snowflakes, bats, pumpkins etc. depending on the season 
Small low cans - tuna, chicken, chilis etc.
Tea candles or electric candles (never leave a lit candle unattended- right?


Wrap a piece of scrap paper around a short can and overlap about an inch. Remove the paper and trim it the height you want your cover. Place your design in the middle of the scrap paper, slightly above where the can edge would sit.


Place your design in the middle of the foil  (not to one side as we've done here in this picture).
Tape the paper to a piece of metal trimmed to the correct size.  
Lay the covered metal on top of a piece of fun foam on a protected surface (like a cutting mat) and use the push pin to poke holes to make the design.


Remember, you can peek under the paper or turn it over to look at the other side.
 
When you're finished poking, remove the paper (and/or add to the design).


Wrap the metal loosely (you will need a little wiggle room to accommodate the bottom paper fastener in the next step) around the can and tape it closed to hold the overlap.
Use an X-acto knife (adults job) to make 3 slits: about .5” from the top and the bottom and then one in the center (we started the slits with pin holes) of the overlap.


Poke the paper fasteners through the slits and spread the fasteners open inside to keep the metal ring closed.
Remove the tape.
Place over the tea candle in the can.
You could also make a giant tea candle and cover it.