Showing posts with label Glitter. Show all posts

Pine Cone Ornaments

The Tiny FunnelYou saw this coming right?
In keeping with my own self imposed rules of using only what I have on hand, I’m making another plastic Easter egg ornament. But it’s one that I’ve wanted to try for a while and it’s really fast and easy- and it has GLITTER! I love glitter!
 
Materials:
Plastic Easter egg
Adhesive backed felt
Fine glitter
Clear tape
“Craft” toothbrush (doesn’t everyone have a Batman toothbrush hanging around?)
Spoon
Paper plate
Push pin (rolled under the tape in the picture)
Needle
String or ribbon 

Cut the egg apart and snip off the little hinge.

Poke a hole in the top of the plastic egg, and then widen it with a thicker needle or a toothpick
(this plastic egg had 2 off-center holes all ready in it).
Loop and knot a 9” long piece of string or ribbon and thread the loop through the needle.
Push the needle through the inside and out the top of the plastic egg and remove the needle.

Secure the egg shut with clear tape.
 

Cut a small circle of adhesive felt, then add a slit to the center, remove the paper backing and thread it around the string on the top of the egg.
Cut three and one half 12” long by 1” wide strips of adhesive backed felt.
Draw a .25” line on one edge of the paper backing on each strip.
Cut scalloped “petals” on each strip but stop at the .25 line so there is a section completely uncut.

Use small scissors-medium and larger ones are harder to maneuver.
Consider cutting one strip with slightly smaller scallops to start with at the top of the pine cone.
Peel off the paper backing.

Start at the top of the egg and add the felt strip with the scallops pointing up, slowly pressing the bottom felt edge as it moves around and down the side.
Line the uncut edge up with the bottom of the previous row.


Trim the end at the bottom.


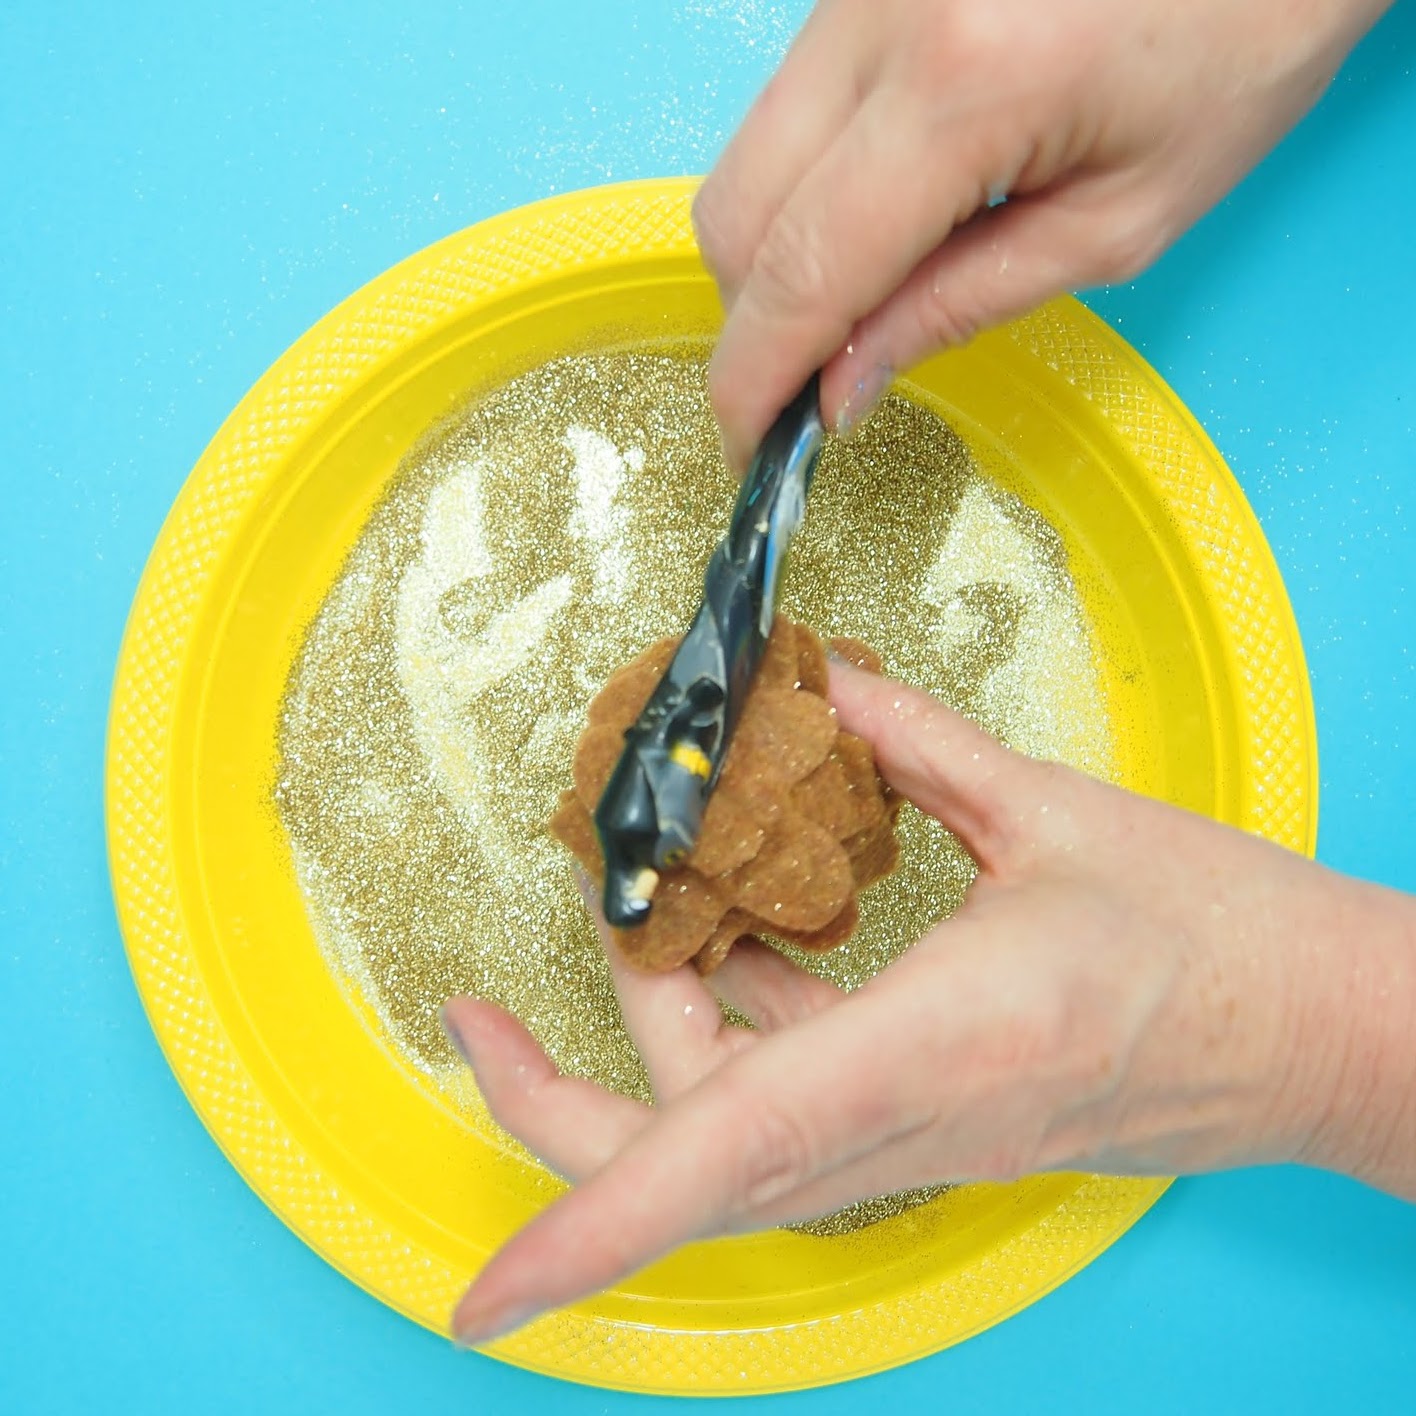
Peel back the petals a little and spoon glitter on the sticky surfaces over a paper/plastic plate.

Be enthusiastic with the glitter!
Flip the cone over and tap the bottom with handle of the craft toothbrush.
Brush the sides to encourage all the extra glitter to go back onto the plate.

So fast and pretty-try other colors too!
 

Glitter Letter Ornaments

The Tiny Funnel
It's the 3rd of  December and for today's easy ornament we're using the plastic magnetic letters that have been floating around the house for years. Somehow, they never were completely thrown away and have been holding up pictures and recipes on the refrigerator and hanging out in the drawer with the batteries.

Materials:
Plastic (magnetic) letters
Mod Podge
Glitter(I prefer fine glitter)
1/2" screw eyes (or larger)
String
Small paper plates to catch the glitter
The Tiny Funnel
Make a hole with a  push pin.
Then either:
1. Enlarge the hole with screw eye (it's easier to grab and turn) or 
2. Add a small screw eye as a hanger.
Either way, the screw eye makes a great holder so you can cover the letter with Mod Podge and then add (i.e. pour) the glitter.
Allow to dry completely, then unscrew the big eye screw and thread a knotted loop through the hole to hang or leave the small screw eye in and add a hanger.
The Tiny Funnel
Maybe spell something on the tree? Merry Christmas! Or the kids names or initials? Or turn them into a garland message-Happy New Year!

Recycled Cardboard Coffee Cup Sleeve Ornaments

The Tiny Funnel
...otherwise known as cardboard beads, these simple ornaments are made from recycled cardboard coffee sleeves from Starbucks (or Panera- they have a lovely texture too). This is day 2 of my Christmas Ornament challenge for myself.

the Tiny Funnel

Materials:
  • Cardboard coffee cup sleeves
  • Hot glue
  • Paint
  • Glitter Mod Podge or white glue
  • String
  1. Open the cardboard sleeve and trim it into a triangle shape. You can use pinking shears to give it fancy edges.
  2. Place the textured surface face down on the table.
  3. Use a dab of hot glue to add a knotted loop of string to the wide inside surface of the cardboard triangle.
  4. Start at the wide end and roll the triangle toward the point.
  5. Add a dab of hot glue to the end to hold the end in place.
  6. Paint the ornament any way you like- or/and use Mod Podge or white glue to add glitter. 
Experiment cutting the triangle in different ways- wavy edges or add extra cardboard pieces.
The Tiny Funnel

Christmas String Ornaments


These string disks are one of my favorite projects I made for work for Christmas this year. They may even use things you already have around the house (because everyone has adhesive jewels- right?) They're fast and easy to make and are a great idea for an ornament exchange.


These pictures were taken in July-my camera is broken! It's been acting wonky since Halloween and now the lens is down for the count.
Very sad. I have some projects planned but will have to wait to post until a fix is found.


Materials:
  • Bakers twine
  • Light weight cardboard (from a white gift box or a thick paper plate)
  • Adhesive Gems (or sequins or pom poms plus glue-use what you have)
  • Pinking scissors
  • Optional: Glitter paper/ tacky glue
Trace around a can or lid on the cardboard then cut out the disks.
Trim each disk with pinking scissors.
Tie one end of a length of bakers twine around the middle of the disk with the knot on the "back".
Wrap the twine around the disk, moving from one notch on the top and then to the bottom until the disk is completely filled.
Tie and knot the twine off at the back.
Add an adhesive gem to the front center (and the back if you like) of the disk.
Determine which edge looks best at the top and thread a short length of twine through the string in the notch and tie the ends together to make a loop.


You could also add to the "back side" with a slightly larger disk cut from glitter paper.

Glitter paper doesn't stick well to things - double sided tapes and glue dots haven't worked for me. So far- tacky glue is the only thing that has done the job.


Glitter Wall Skulls

Materials:
• A wood frame or a wood plaque base-they're found in the wood section of the craft store (the usual suspects, Joann Fabrics, Michaels, A.C. Moore)
• Paper skull from the craft store
• White Glue
• Paint 
• Fine glitter
• Brush
• X-Acto knife or sturdy kitchen scissors
• Saw Tooth Hanger (from the hardware store or the picture hanging section of the craft store) sometimes called a claw hanger
• Not shown: Push pin, Wax paper
• Optional: Glow in the dark Mod Podge or glitter Mod Podge.


Add the hanging claw to the back of the plaque- the tiny nails are hard to get in so pre-poke a hole with a push pin.

Prime (if you feel inclined) then paint the plaque and set it aside to dry.


Draw a line around the back of the skull so that it will lay flat against the plaque surface.

Use an X-Acto knife or a sharp kitchen scissors to cut off the skull back (adult job).
Paint the skull of color of the glitter that you plan to use- grey/silver, white/white, black/ black etc.
Prep a piece of wax paper about 14“ long and fold and unfold it in half then set it aside.

Over a second piece of wax paper, cover the skull with glue.

Move to the folded wax paper and sprinkle the glue covered skull with the glitter.

You may need to spoon the glitter onto the skull to make sure it's covered entirely then set it aside and allow it to dry completely.


You could stop here and have glitter everywhere, which is why I think it might be good to do an extra step and add a layer of Mod Podge…. you can use regular Mod Podge the glitter Mod Podge or glow in the dark Mod Podge to seal the glitter in place or skip it all together.

Use the fold in the wax paper to guide the glitter back into the jar (over a second piece of was paper). Glitter is everywhere by now.

Add a line of glue to the back edge of the skull , then put it on the plaque so that lies flat and straight and let it dry completely (or you could be impatient like me and use hot glue!)

Glitter Spider Web

The Tiny Funnel

Did you think we fell off the planet Earth? It feels that way in terms of blogging.
I've been very busy this summer with Halloween, Thanksgiving and Christmas development for work. The boy is going to camp, the husband traveled to Germany- busy! busy! And while we've been doing projects - most are work related. 

OH-And I've discovered Instagram (look there's a little box on the right column!) 

I had plans to make a “firework” version of this spider web for the 4th of July- but instead it rained cats and dogs here and we all went to IKEA to shop for mattress (which we did not buy BTW).

I may try making one in fine glitter anyway but I have to stock up. I know! The girl who loves glitter is almost out. Crazy!

So that's why you're seeing this spider web in July.

In the meantime, I was interviewed by Cindy Atoji Keene from The Boston Globe about my job. It was pretty cool-the linky is here. She is wonderful and we had some lovely talks.

The Tiny Funnel
If YOU want to try making a glitter fireworks or a spider web place mat-- here's what I found out:

Use flexible drying glue like Aleen's tacky glue and not Elmer's white glue as white glue dried brittle and hard and the whole thing snapped apart. 

Draw your design on a piece of paper first- put a piece of wax paper over the drawing (may need to overlap because you drew something biggish) and lay lines of glue on the wax paper over the drawing.

Sprinkle the glitter all over the glue and let it sit until it’s dry- don’t fuss with it. Maybe gently tap some of the excess away onto an extra piece of pre-creased paper (it’s easier to help get the glitter back into the jar).

DON'T get impatient and try drying it in the oven- the wax will melt to the glue and you will have to trim it away like I did.

When it's completely dry – use a (dry) paint brush to loosen any glitter that is not stuck down- that’s my trick for glitter projects so that you don’t leave a trail about the house.

I’d love to see yours if you make one!


Wire Nests

I've dyed a lot of eggs and made a lot of nests for work in years past. But for my own family- we're a little less organized - this is our last minute table decoration for our glitter eggs (left over from a work assignment).

For our Easter table we made these easy wire nests using 24 gauge wire "stringing wire" from the craft store (jewelry aisle).
Wrap the wire around a flexible ball (think big tennis ball or squeezey -used! dog ball pictured here).  


Just wrap and turn and wrap – holding the wire down with one hand on the ball. Criss-cross this way and that- it’s fine if it’s messy or sticks out. When the ball is pretty evenly covered- cut the wire and loop it back on the ball somewhere.


Spread the wires apart with your thumbs and squeeze the ball out. Mush (that’s a technical term) the sides down and smoosh any stragglers back into place until you have a nest shape. 
That’s it- TA- DA. If we'd more time, I might have added little seed beads to the wire as I wrapped it but there are eggs to be found!