

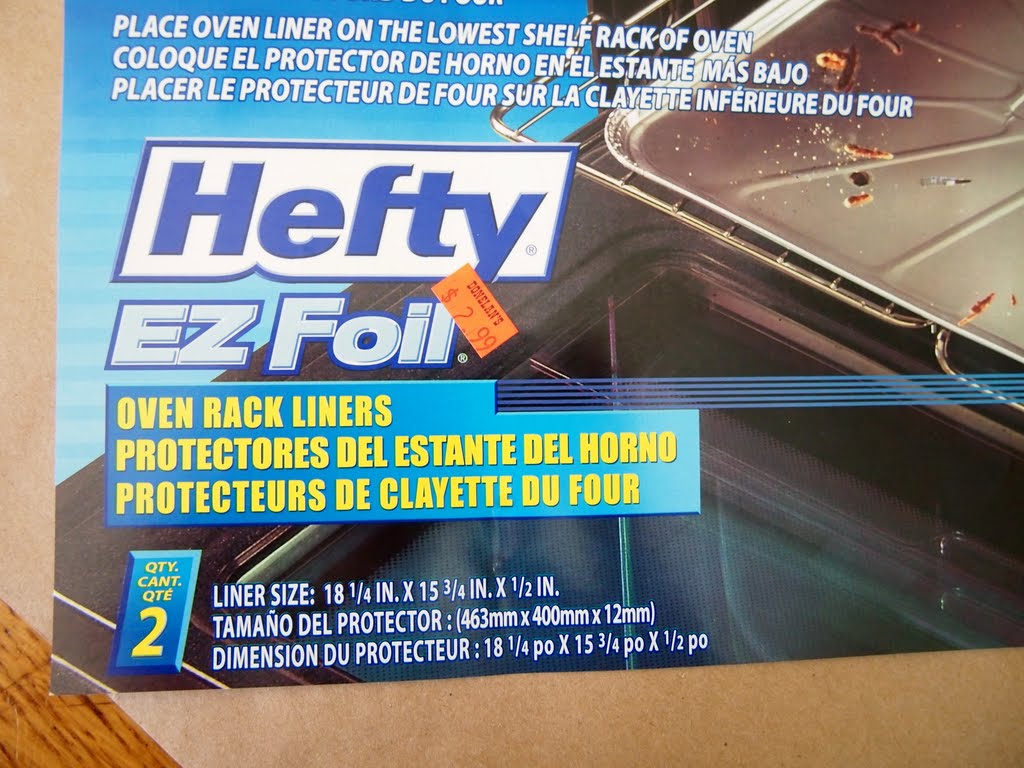
 Materials:
"EZ Foil" oven rack liners (2 pack) with their edges cut off (adult job) or any disposable foil pan
A sheet of Fun Foam
Push pins
Permanent Sharpie markers
Simple pictures- flowers might be nice (we used copies of Elliott's bird drawings and some copies from the Charlie Harper Coloring Book)
Tape and Scissors
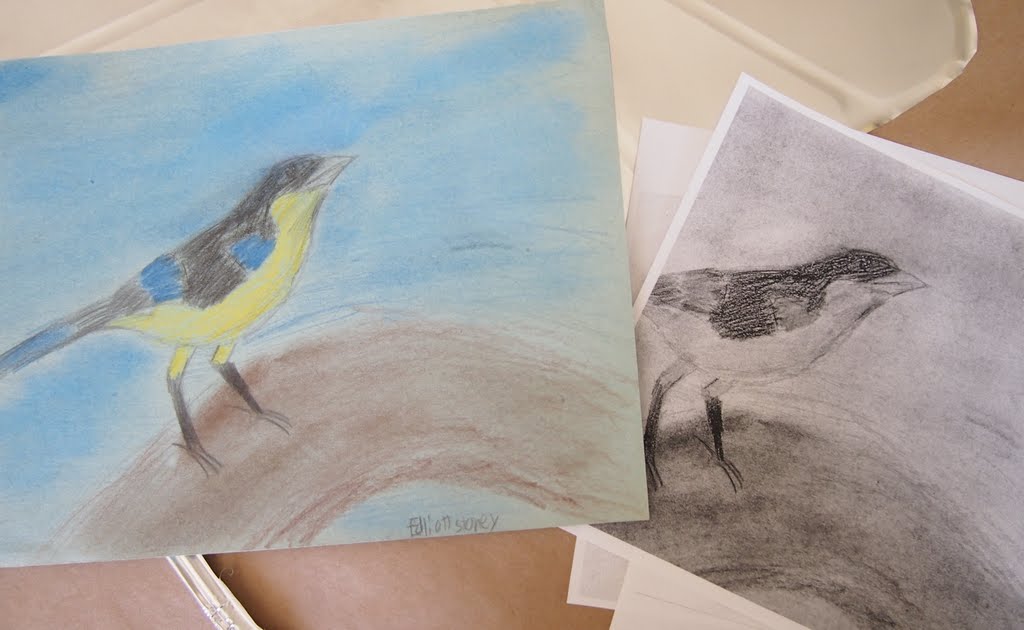 |
| Elliotts drawing and a B&W copy |

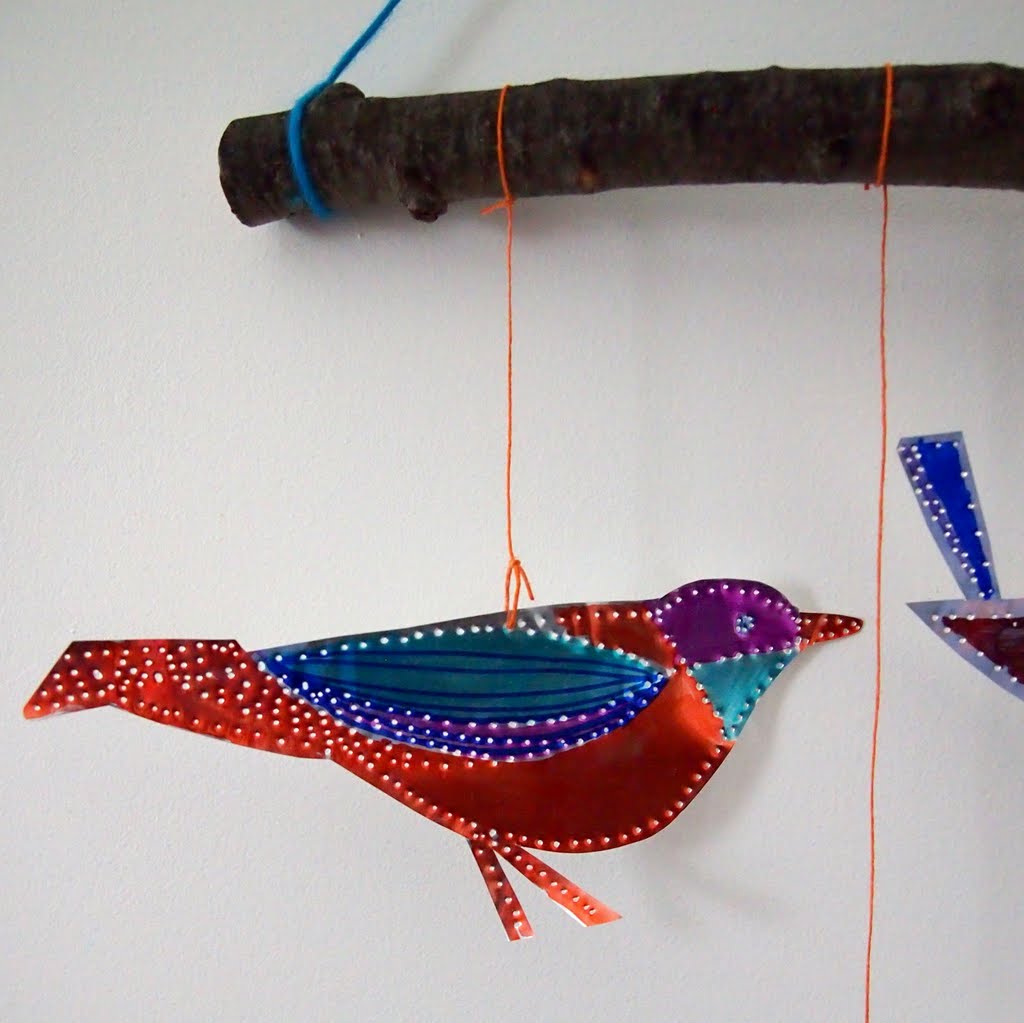
Cut the edges off one pan- we tried smoothing out the grooves with a bone folder and a tongue depressor over waxed paper but really, it wasn't necessary with such a big piece (maybe with a pie tin?)


Cut out the image being reproduced and tape it to a piece of metal trimmed to the same size.
Round any sharp metal corners with regular scissors.

Make sure to use a straight pin- not one with a nub or defect like the one shown here- okay?


Use permanent color markers to color in or leave the shapes plain.


We hung ours on a stick with string- the holes are already there!
Oh I love these birds to pieces! And you have introduced me to a new material to consider for "punched tin" work!
ReplyDeleteIt seems so few bloggers in the crafty blogiverse play with "punched metal" art - it is always a thrill to find company!!! :-)
I will definitely be sharing these. And your great tutorial.
I love them.
ReplyDeleteThese are really nice!!
ReplyDeleteHi Kimberly, so glad I came across your blog! I love the tutorials and crafts (especially this one) it looks fantastic! Am following you on Bloglovin now so I can get updates! Thanks :) Carly
ReplyDelete