Showing posts with label St. Patrick's day. Show all posts

St Patrick's Day Ties

These ties were developed for a Valentines day project but I think they're great for St. Patrick's day (or the Fourth of July). You can make them regular sized or super size them. Here are the basic instructions with great thanks to my models below.

This is just a photo opp with our sweet dog Chester. 
He would never be left alone with the tie as he might try to chew it and that might make him very sick!
 

Materials:
Duct tape
Sparkly material
Elastic cord

Bow tie/Hair tie: 
Slightly overlap two 7” lengths of duct tape onto the back side of the sparkly material.

Trim them to make a 6.5” x 3” rectangle


Trim the .5” leftover strip to 1.5” long and wrap it around the middle of the rectangle.


Gather the rectangle together in the middle then secure it in place on the back with a small piece of duct tape.

Thread an 18” length of elastic through the back loop and knot the ends.
Tie:
Slightly overlap two 14” lengths of duct tape onto the back side of the sparkly material.
Trace around the template on the duct tape and cut the tie shape out.
Cut 18” length of elastic and knot the ends together to make a loop.
With the duct tape side up, fold the tie top over the elastic loop and secure in place on the back with a small piece of duct tape.
You can also make the ties over-sized!


St Patrick's Day Cucumber Pot's of Gold

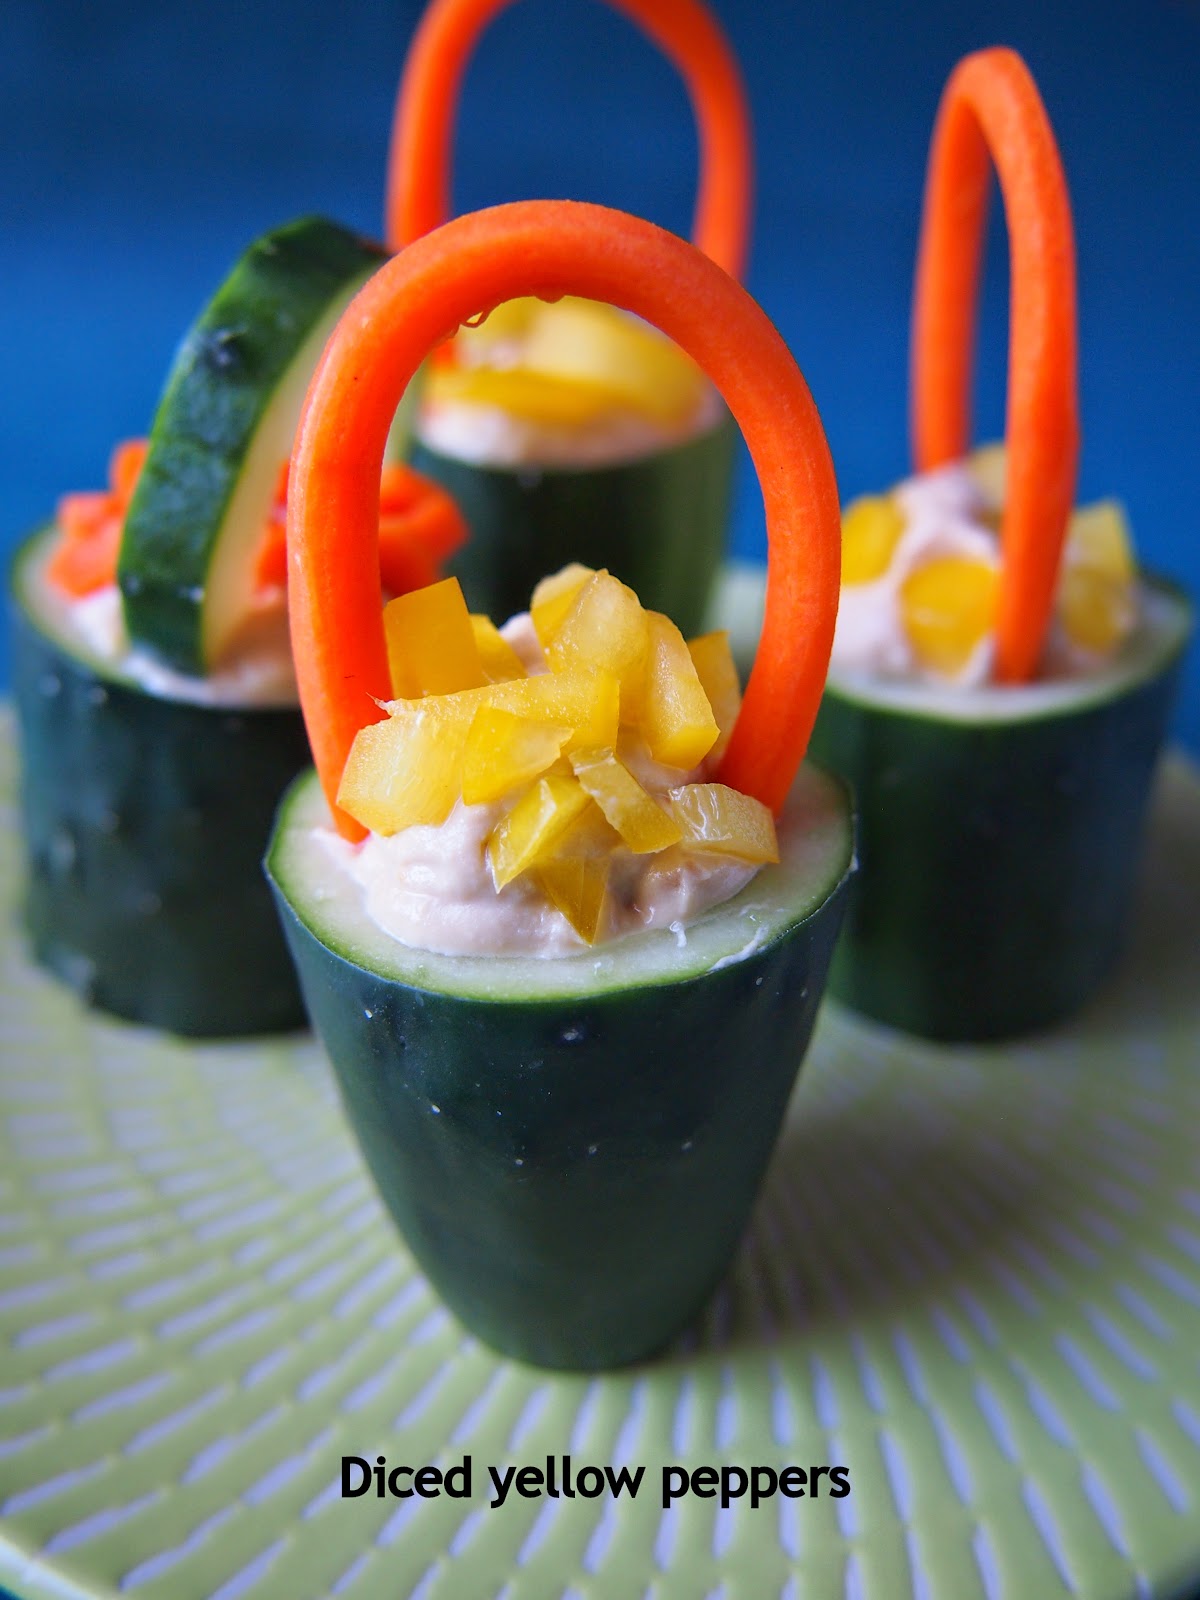
I tested making little "pots of gold" for work awhile back –they're really easy and fun. A lot of my job as a developer is to test things like this to see if they're going to work, how hard they are to make or what options look and taste the best.


Slice a (washed) cucumber into 2” sections.

Use a melon scooper to take out the soft center then add hummus, a handle and some gold “coins”.

I tested making the tiny coins by punching disks from a yellow pepper with a straw, an apple corer and also tried them diced.
 Here are some of the options I tried:


 And here are some of different handles:  celery, carrot and a scallion (not so good). 


My favorite version has little legs but it's more complicated to make and it actually seeps a little cucumber juice after its sat for awhile. The celery handle is the easiest and looks the best.
I wonder what else you could use for the coins? Cheese? Some tiny crackers?


It’s that time of year again! Lucky March 17th is next week and we are so ready for spring! This year we wanted to make a small trap for tiny Leprechauns. So we modified a trap I made for work a longtime ago from an oatmeal container.  (The original image has disappeared from the website but it still exists everywhere on the internet).

Apparently, leprechauns are the shoe makers for fairie folk; they have huge egos, love gold (a lot) and are also very curious and mischievous. Hopefully this hat with a gold nugget on top and an inviting ladder will be enough to catch one.

For the first try- we used a paper coffee cup but the cup slant is hard to negotiate- a cylinder is much easier to cover with felt.

The second try-we used a shortened paper towel tube but the proportions seemed a little off.

Third times a charm- just a cylinder of paper covered in felt.

Materials:
Card stock cut to 4” by 7”
Green felt
Double sided tape
Rickrack, sequins, ribbon or a felt strip- an embellishment


Ladder & Footprints

Little sticks
Hot glue
Pencil
X-acto
Stamp pad
Tin foil
Yellow marker


Our ladder measures 612" by 112" and is made by gluing little sticks on the 2 sides about every 12".
Trim the felt into a 4” by 7’” rectangle, a 214" diameter circle and a  378" diameter circle.

Roll the card stock into a cylinder shape and secure the edge closed with the double sided tape.

Add double sided tape to the paper cylinder then press the felt rectangle around the cylinder, trim off any excess.

Add the embellishment trim to the felt covered cylinder – we used double sided tape to attach the rickrack and the sequin chain on the back near the felt seam.

Trim top the felt circle so it fits perfectly on top of the cylinder.
Place the cylinder on the larger circle.

Cover a piece of tin foil with yellow marker then squish it up to make the “gold nugget.”

Carve a little shoe print into a pencil; eraser to make a tiny boot print (yeah- it's kind of wonky but it printed up fine).


St. Patrick's Day Cucumber Hats

The Tiny Funnel
I made these fun cucumber hats for work awhile back- not with the clovers though.

I love this little set of "Jelly & Aspic" cutters for punching out tiny shapes- usually in the middle of cookies or to make flowers from Airheads for cupcakes. Even though the set has a clover, I like the one without the stem. You get similar sets at Amazon or buy the fondant cutters at the craft store.


I tested American cheese cut at the deli for the hat bands first but the per-wrapped singles drape over the cucumber sections more easily.

Cut 1.5" sections of an English cucumber.
Halve them lengthwise and lay the pieces flat on a plate with the peel side up.

Cut a straight section of the cucumber to make the brim for each hat.

Add a thin slice of American cheese band and  a square of cheddar to make the buckle.

Punch out a few clovers (or use a small flower punch) from the flat slice of cucumber then cut and add a stem.
The Tiny Funnel


 Happy St. Patrick's Day!

Lucky Charm Necklaces-DIY Shrinky Dinks

We have a lot of plastic in the recycling bin right now (left over from a work project) so we're making a few recycled crafts. These DIY Shrinky Dink lucky charm necklaces are just in time for St. Patrick's Day's (and my son’s market day at school)- and are made from # 6 plastic.

Make any shape charm you want- stars, moons and clovers- or hearts! I’ve loaded our clovers onto Google drive for you- not fancy- just drawn out and copied.
Here are a few tips :

*Only use #6 plastic-it's doesn't work with #1 (we have another project for that)

*Whatever line you draw will get thicker and darker.
*Holes gets smaller and must be punched before the plastic shrinks.
*Don’t be alarmed if/when the plastic curls- it will flatten out again.
*Our plastic shrank down from 1.5” to .5” but it varied a bit.

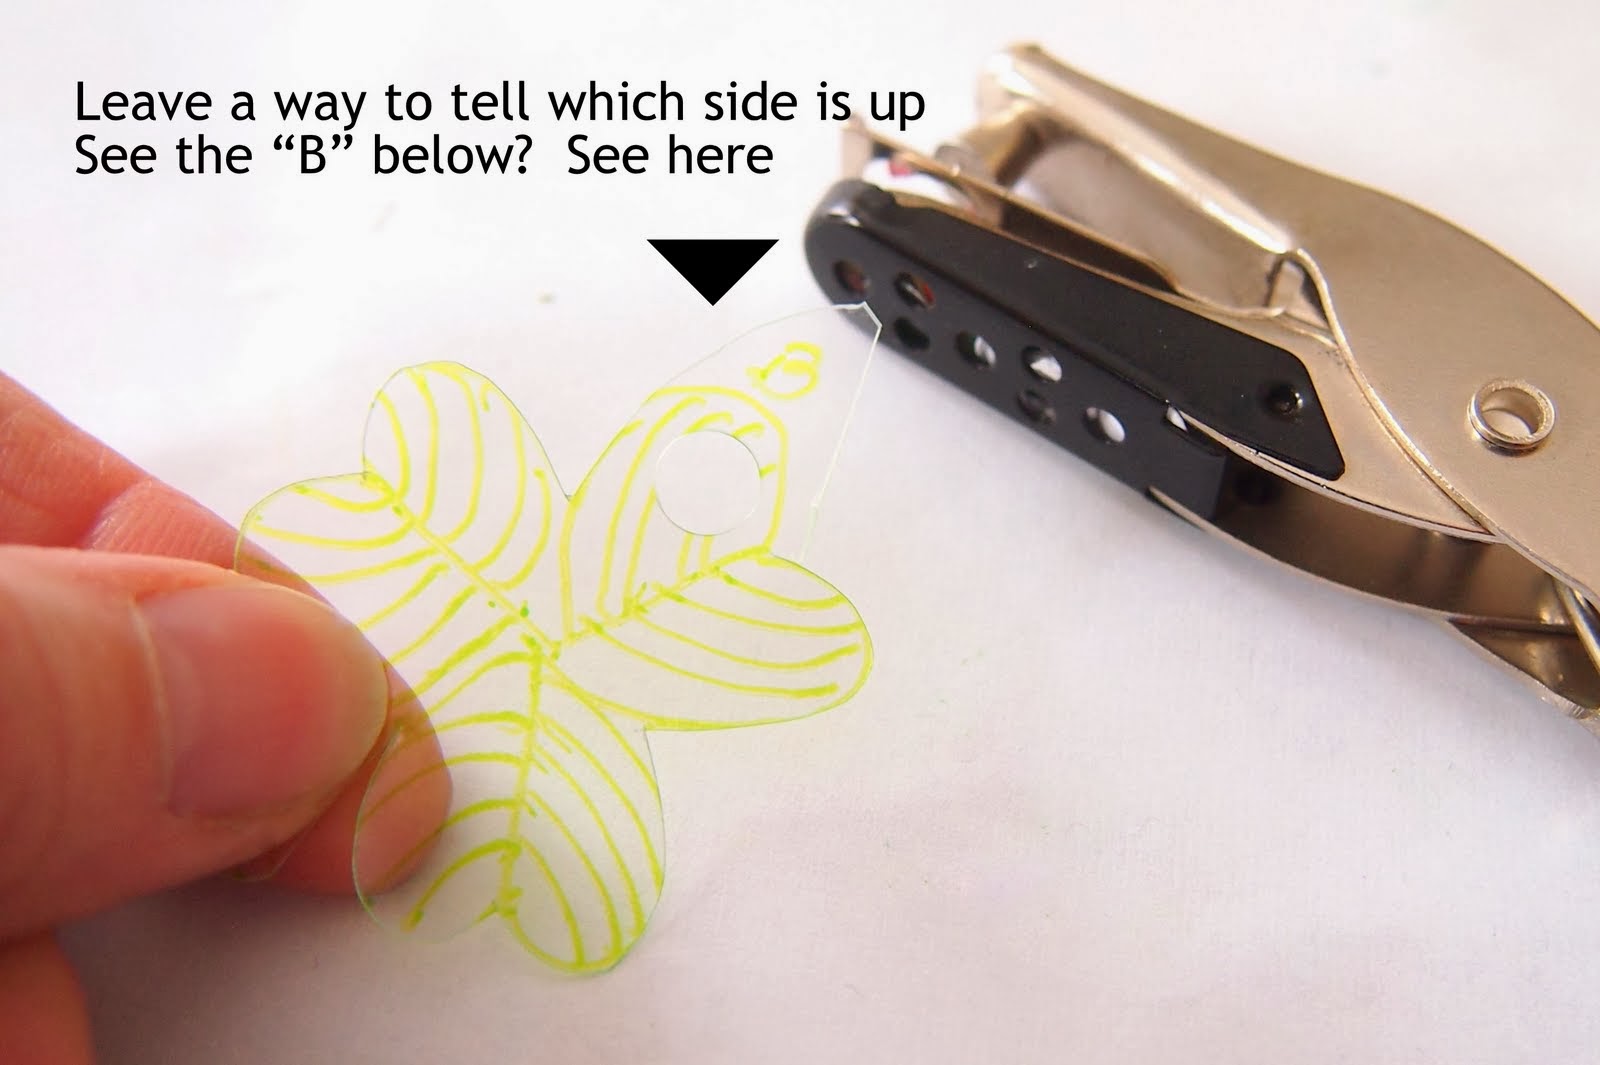
*Make a little notation somewhere close to one edge that will be cut off before baking-- we drew the letter "B" which shows which side is up; if the drawn side is face down-the ink will transfer to the paper and come off the plastic during the shrinking process.
Materials:
  • Clean, dry recycled number six plastic –ours is cut from a salad takeout container
  • Thin permanent markers
  • ¼ hole punch
  • A piece of paper cut from a brown paper bag
  • Satin cord or metal chain for the necklace-- whatever necklace supplies you'd like to use- I bought the jump rings from Micheal's; they come in silver and gold. 

To start-preheat the oven to 325 degrees; all oven activities should be done by an adult!  

Lay the plastic over the image and copy and decorate it with a thin permanent marker (or free draw).


Cut the shape out-sometimes cutting a curve is easier to do by turning the plastic over and coming at it from a different angle ---but keep track of which side was drawn on (with that little B).


Punch a hole in the shape before it's baked (trim that little B off now).

Place the (drawn side UP) shapes on the brown paper on a metal pan (not insulated) and put the pan in the oven; set the timer for 3 minutes. 


Remove the pan after 3 minutes and the pieces will have shrunk. Ta-da!


Experiment with different shapes (we did a bunch of hearts) or even try a different (water proof) pen- we tried this Sharpie oil pen- cool!


Just a word about jump rings- it's best to twist the opening ends away from each other- not pull them apart.
 

Just sayin' in case you wondered why yours are always out of whack.
I had to learn the hard way.
Then twist them back together.


Lastly- someone might ask about fumes- we didn't smell any but we were in a well ventilated room.


Happy St. Patricks Day


This morning the milk was green in our house!
It inspired some shamrock pancake action.
Enjoyed by the boy; gone in 60 seconds.


Posted by Picasa