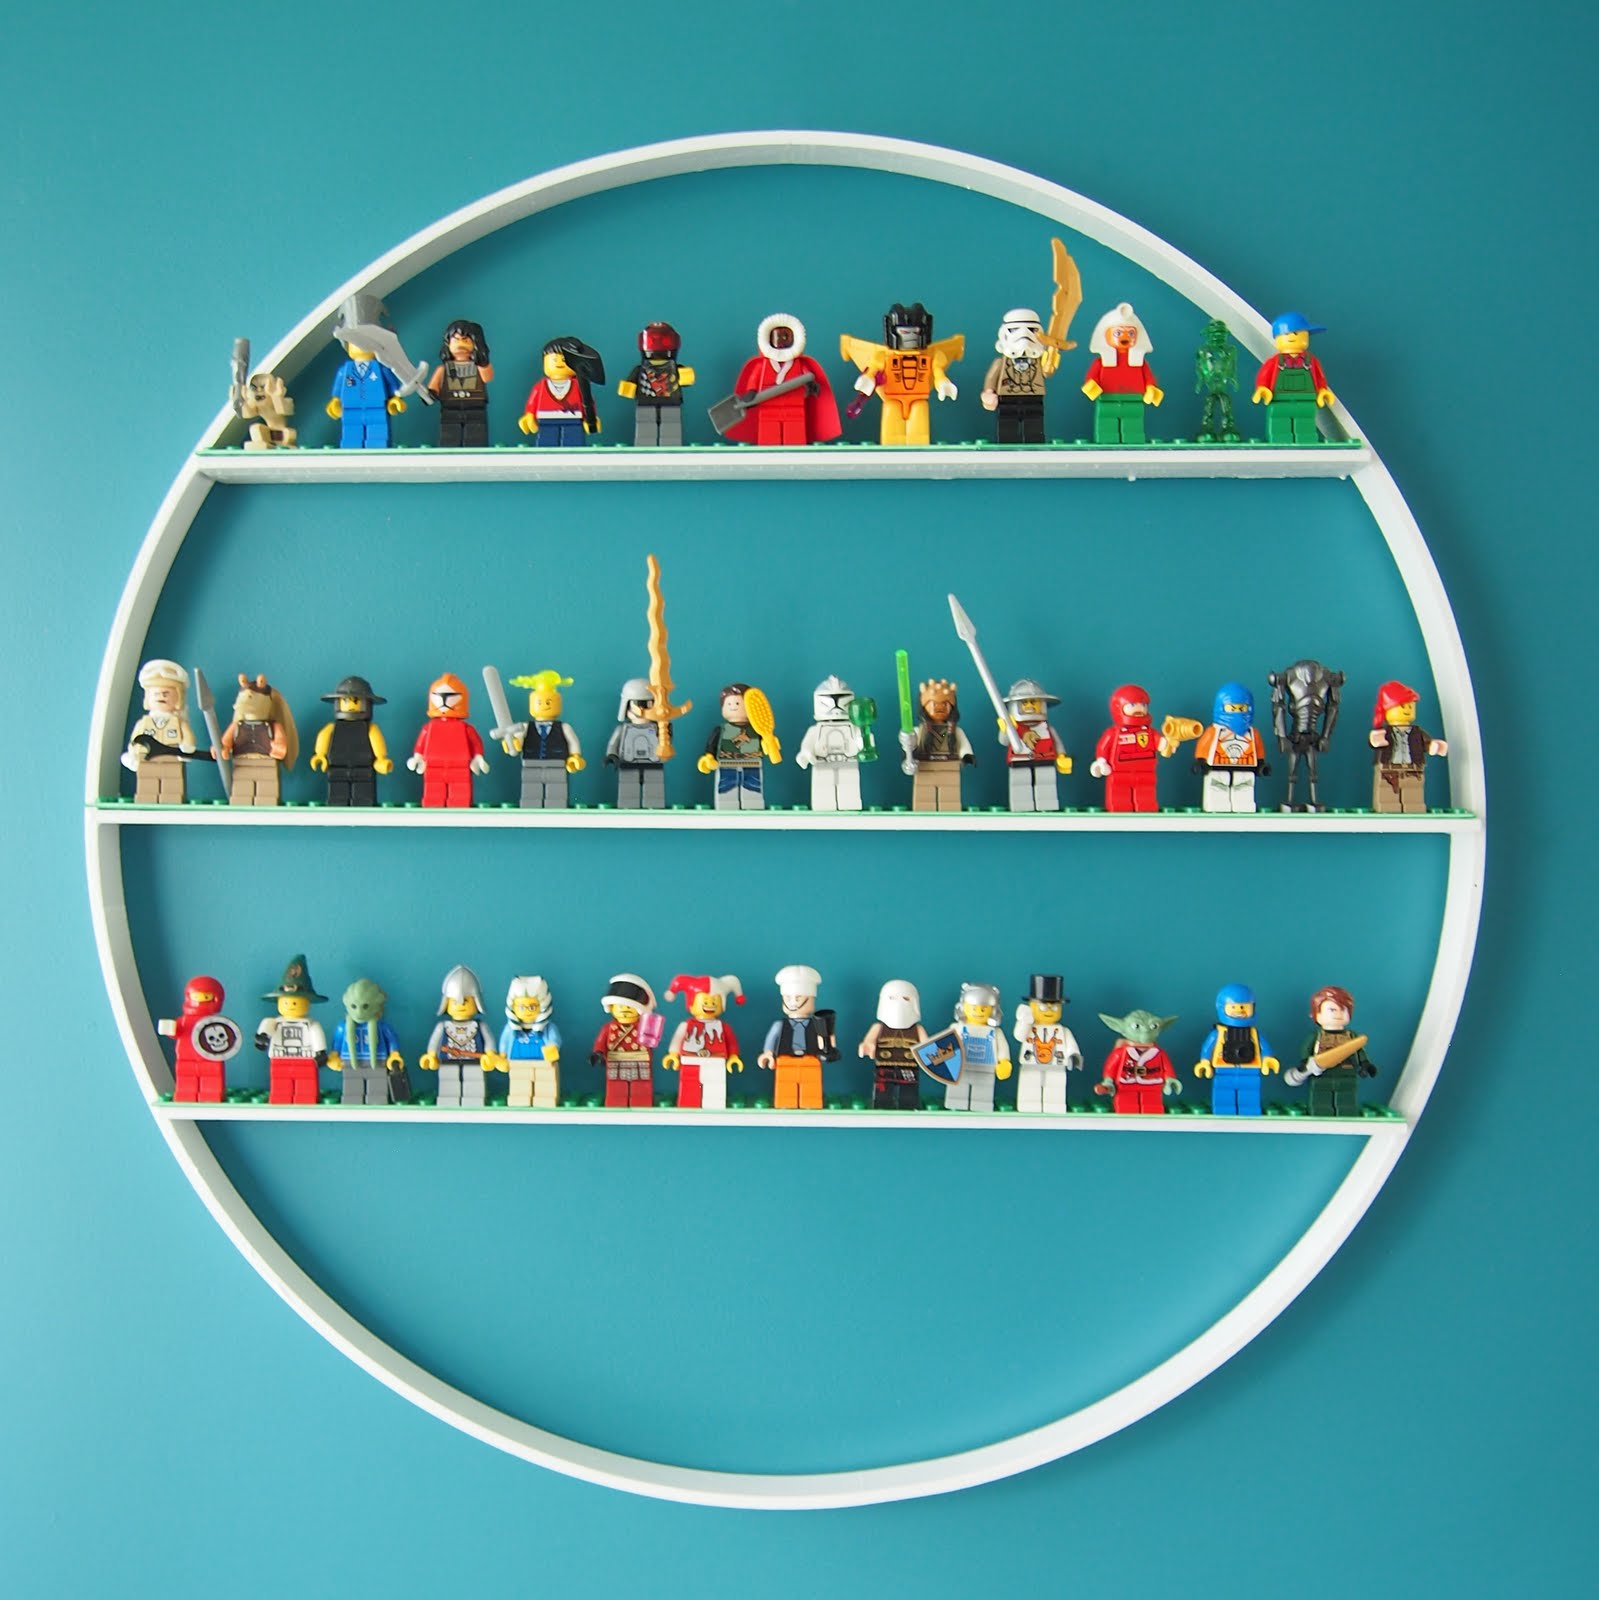
A place for all those little Lego people!
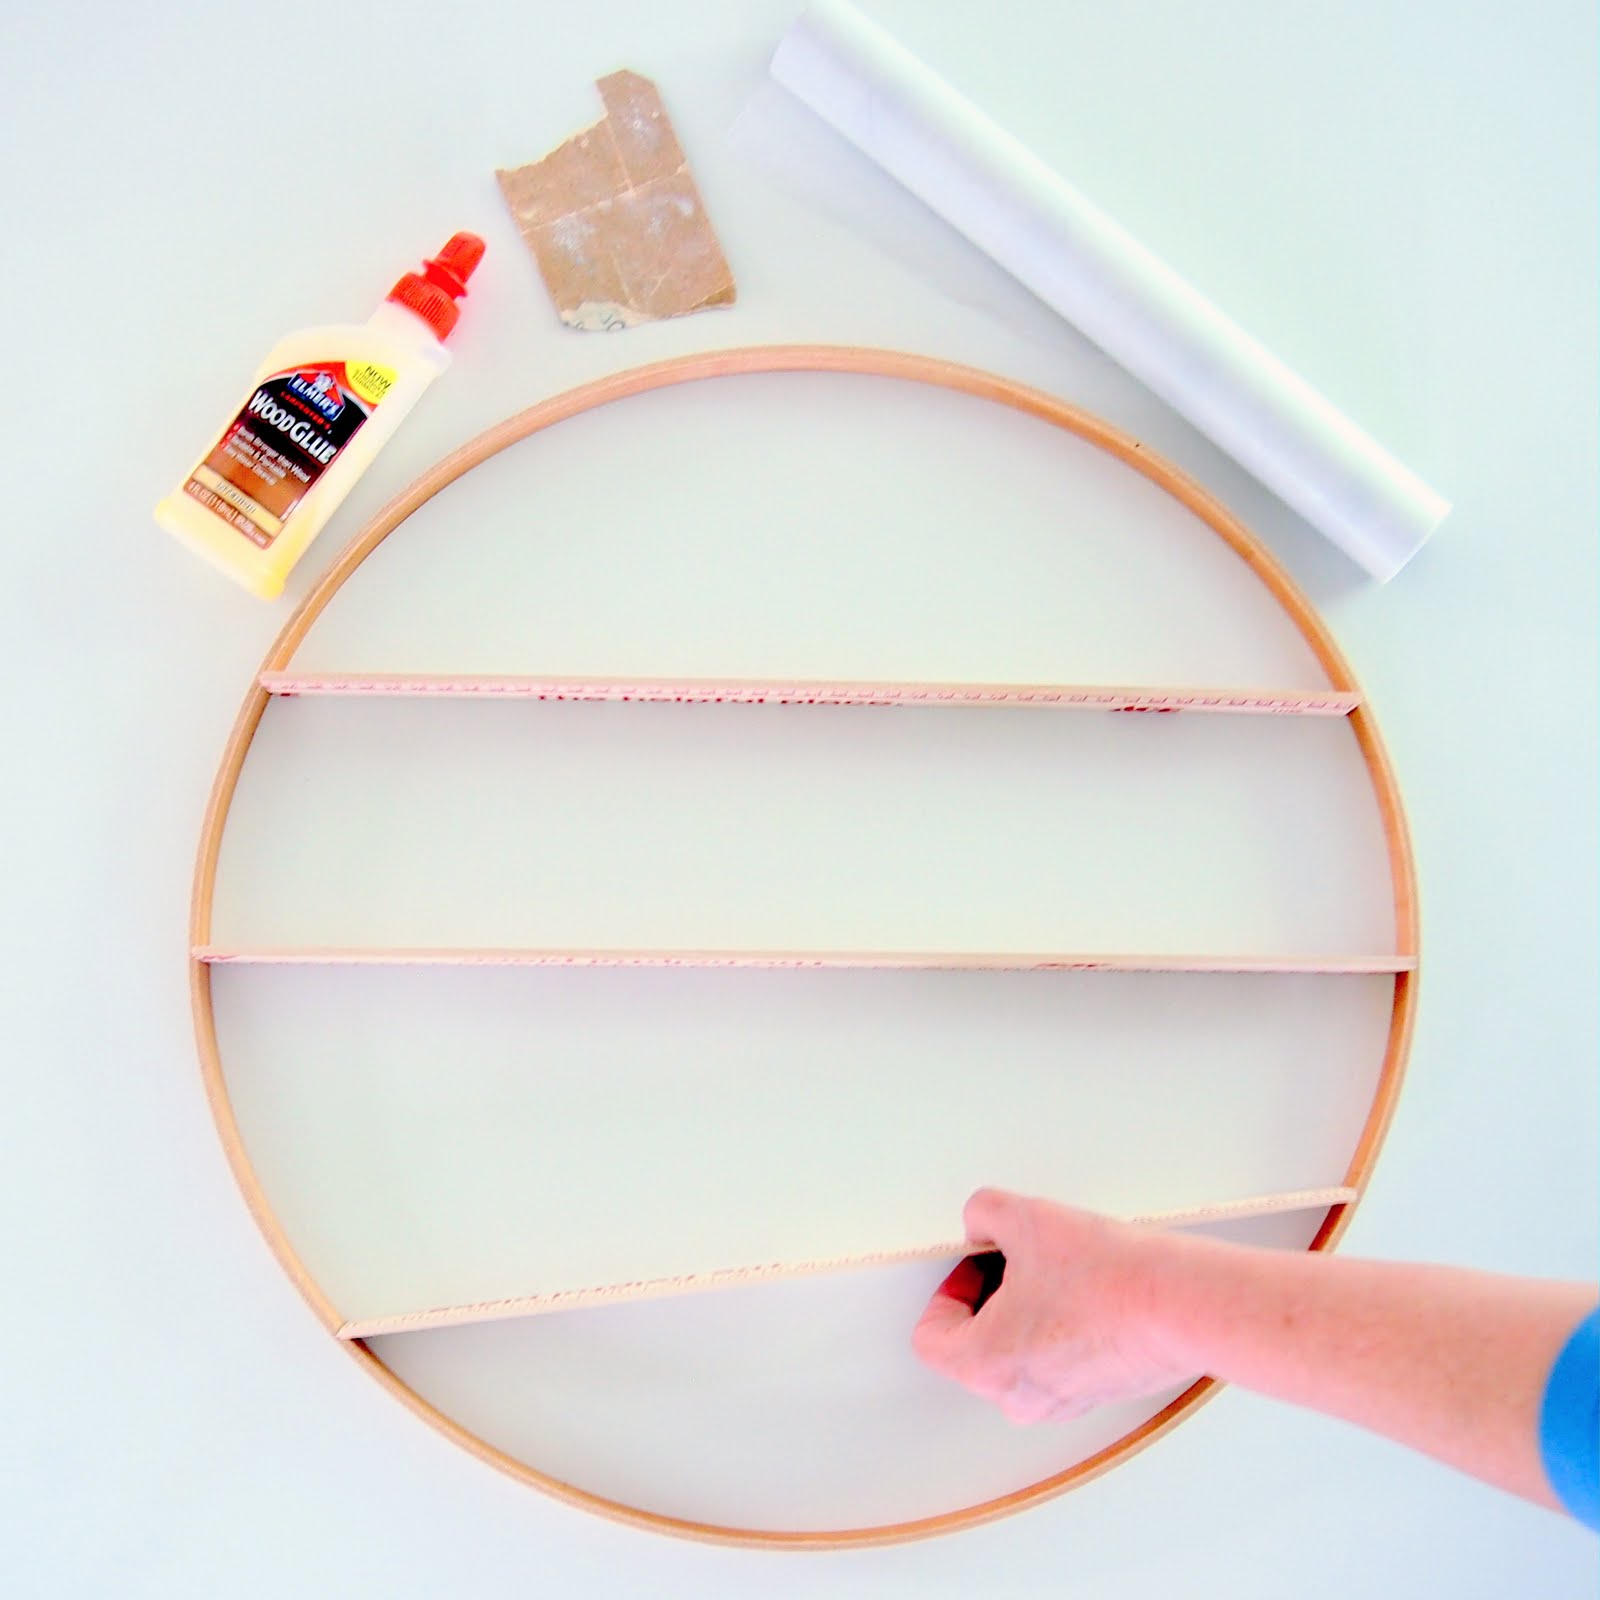
This little shelf started off as a project I made for work about 3 years ago (I'd link to the original but it's gone now). I saw one of those Anthropolgie mirror hacks and thought I could do one with tiny shelves as we have a lot of tiny things in our home that really need a place to hang out. These tiny shelves are made from 2 wooden yard sticks and an 18" quilting hoop.
 With the de-toying of my son's room, we're keeping some favorite Lego people on display. This is also another project that uses the Lego plates from a previous post.
Materials:
18” quilting hoop (Joann fabrics $5.99)
Two 36” wood rulers
Wood Glue or Aleens Fast Grab Tacky Glue
120 grit sand paper
Acrylic Paint and brush
Skewer or toothpick
Wax paper
X-acto Knife
10" by 10" Lego Plate
Cutting surface/protected paint surface
Metal Ruler
E-6000 Clear “Craft Adhesive”—this is an industrial-strength adhesive made from a clear drying, flexible epoxy for adults to use- not children! Always read the directions/precautions on the package.
A few notes about the supplies:
- The quilting hoops come in three different sizes: 14” 18” and 23”; I used the 18” hoop
- There's even an oval-shaped option!
- The rulers at Home Depot and Lowe's are slightly thicker and wider than those that I found at the Ace Hardware.
- I prefer the rulers at Ace Hardware as the wood has not been indented with the inch marks and are easier to score and snap with a craft knife (and to paint).
 Lay the ruler across middle of the hoop with one end of the ruler against the side of the hoop.
Mark where to cut it on the other side; this will vary from hoop to hoop.
For example-I measured 17 and 5/8” and another hoop was 18" across.
Repeat for the upper and lower shelves.
The ruler is "deeper/wider' than the hoop- so one side will be the "front" and have a little over hang.
It's possible with the lighter weight rulers to score and snap them to length or use a hand saw.
Lightly sand the ends with 120 grit sand paper.
Lay the hoop flat on wax paper.
Make a pencil mark where the shelves will butt up against the hoop.
Use a skewer or popsicle stick to apply glue to both the hoop and the ruler piece where the 2 surfaces touch and then slide the shelf into place.
Start with the middle shelf first (establishes structure) then repeat for the other shelves.
Wipe excess glue off the rulers exposed edge with a damp paper towel.
Make sure the ruler shelves are horizontal to each other!
Allow the glue to set.
Apply more glue if necessary in the cracks where the shelf meets the hoop.
Allow them to dry completely before priming, sanding and painting.
 You could just glue long Lego pieces onto the tiny shelves. That would completely work. But if you want to try to make the long pieces from a Lego plate, they're incredibly easy to cut with scissors, however, for a long straight edge I suggest using a metal ruler and an X-Acto knife.
 On the back of the Lego plate measure and score the surface with the X-Acto knife then snap the length off (careful of pinching your fingers).
 Follow the directions on the package for the E-6000 Glue and add the Lego strips to the wood shelves.
You can cut the Lego plate quite thin - I added a strip to the very bottom and curved it - hold it in place with masking tape until it dries.
Follow the directions on the package for the E-6000 Glue and add the Lego strips to the wood shelves.
You can cut the Lego plate quite thin - I added a strip to the very bottom and curved it - hold it in place with masking tape until it dries.
But if you don't have Lego people and have monsters instead or tiny treasures - it also makes a nice display for those too.


 Gently cut the handles off of the bowls with a pair of kitchen scissors; leave about 3/8” to 1/2“ uncut on top of the spoon bowl.