Showing posts with label Paper. Show all posts

Springtime Seed Paper Flowers

The Tiny Funnel 

It's finally spring! Seed paper is easy to make with kids- you just need an old blender. The finished paper can be cut into shapes to make lovely cards for Mothers Day or as teacher thank you notes in little pots.

The Tiny Funnel
Materials:
Old wood frame
Screen material (fiberglass) from Home depot or buy some online
Thumb Tacks
A hammer
Color Construction paper 3-4 sheets torn or cut in 1” pieces
Seeds- we used wild flowers
Big pan- ours is a foil pan from the baking aisle at the grocery store and measures 13”x19”
Shaped cookie cutter
Handy wipes or paper towels- Handi wipes work GREAT and are reusable!
Old blender- ours is 2nd hand from the Salvation Army

Soak shredded paper overnight in bowl of water.


Use a hammer to thumbtack the mesh screen tightly across a frame (or use an embroidery hoop - instructions below).


Add the soaked paper with the water to a blender and mix. 

Add more water if mixture isn’t smooth.

Put pulp mixture in the baking pan.
Add more water so that it’s about 2.5” deep.
Stir in the seeds.

Mix with your hand as the stuff settles and sinks.
Hold the screen frame parallel to the tabletop and dip it into and under the pulp and seed mixture.
Move it gently from side to side to remove excess water and distribute the pulp evenly on the screen.
Keep the screen horizontal to the water as you lift the screen frame out of the water.

Place the screen frame with the pulp and seed mixture on top of an old bath towel or pan and let it drain.
Press the Handi wipe or paper towel to absorb and lift the water from the paper.
Squeeze the wipe out and return it to the screen.
 
Place the frame, pulp side down, onto a dry towel or handy wipe.
Slowly lift the screen and peel the edge of the paper away so that the seed paper drops onto the cloth
The Tiny Funnel

You can do the project with an embroidery hoop as well.
Add the screen between the hoops then trim off the outside material and continue as above. 


Let the paper dry overnight or place it outside in the sun to dry.
Trace a shape (we used a cookie cutter) and cut the paper.

The Tiny Funnel


Tip: If the paper is not flat after drying, place a heavy book over it for a few hours.

Directions for planting: Lay paper in the dirt and sprinkle ¼-inch layer of soil over it.
Water the soil and keep seeds wet until they sprout.

Matchbook Covers


Tiny pleasures.
I really couldn’t stop myself. I had to cover more match boxes and got carried away. Yes. I did.

I was asked to cover 3 matchbooks to accompany a project for work.  But after the boxes were sent off to the photographer- I just kept going.

It’s so satisfying to use small scraps of pretty paper to cover little boxes. And all together, they make me so happy. I can’t imagine what I’ll do with them all. 


They’re really easy & inexpensive to make and you can probably figure it out by looking at the pictures but I’ll walk you through it because I tried it a couple of ways and they all work.

What you'll need:

A small piece of pretty paper: use light weight paper if you can rather than cardstock but --either will work.
Any one of these adhesives will do the job:

Double sided tape
Terrifically tacky tape (a favorite, as it very strong)
White glue
Mod Podge
Or a Xyron sticker maker
*You can add a layer Mod Podge on the outside to make the surface more water proof.

If you’re using the box to hold matches, measure the paper so it wraps around 3 sides -leaving one striker side uncovered; otherwise, use a piece large enough to cover all 4 sides. 

Measure, cut and pre-fold the paper.

Use a paint brush to add the glue (on top of piece of wax paper) or tape of your choice to the wrong side of the paper. 

Then wrap the paper around the outside of the box and press in it place.


Paint the outside with Mod Podge and set it on the open edge to dry.

If you use a double sided tape instead of glue to add the paper, consider using clear packing tape to cover the outside to protect it.
And then!
I saw this set of “drawers” sitting on my craft bench. There it was, where it has sat for many years – a left over from a long ago work project. 


 Holder of crafting minutiae.


If you decide to make a set of drawers- cover only the fronts (and backs) of the inner boxes (so they can still slide).

Make a tiny vertical slit in the center of each front side, then add a paper fastener for a drawer handle.
Use double-sided tape to hold all 3 boxes together then measure, cut and add the decorative paper around the whole bundle.
And this emergency gold dollar stash in my purse!

Little sliding boxes.
I really love them.

And it appears, I've loved them longer than I knew.


Valentines Heart (mini) Piñata


I really wanted to make a mini pinata for Valentines- I've worked the last few days trying to figure out how to streamline it but it's still a little much to make for a whole classroom of kids.
Still, making a bunch over a few days might work or maybe just for a few special people?
Materials:
Crepe paper streamer roll
Brown paper bag cut out hearts
Glue stick
Perle cotton (light string)
Clear tape
Flat candy, tiny toys and confetti
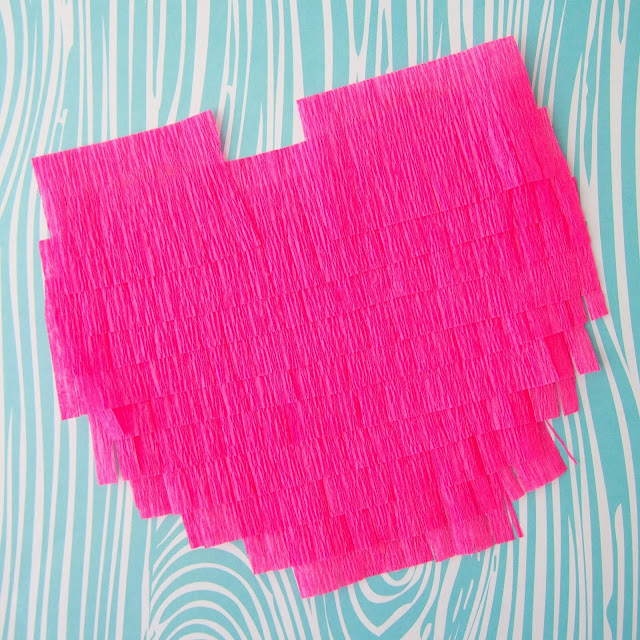
One trick is to roll the crepe paper around a can 6 or 7 times, slip the paper off and then make the tiny slits through all the layers (yes, I tried to cut it on the actual roll but it was a disaster as it's wound so tightly).


Cut two 5.5" tall by 5.5" wide hearts from a brown paper bag (you can make your own template by folding a piece of card stock in half and cutting one heart out); it's fine to have fold lines or printing on the bag- no one will see them.

I like using the brown bag paper because it has suppleness to it, it's strong and has a nice weight. If there's writing on the bag, place it face down and cover the plain side.

Cut a few lengths of the fringed crepe paper.
Start at the bottom of the heart and add glue stick about 2" at time- then add a layer of crepe paper and move up to the top of the heart shape until the whole shape is covered- I left about .25" fringe between layers.


Go right across the top humps.

Trim the crepe paper from the edges.

Use clear tape to add an 8" string looped in half to the middle of one inside heart shape.

You could alternate colors of crepe paper too.

Run glue stick around the inside edge of one heart- leave a section/side unglued to poke things into later.


LET THE GLUE DRY!!

Walk away and do something else - trim the other hearts, check the weather, make some hot chocolate or... make some confetti!
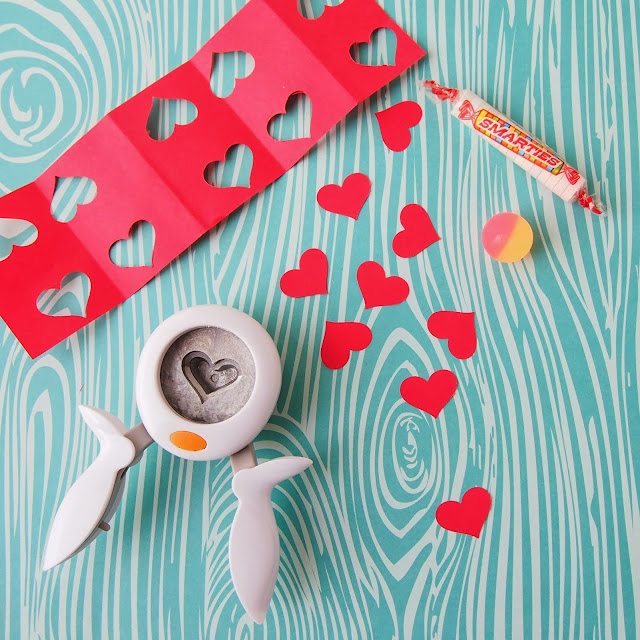
We used a heart punch from Micheal's (use your coupon!) to make little hearts for the inside of the Piñata heart.
You could just use regular round hole punch.

I plan to get some flat chocolate hearts when we make these for school but for now, I had some smarties on hand and a little bouncy ball (a pack from Target).
Print and cut out a strip of paper for the heart string- though you could use it to address the Valentine as well.
When the glue is completely dry - pop the goodies into the pocket.

Just to note here- I tried making this several ways- stapling and/or taping the heart together THEN covering it but it got really cumbersome and messy so this is the order that seems to work the best. 

When we make them for school I'll see if there are any other tips and add them.


Add glue stick to the last edge.
Pinch the glued edge shut- this is why you waited for the glue to dry earlier! so the pressure of the stuff inside doesn't cause the whole thing to come undone while the glue stick sets up.
There might be a little unevenness on an edge-- this is real life and I'm not going to pretend it's all perfect so just trim around the heart until it's good enough but DON'T cut that little string hanging out of the middle V.


Add the little paper loop to the string loop and use the glue stick to close the strip to itself.
Do you have a good (clean) pun for this project? We want to print something clever on the paper loop. 
We have: Piñhearta, 
You pull my hearts strings, You tear me up, but we haven't come up with a great one yet.

Let us know if you have one!

Valentine Pop Out Cards

These Valentines cards are really easy to make but they look super special- just for that one special person or set up an assembly line and make a bunch.

You could change them up to be any symmetrical shape inside (Easter Egg? Birthday present/cake? Christmas tree?) for another occasion.

I'm showing you each individual step below but you can whip them out them pretty quickly after you've made the first one.


Materials:
2 Blank cards from Micheal's 4”x 5.5" (or card stock folded into cards)
2 pieces of pretty paper
Glue stick


Cut a pretty paper slightly smaller than the front of the card.
Fold the pretty paper in half width wise and cut a heart from the center.
Set the little cut out heart aside.

Take the folded paper and place it over the fold of the one of the blank cards.
Trace the heart-shape onto the blank card. 

Remove the template.
Make 2 marks on either side of the heart where you will not cut!!
Cut the top curve of the heart and the bottom curve- leaving the tabs uncut.
Fold the tab one way and then the other.

Open the card and push the heart shape so it pops out.

Then re-fold it with the heart inside.
Open the second blank card and put glue stick on the front inside of the heart-cut out card.
Line the inside fold of the heart-cut card up with the inside fold of the blank card and press down in place.
Flip the card over and apply glue stick to the other side of the cut card and press into place.
Open the card and the heart should pop out -because you didn't put glue on it - right?! (pull it out with your finger if necessary).

Use glue stick to attach the 2nd piece of pretty paper to the back of the cut out heart hole paper (pretty paper you used as a template earlier).


Then glue whole thing to the front of the card.
 Use glue stick to attach the leftover pretty paper heart to the inside heart.

You may need to trim the edges of the card depending how well they're lined up and fit together.


If you're feeling adventurous-make three hearts!
Just remember to put the heart tabs in the middle of the hearts- not too close to the top edge as they will pop up and not out when the card is opened.


Good tabs!


Bad tabs!