Make any shape charm you want- stars, moons and clovers- or hearts! I’ve loaded our clovers onto Google drive for you- not fancy- just drawn out and copied.
Here are a few tips :
*Only use #6 plastic-it's doesn't work with #1 (we have another project for that)
*Whatever line you draw will get thicker and darker.
*Holes gets smaller and must be punched before the plastic shrinks.
*Don’t be alarmed if/when the plastic curls- it will flatten out again.
*Our plastic shrank down from 1.5” to .5” but it varied a bit.
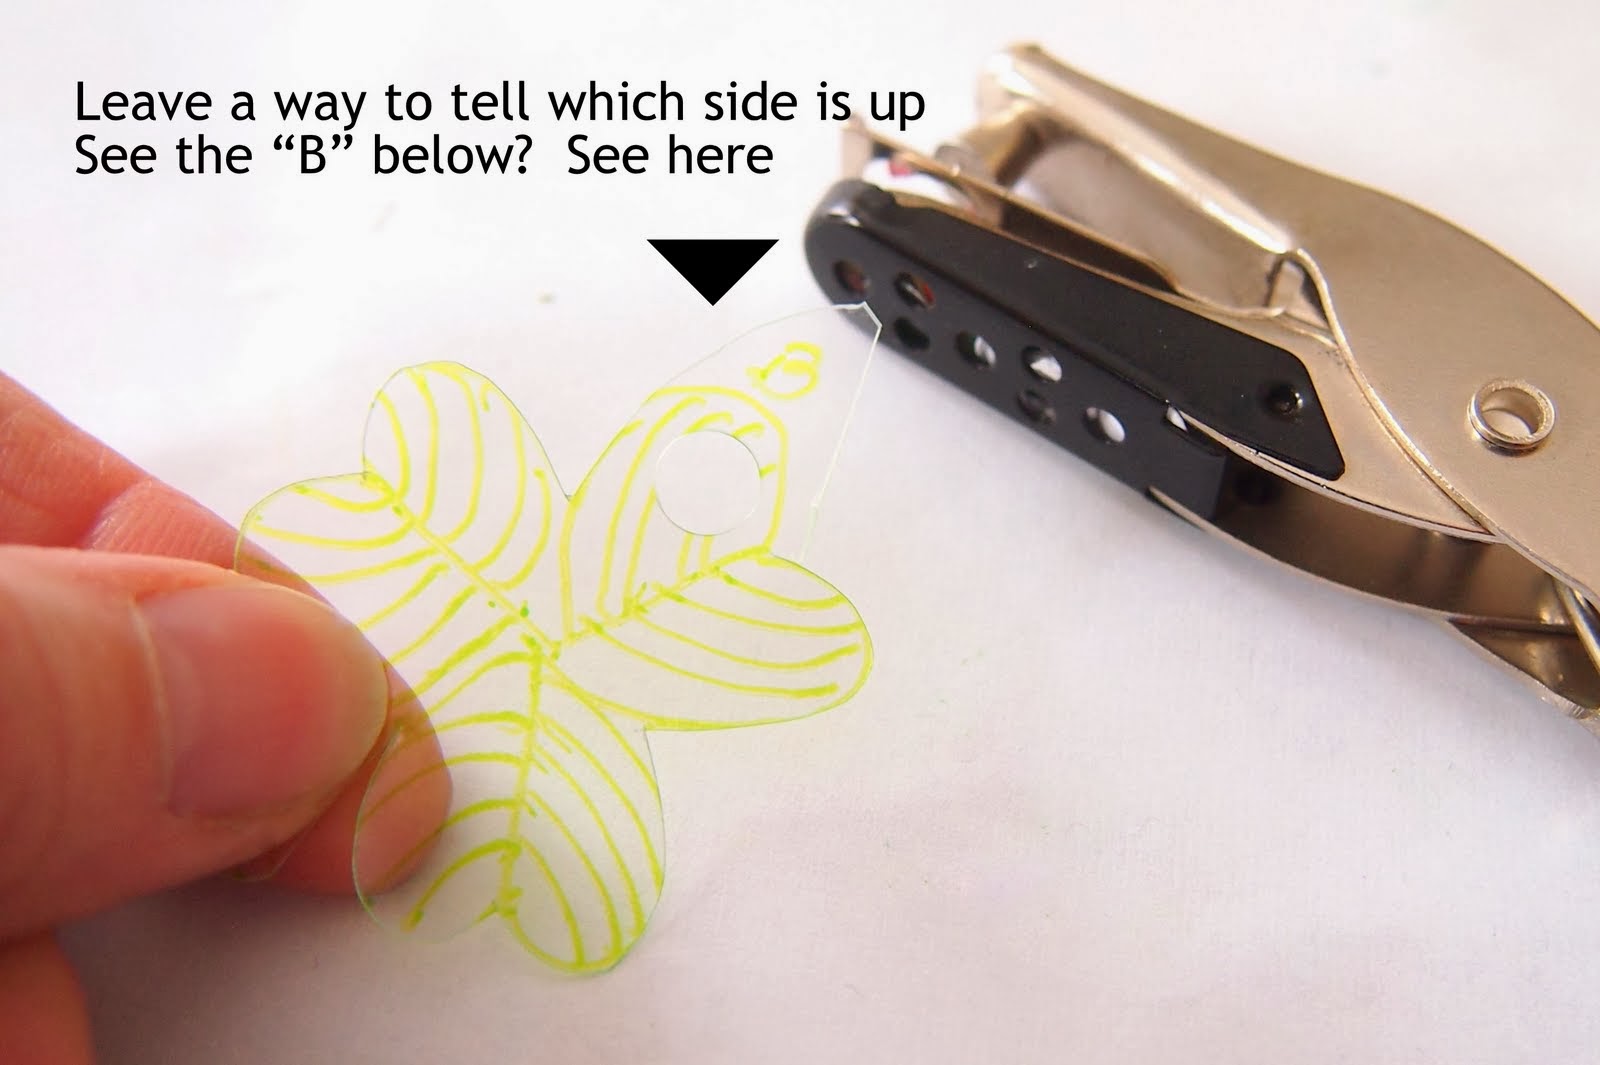
*Make a little notation somewhere close to one edge that will be cut off before baking-- we drew the letter "B" which shows which side is up; if the drawn side is face down-the ink will transfer to the paper and come off the plastic during the shrinking process.
Materials:
- Clean, dry recycled number six plastic –ours is cut from a salad takeout container
- Thin permanent markers
- ¼ hole punch
- A piece of paper cut from a brown paper bag
- Satin cord or metal chain for the necklace-- whatever necklace supplies you'd like to use- I bought the jump rings from Micheal's; they come in silver and gold.
 To start-preheat the oven to 325 degrees; all oven activities should be done by an adult!
 Lay the plastic over the image and copy and decorate it with a thin permanent marker (or free draw).
Cut the shape out-sometimes cutting a curve is easier to do by turning the plastic over and coming at it from a different angle ---but keep track of which side was drawn on (with that little B).

Punch a hole in the shape before it's baked (trim that little B off now).
Place the (drawn side UP) shapes on the brown paper on a metal pan (not insulated) and put the pan in the oven; set the timer for 3 minutes.
Remove the pan after 3 minutes and the pieces will have shrunk. Ta-da!
Experiment with different shapes (we did a bunch of hearts) or even try a different (water proof) pen- we tried this Sharpie oil pen- cool!
Just a word about jump rings- it's best to twist the opening ends away from each other- not pull them apart.
Just sayin' in case you wondered why yours are always out of whack.
I had to learn the hard way.
Then twist them back together.
Lastly- someone might ask about fumes- we didn't smell any but we were in a well ventilated room.


This comment has been removed by a blog administrator.
ReplyDeleteThis is absolutely one of the sweetest ways to use shrinky dinks I have seen. Nicely done!
ReplyDelete