Doughnut Bunny


We actually eat a lot of fruit and vegetables but I think in doughnuts- what can I say? They're round and they can be cut apart and made into so many different things! But I always try to use cake doughnuts, not frosted ones (unless it's dirt bike cake and needs boulders-then nothing but chocolate doughnut holes will do) so at least there is some moderation. These little bunnies only use a half a doughnut each - so they're even healthier. Right?

Materials:
1 cake doughnut
White frosting
Sweet flaked coconut *chopped extra and sifted
Marshmallows
Pink sanding sugar
Pink dot candy
Mini chocolate chips
Sprinkles


Special equipment: 
Scissors
Tweezers
Frosting knife
Spray oil
 
*Prep the coconut- I chopped ours a little  in the food processor as my bunnies were looking hairy – not fuzzy; then I sifted out the sugar dust. You can substitute shaved white chocolate if you don’t like coconut.
 
Prep the scissors – spray a little oil onto the blades then wipe it off; this will prevent the marshmallows from sticking. You may need to wash and reapply if you’re cutting a lot.


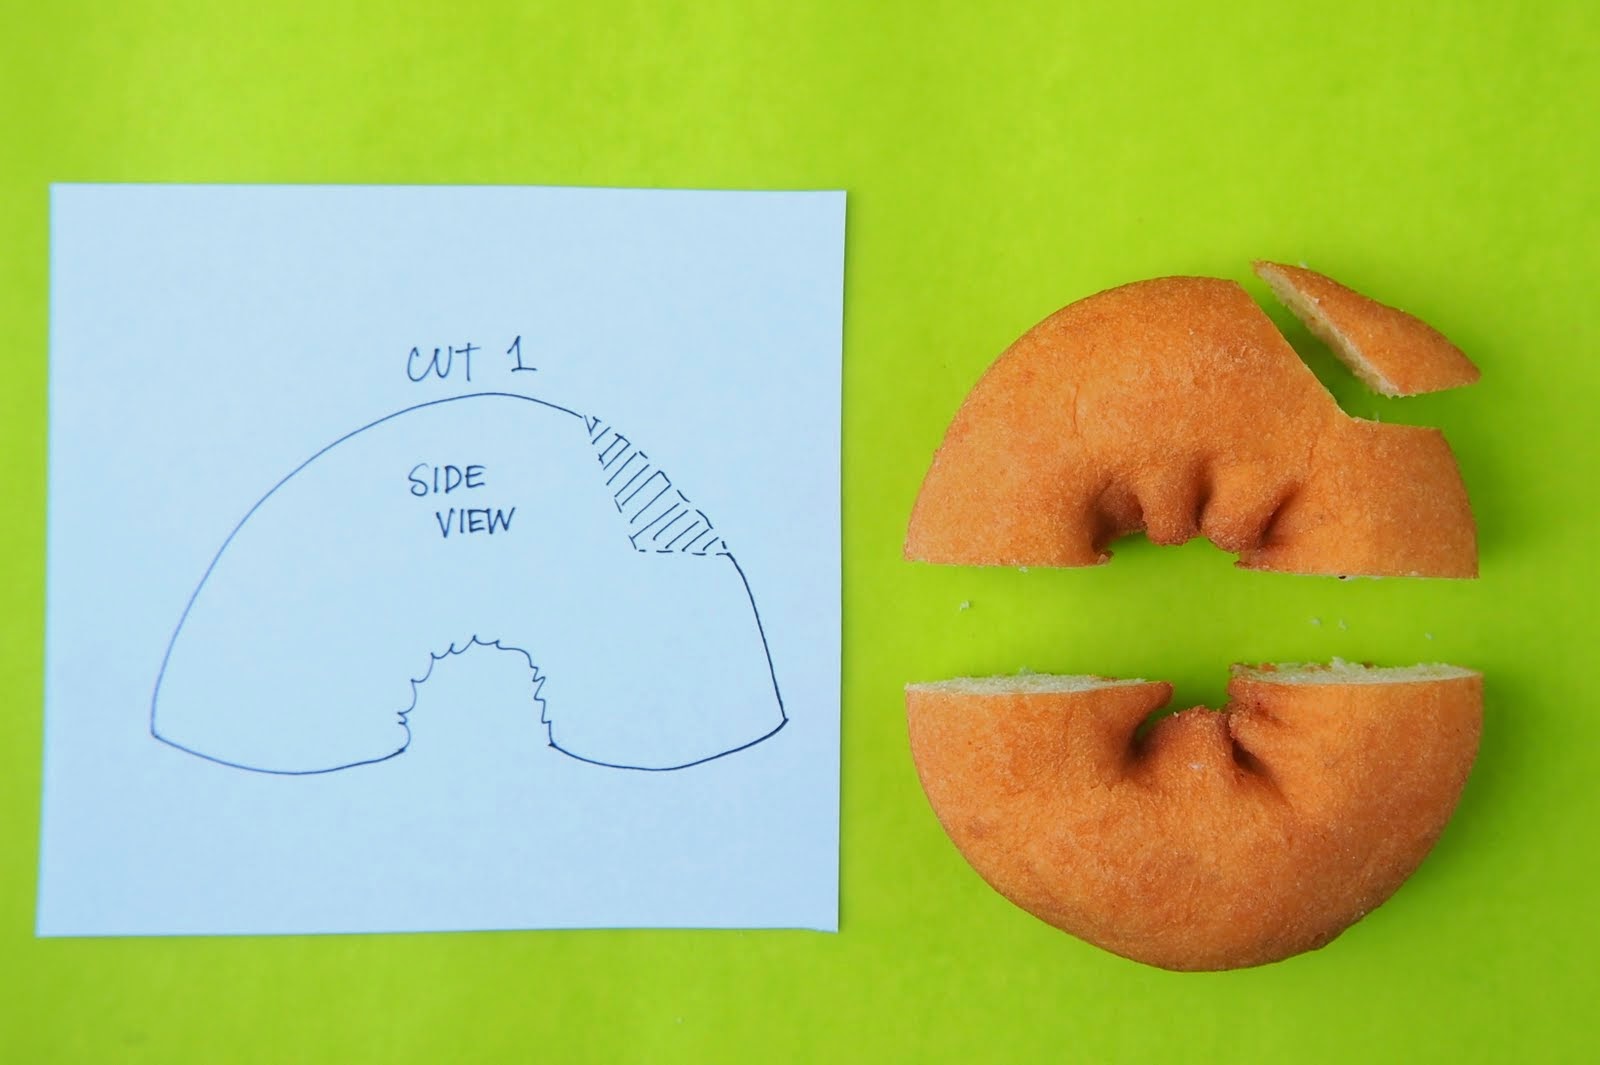
Cut the doughnut in half.
Cut a laid back L shape from the top of one half.
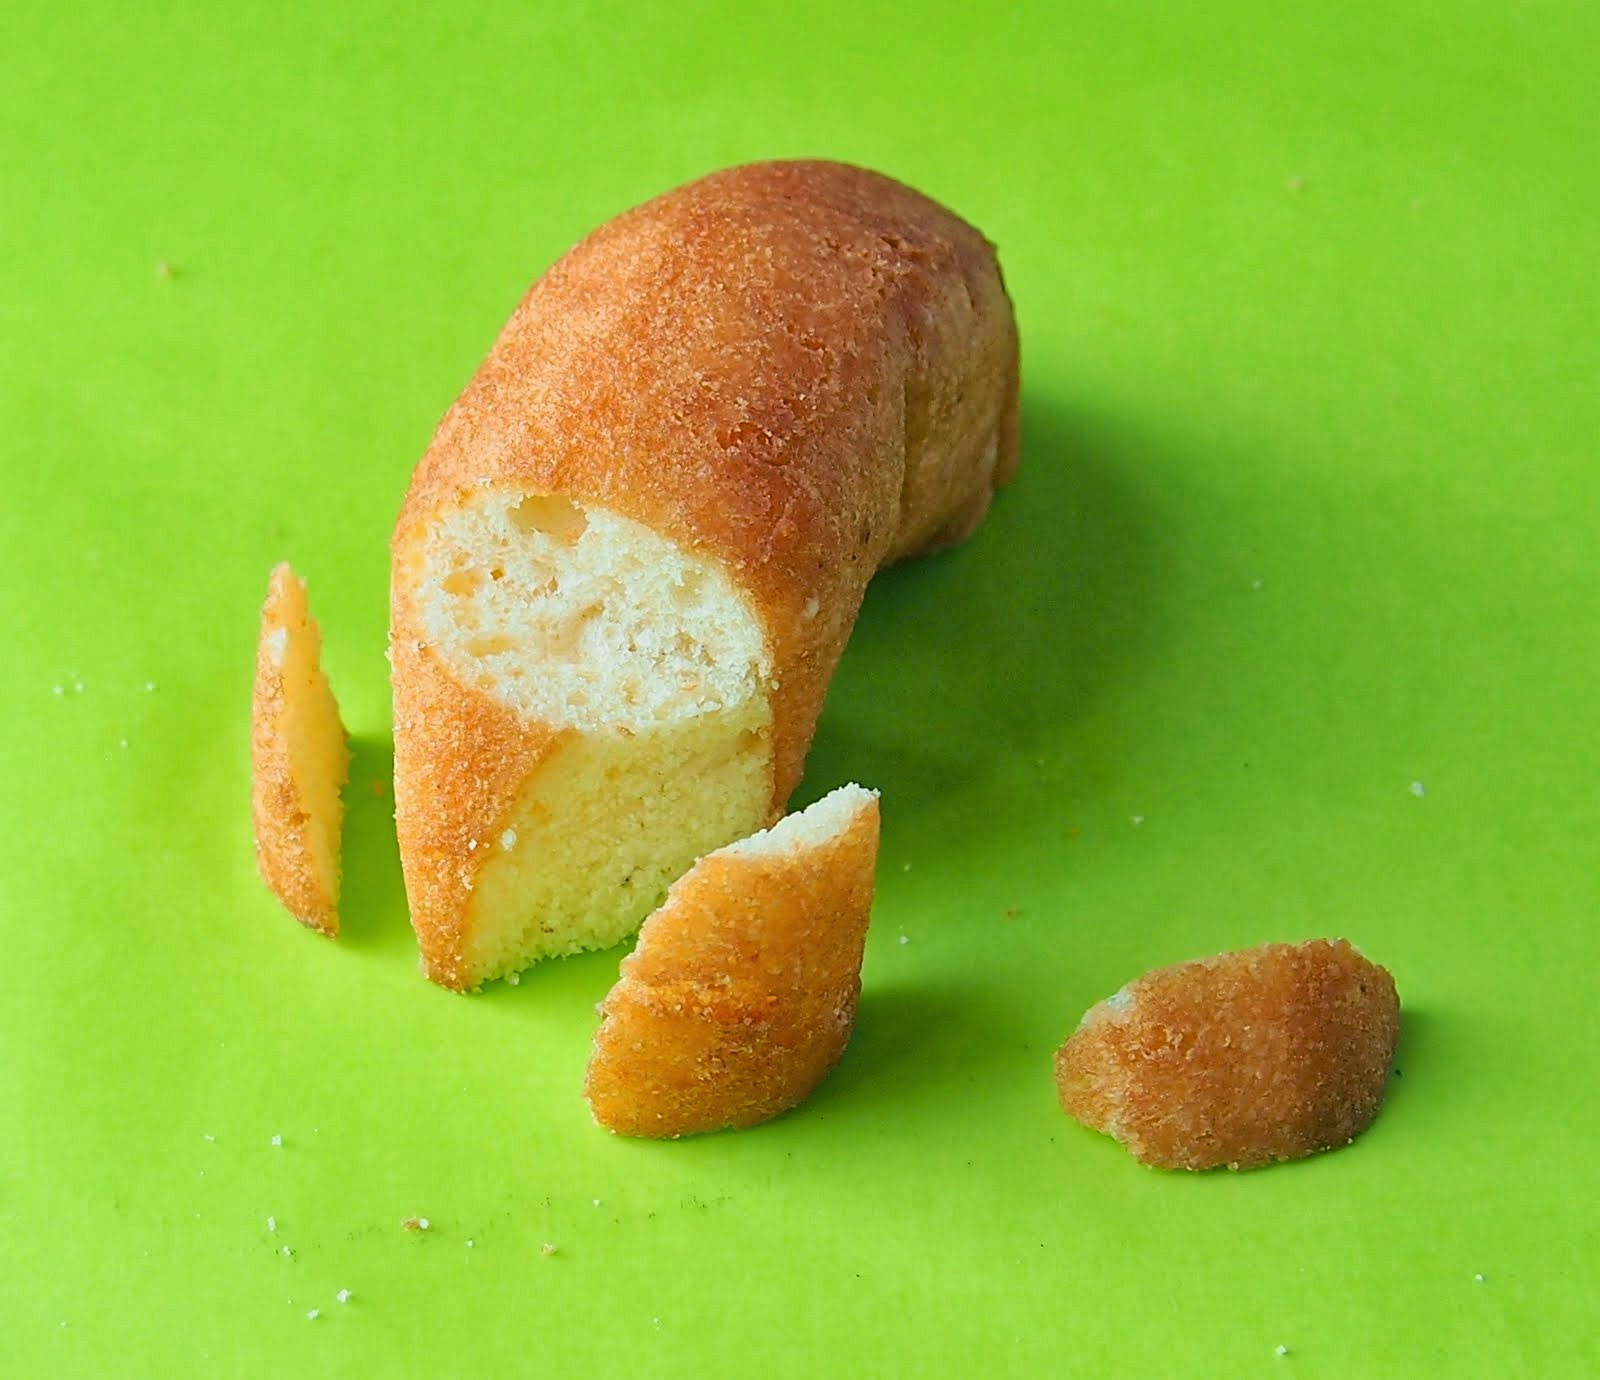
Cut 2 slices away from the front on either side to create the bunny nose.


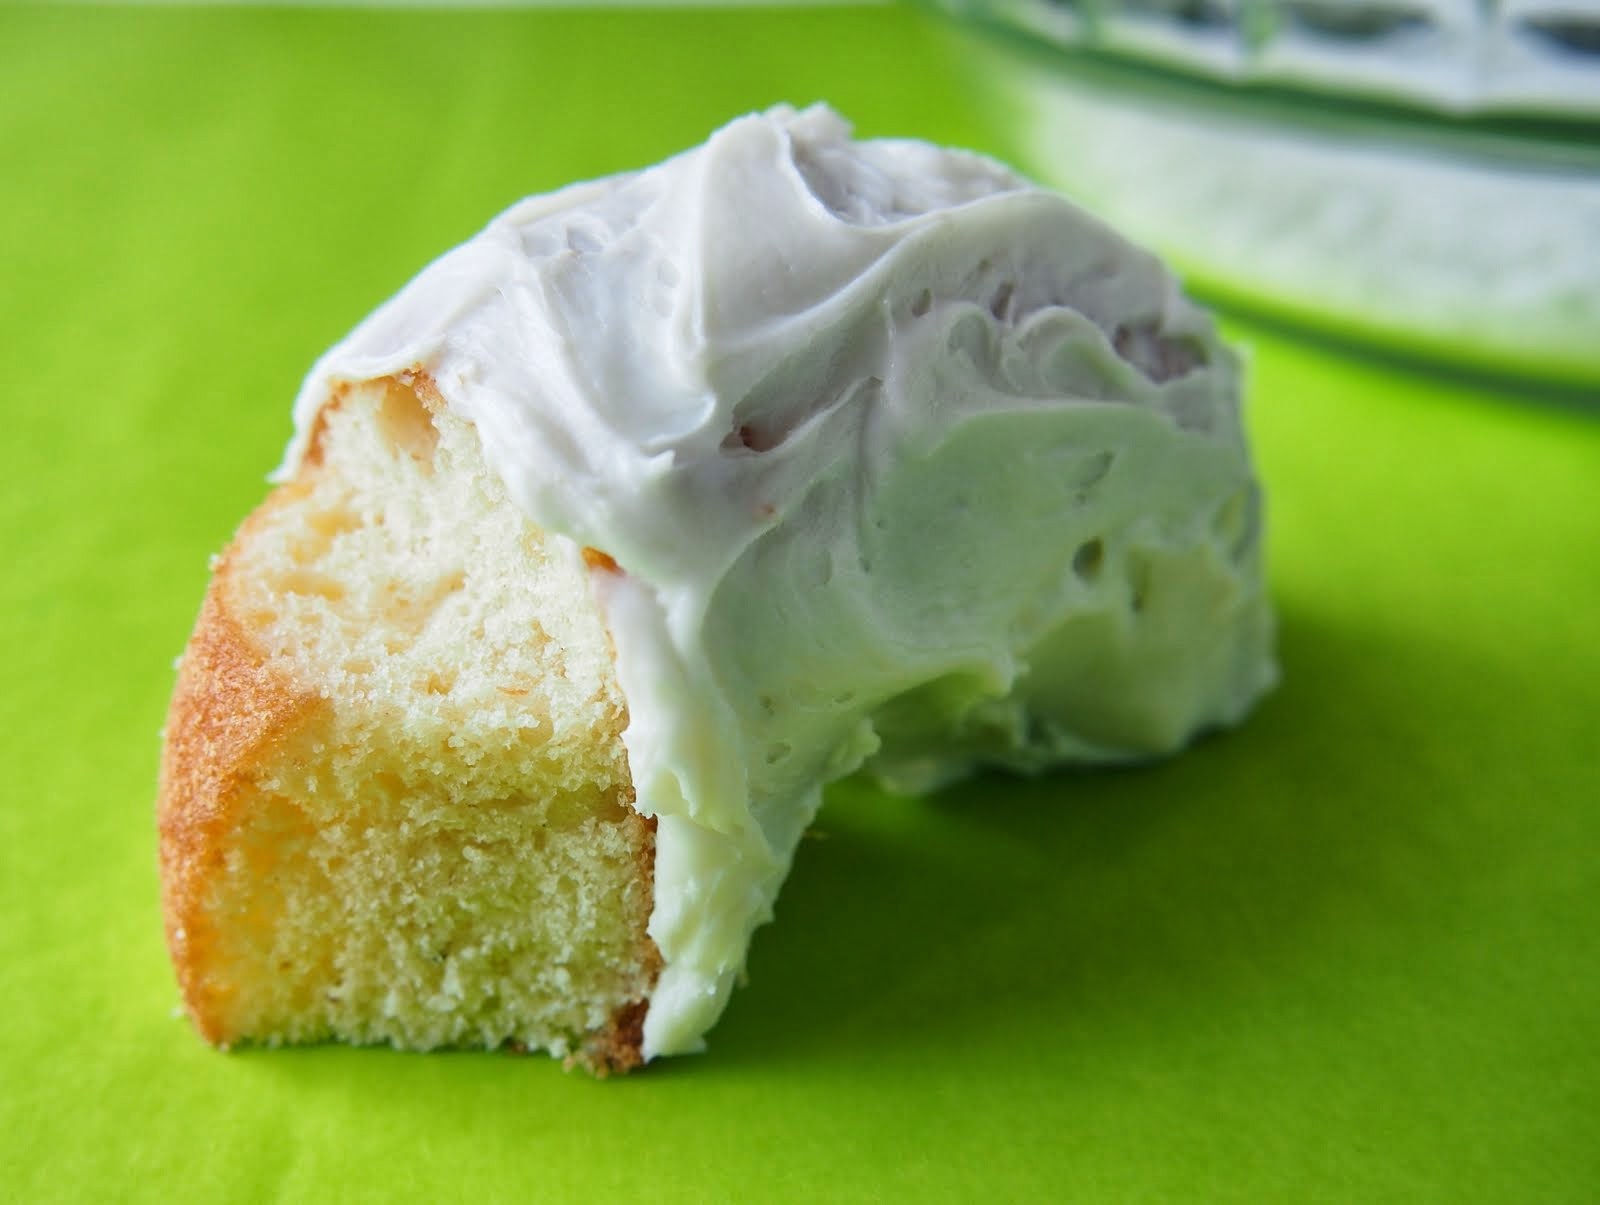
Frost all but the uncut parts of the doughnut (skip the bottom).
 
Carefully frost the cut sections (then you won't get crumbs in your frosting).


Set the doughnut into the coconut and cover it completely- you can pat the coconut on too.
Pick the doughnut up and set it aside (I thread a chopstick through the bottom middle and transport it to the tray).


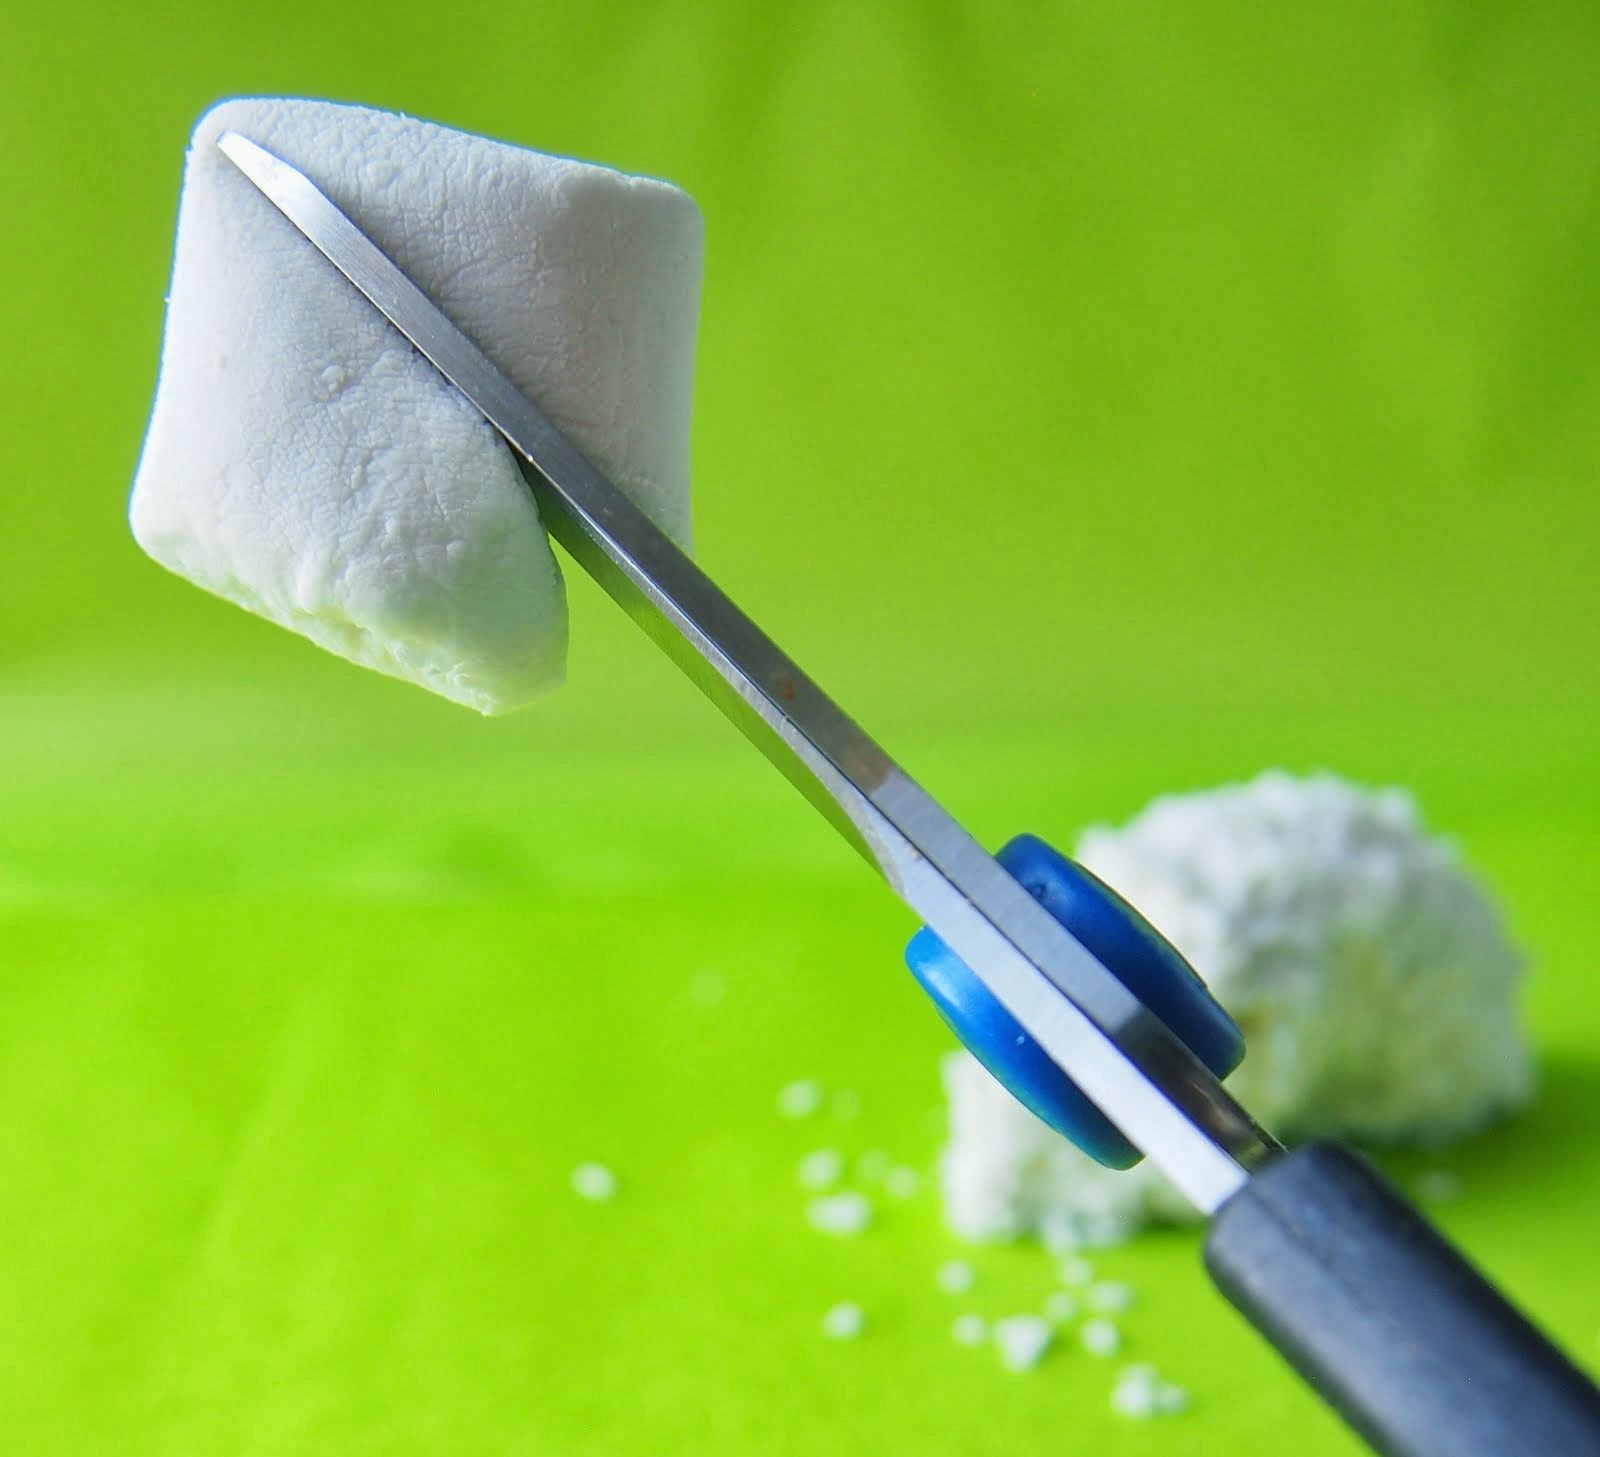
Use the oiled scissors to cut a marshmallow in half on a diagonal, then cut each half again to make 4 sections:  2 ears, one tail and an extra bit to pop in your mouth.


Dip the sticky side of the marshmallow ears and tail in the sanding sugar so they pick up the sugar.
 
 
Then dab a bit of frosting to the back of each ear and attach to the front ledge of the face.
Dab frosting on the tail and add it to the bum.


Stick in the chocolate chip eyes and add the nose with a bit of frosting-you might need tweezers to add the sprinkle whiskers.


I tried a lot of different whiskers- chowmein noodles, licorice, potatoes sticks, uncooked pasta (ugh!) and at the end of the day these little sprinkles seemed just right.
But they are tedious to get in there- choose the longest ones!


Washi Tape and Recycled Plastic Bookmarks

Did you know that March is National Reading Month? 
Anytime is reading time around here!
 
This project is the 2nd in a plastic series that is once again, inspired by our recycling bin.
 

These bookmarks are fun and really easy to make and actually, quite resilient. 

We’ve been testing them for a couple of weeks. 


Also- It’s an excuse to use washi tape – which as you can see, I store on an embroidery ring à la so many Pinterest pictures.
It’s a very functional system.


 Materials:
#1 plastic- ours is from a clear egg carton.
Washi tape
Ruler and X-acto knife or scissors
Corner punch

Cut the flat top off the egg carton and recycle the rest of the carton (or make these butterflies I made for work a longtime ago); if you’re using another source for plastic -say from a salad container, you'll need to wash and clean any paper branding off (and it might take hot water and even some Goo Gone to get the glue off off).


Cut a 1” wide by 7” long strip of plastic (a wider version is pictured here).
Apply tape to one side then trim the edges and flip the plastic over.


Stick tape to the second side, carefully lining the patterns up on both sides (so they don’t compete with one another).
    
Trim the excess tape off the sides.
The trim the sides with scissors or use a ruler and X-acto knife on a protected surface (adults job).


I really like using the corner punch to get rid of the sharp corners- you could use a scissors if you don't have a paper punch obsession like mine.
We also tried punching a hole in one end and adding a ribbon but it’s just not necessary.


You can leave sections of clear plastic too.


When I showed my friend our bookmarks, she suggested making a wider bookmark and blocking out all but one line to help a young reader focus.

When my son was little, he read using his pointer finger to help him keep place; I was told that's developmentally normal so I made one like that for the instructions here. Do you have an early reader? Would this help?

St. Patrick's Day Cucumber Hats

The Tiny Funnel
I made these fun cucumber hats for work awhile back- not with the clovers though.

I love this little set of "Jelly & Aspic" cutters for punching out tiny shapes- usually in the middle of cookies or to make flowers from Airheads for cupcakes. Even though the set has a clover, I like the one without the stem. You get similar sets at Amazon or buy the fondant cutters at the craft store.


I tested American cheese cut at the deli for the hat bands first but the per-wrapped singles drape over the cucumber sections more easily.

Cut 1.5" sections of an English cucumber.
Halve them lengthwise and lay the pieces flat on a plate with the peel side up.

Cut a straight section of the cucumber to make the brim for each hat.

Add a thin slice of American cheese band and  a square of cheddar to make the buckle.

Punch out a few clovers (or use a small flower punch) from the flat slice of cucumber then cut and add a stem.
The Tiny Funnel


 Happy St. Patrick's Day!

3.14 π Pie Day T-Shirt


I made an easy Pi π day shirt this morning for Elliott to wear tomorrow to school in honor of 3.14 day.
It was just a quick project on a bleak cold day.

 
Materials:
T-shirt
Deco Fabric paint pen
Cardboard
Chalk


Wash and dry the shirt if it’s new just to get the sizing out.
Give it zip with the iron to make it easier to transfer the design.
Draw your own picture or you can use mine- it’s here on Google docs.
I recommend laying the design on the shirt to make sure everything fits.


Place a piece of cardboard or a paper bag - some kind of barrier inside the shirt between the front and back layers.
I transferred the drawing the old fashioned way-- rub chalk on the back of the picture, flip it over and then draw over the lines with a pencil- transferring the chalk onto the t-shirt.
I’d show you a picture of the chalk lines but it didn’t photograph well; just know that I could see it and you will too. I’d use white chalk next time (didn’t have any on hand).
Remove the paper design.


With the cap on- shake the pen.  Then remove the cap and depress the pen tip on an extra piece of paper to get the paint flowing. You might need to depress the pen repeatedly during the drawing/writing process.


When the paint is flowing – draw over the chalk lines.
Remember to recap the pen when you're done- it will dry out if you don’t.
After the pie drawing is dry- add the equation inside (I looked it up online) –obviously you can’t write ALL the numbers…...


Leave the pie end open and close it after all the numbers are written.


Go ahead and draw the design 2 times if it isn't as dark as you'd like it. I let the first layer dry for a few hours and then went over the drawing/writing a second time. 


The directions I found online said to allow the paint to dry over night, then lay a cotton cloth over the design and use an iron (with heat set to correct fabric setting) to apply heat evenly for 10 to 15 seconds to set the paint. But… I didn’t wait over night because I’m impatient like that sometimes.
Ready for Pi day!

Lucky Charm Necklaces-DIY Shrinky Dinks

We have a lot of plastic in the recycling bin right now (left over from a work project) so we're making a few recycled crafts. These DIY Shrinky Dink lucky charm necklaces are just in time for St. Patrick's Day's (and my son’s market day at school)- and are made from # 6 plastic.

Make any shape charm you want- stars, moons and clovers- or hearts! I’ve loaded our clovers onto Google drive for you- not fancy- just drawn out and copied.
Here are a few tips :

*Only use #6 plastic-it's doesn't work with #1 (we have another project for that)

*Whatever line you draw will get thicker and darker.
*Holes gets smaller and must be punched before the plastic shrinks.
*Don’t be alarmed if/when the plastic curls- it will flatten out again.
*Our plastic shrank down from 1.5” to .5” but it varied a bit.

*Make a little notation somewhere close to one edge that will be cut off before baking-- we drew the letter "B" which shows which side is up; if the drawn side is face down-the ink will transfer to the paper and come off the plastic during the shrinking process.
Materials:
  • Clean, dry recycled number six plastic –ours is cut from a salad takeout container
  • Thin permanent markers
  • ¼ hole punch
  • A piece of paper cut from a brown paper bag
  • Satin cord or metal chain for the necklace-- whatever necklace supplies you'd like to use- I bought the jump rings from Micheal's; they come in silver and gold. 

To start-preheat the oven to 325 degrees; all oven activities should be done by an adult!  

Lay the plastic over the image and copy and decorate it with a thin permanent marker (or free draw).


Cut the shape out-sometimes cutting a curve is easier to do by turning the plastic over and coming at it from a different angle ---but keep track of which side was drawn on (with that little B).


Punch a hole in the shape before it's baked (trim that little B off now).

Place the (drawn side UP) shapes on the brown paper on a metal pan (not insulated) and put the pan in the oven; set the timer for 3 minutes. 


Remove the pan after 3 minutes and the pieces will have shrunk. Ta-da!


Experiment with different shapes (we did a bunch of hearts) or even try a different (water proof) pen- we tried this Sharpie oil pen- cool!


Just a word about jump rings- it's best to twist the opening ends away from each other- not pull them apart.
 

Just sayin' in case you wondered why yours are always out of whack.
I had to learn the hard way.
Then twist them back together.


Lastly- someone might ask about fumes- we didn't smell any but we were in a well ventilated room.